1. Welcome to Tundras.com!

    You are currently viewing as a guest! To get full-access, you need to register for a FREE account.

    As a registered member, you’ll be able to:
    • Participate in all Tundra discussion topics
    • Transfer over your build thread from a different forum to this one
    • Communicate privately with other Tundra owners from around the world
    • Post your own photos in our Members Gallery
    • Access all special features of the site

What have you done to your 1st gen Tundra today?

Discussion in '1st Gen Tundras (2000-2006)' started by T-Rex266, Sep 7, 2015.

  1. Jul 5, 2020 at 2:25 PM
    jImmegart

    jImmegart Second Youngest tundra owner in the west!

    Joined:
    Apr 8, 2019
    Member:
    #28798
    Messages:
    930
    Gender:
    Male
    First Name:
    Jonah
    California
    Vehicle:
    2003 Tundra TRD Sport
    FN Counter steer type X w/ 285/70r17 Geolanders JBA y-pipe and pro street 6000 muffler 2.5 king coilovers w/ total chaos uca and custom 2.0 king rears Skidrow front plate TRD Sport package W/ Factory rear swaybar and LSD
    Can you change the accessory belt with out taking the timing belt off?
     
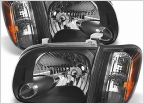
  2. Jul 5, 2020 at 2:36 PM
    Professional Hand Model

    Professional Hand Model A.K.A ‘Golden Hands’

    Joined:
    Apr 29, 2018
    Member:
    #14878
    Messages:
    15,000
    Gender:
    Male
    First Name:
    Fred
    ‘Somewhere’... a State of Mind
    Vehicle:
    2002 Tundra SR5 4WD 4.7L AC Silver Metallica
    Hand Protectors
    Yes. Its very easy. That tensioner you pictured needs a 14mm flex head ratcheting wrench to ease the tension off of it. A slight levered pull on the tensioner nut with the 14mm allows the belt to be loosed and slipped off. The new one goes back the way the old one was routed which is posted on your factory engine hood sticker directly above the tensioner.

    Your T-Belt is hidden by those cam covers on either side of your Throttle Body.
     
    jImmegart[QUOTED] likes this.
  3. Jul 5, 2020 at 2:54 PM
    empty_lord

    empty_lord They see me rollin'

    Joined:
    Feb 1, 2019
    Member:
    #25441
    Messages:
    10,089
    Gender:
    Male
    First Name:
    Dan
    Indiana, Chicagoland
    Vehicle:
    05 rollover special
    custom body work, Billies with taco ARB springs, Icon AAL, TRD FJ trail team wheels, 2019 Toyota 86 radio, Blacked out interior, Added factory power everything, heater mirrors, ETC
    Access cab front door is totally different. Won’t fit. Best way to adhere is is make sure it’s super clean and industrial strength 3m tape
     
    skunk[QUOTED] likes this.
  4. Jul 5, 2020 at 4:04 PM
    FirstGenVol

    FirstGenVol More Shifty than Shifty

    Joined:
    Dec 13, 2018
    Member:
    #22934
    Messages:
    13,741
    East TN
    Vehicle:
    2002 AC
    @Roman might be able to sell you this piece. He works for a dealership.
     
    Roman and skunk[QUOTED] like this.
  5. Jul 5, 2020 at 4:30 PM
    jImmegart

    jImmegart Second Youngest tundra owner in the west!

    Joined:
    Apr 8, 2019
    Member:
    #28798
    Messages:
    930
    Gender:
    Male
    First Name:
    Jonah
    California
    Vehicle:
    2003 Tundra TRD Sport
    FN Counter steer type X w/ 285/70r17 Geolanders JBA y-pipe and pro street 6000 muffler 2.5 king coilovers w/ total chaos uca and custom 2.0 king rears Skidrow front plate TRD Sport package W/ Factory rear swaybar and LSD
    @Roman any way to get info on this body kit? Is it still available and does it come painted?
    00602-52505-000
     
    Tundra2 likes this.
  6. Jul 5, 2020 at 4:30 PM
    empty_lord

    empty_lord They see me rollin'

    Joined:
    Feb 1, 2019
    Member:
    #25441
    Messages:
    10,089
    Gender:
    Male
    First Name:
    Dan
    Indiana, Chicagoland
    Vehicle:
    05 rollover special
    custom body work, Billies with taco ARB springs, Icon AAL, TRD FJ trail team wheels, 2019 Toyota 86 radio, Blacked out interior, Added factory power everything, heater mirrors, ETC
    Added a dampener from a 4runner a750f onto my transfer case... might or might not make a difference.

    also put a cleaner skid on
    [​IMG]
     
    bmf4069 and Tundra2 like this.
  7. Jul 5, 2020 at 6:41 PM
    shifty`

    shifty` I'm so tired sheep are counting me

    Joined:
    Jun 20, 2020
    Member:
    #48239
    Messages:
    24,925
    ATL
    Vehicle:
    '06 AC Limited V8/4WD
    (see signature for truck info)
    Finished the job today for all of passenger side from roof rack mount down, and the hood. Best shot I could get at end of day. It's not perfect, I'm not a paint and body guy or pro detailer, but holy crap I'm OK with it when I look at the difference from chalk white to shine.

    Using Meguiar's liquid Polish and an orange Griot's correction pad with smaller orange pads to correct the tight spaces by hand.

    Before today, but after I already did the bed:


    Here's after I finished earlier, this was about 3 hours work with wash + claybar + polish + cleaning wax. Local shop wanted $800 to do the entire truck, including touchup. I'm probably in it for $100 in supplies at this point with white/orange/black pads and sponges, clay, polish and wax, towels, and the matched touch up paint.

    IMG_1870.jpg
     
    Last edited: Jul 5, 2020
  8. Jul 5, 2020 at 6:58 PM
    Tundra2

    Tundra2 Zoinked

    Joined:
    Feb 10, 2019
    Member:
    #25875
    Messages:
    12,192
    Gender:
    Male
    First Name:
    Noah
    Western Kentucky
    Vehicle:
    '00 Tundra V8 SR5 '03 Corolla Virus
    May be easier to message him directly. He usually responds during week days.
     
  9. Jul 6, 2020 at 3:46 AM
    robabeatle

    robabeatle New Member

    Joined:
    Jun 14, 2020
    Member:
    #47947
    Messages:
    856
    Gender:
    Male
    AZ
    Vehicle:
    2002 Tundra 4x4 LTD AC
    Bilstein 6112 & 5160, Katskinz, audio upgrades
    Can you explain what you did here for the paint correct? I did not follow your other post. Did you rattle can at all or just clay, compound, polish? The more youtube videos I watch, the more I am thinking of eventually fixing the paint on my 02. It would involve a sand and repaint of the right fender, the top of the cab, and maybe even the hood. I am starting to think that if I give myself a good week to do it, I can make it look good or at least better than it does now and not spend thousands on a full repaint.
     
  10. Jul 6, 2020 at 5:17 AM
    abcinv

    abcinv OEM (+) Junkie

    Joined:
    Jan 13, 2019
    Member:
    #24407
    Messages:
    820
    Gender:
    Male
    First Name:
    Tommy
    South of ATL
    Vehicle:
    2006 Tundra 4X4 Limited Dbl Cab
    Very nice sir, great job!
     
    shifty`[QUOTED] likes this.
  11. Jul 6, 2020 at 6:26 AM
    Professional Hand Model

    Professional Hand Model A.K.A ‘Golden Hands’

    Joined:
    Apr 29, 2018
    Member:
    #14878
    Messages:
    15,000
    Gender:
    Male
    First Name:
    Fred
    ‘Somewhere’... a State of Mind
    Vehicle:
    2002 Tundra SR5 4WD 4.7L AC Silver Metallica
    Hand Protectors
    Competition is getting tough around here with all these clean engine bays and shiny paint jobs. I might have to break out some secret Hand Mojo in the next couple months to rise above the fray. :D
     
    shifty`, bmf4069 and Darkness like this.
  12. Jul 6, 2020 at 6:31 AM
    Professional Hand Model

    Professional Hand Model A.K.A ‘Golden Hands’

    Joined:
    Apr 29, 2018
    Member:
    #14878
    Messages:
    15,000
    Gender:
    Male
    First Name:
    Fred
    ‘Somewhere’... a State of Mind
    Vehicle:
    2002 Tundra SR5 4WD 4.7L AC Silver Metallica
    Hand Protectors
    @jImmegart you might want to check some junkyards for your piece. The part number you provided brings this up on a Toy Stealer search.

    upload_2020-7-6_9-31-14.jpg
     
  13. Jul 6, 2020 at 9:47 AM
    Tundra2

    Tundra2 Zoinked

    Joined:
    Feb 10, 2019
    Member:
    #25875
    Messages:
    12,192
    Gender:
    Male
    First Name:
    Noah
    Western Kentucky
    Vehicle:
    '00 Tundra V8 SR5 '03 Corolla Virus
    Woke up WAY TOO EARLY for tonight's shift.

    Went out, vacuumed out the floor boards, and started poking around the engine bay because I was bored.

    Lubed the:
    1. Heater core flow gate valve thing (Blue circle)
    2. Hood latch on body
    3. Hood latch on hood
    20200706_113719.jpg 20200706_114452.jpg

    Verified all fluid levels were within spec for SOP
     
  14. Jul 6, 2020 at 10:25 AM
    shifty`

    shifty` I'm so tired sheep are counting me

    Joined:
    Jun 20, 2020
    Member:
    #48239
    Messages:
    24,925
    ATL
    Vehicle:
    '06 AC Limited V8/4WD
    (see signature for truck info)
    Man, I don't even want to think about the engine bay. Most paint not exposed to the sun on this truck is shiny, like between bed and cab and the door jambs. However, the entire engine bay is flat-flat-white, not even the eggshell white much of the outer flat panels were. Almost like a detailer used Bleche White on the paint? The thought of just doing the front of the cowl above the firewall, which would need to be done by hand, is absolutely daunting. Give me flat panels and I'm good. Believe it or not, even the body lines above the rear wheels, and below the antenna were a pain - went over with the 6" pad, had to re-visit the valleys by sponge. No bueno.

    Long version? Good thing I type fast...

    I believe all of the non-metallic paints on the Tundra are single-stage (no clearcoat) so they tend to oxidize pretty badly if not kept sealed/waxed. Single-stage was a reality for all solid-color 1st-gen Tundras IIRC, it may even be true to this day with some Toyotas. Clearcoat for the 1st Gen was limited to metallic paint jobs. That said, it appears my grille, side steps and fender flairs may have clearcoat? Very strange. Looks like metal parts are single stage, plastics are clear'd.

    Disclosure: Obligatory "IANABODG" (I am not a body or detail guy). What you read below may not be 100% correct, it's just my interpretation and-or understanding. Don't follow my lead, I'm probably wrong. I'm not responsible if you try doing things my way and mess up your stuff.

    I personally believe how you handle paint correction depends on the paint type you have and how much product still exists on the panel. I normally tackle single-stage paint based on how bad it's oxidized. You handle clearcoat based on the amount of clearcoat product remaining ... if you don't know how or when the paint has been compounded or polished in the past or it was done by a home user instead of reputable shop, a special optic tool is required to measure how much clearcoat remains. Single-stage paint is single-stage paint in my opinion, if there's still color on the panel, try to keep it that way. Single-stage has been around forever and can be very easy to buff out.

    Buffing and polishing products are abrasives which remove paint. With some more aggressive paint correction products, if used repeatedly, you can blow right thru single-stage or thru clearcoat, right into the base coat. I recognize three basic options for paint correction from mild to wild: Wax to seal paint, polish to slough off a minor paint imperfections or remove swirls, and buffing compound to really cut past heavy damage. There's a couple levels of compound from light to extreme cutting. There's a wild array of pads and materials to polish panels - I'm primarily familiar with sponges, so that's what I chose here. Different color foam pads are used for different purposes, cutting/polishing/waxing.

    I typically work from lowest-to-highest impact products. With that said, on this truck, I assumed the paint damage was high because of how chalky it was. I started in an obscure area, behind the rear bumper corner. I tested a little cleaning wax, it did less-than-nothing. I put a dab of polishing compound on my finger, ran it in circles for 10 seconds, it cleaned up a little, but was a tad hazy. Finally, I pulled out buffing compound (No. 7, which will cut through anything including clearcoats) and I tested for 5-6 seconds in another spot, shiny as new. This gave me a good gauge where I needed to be with products: Somewhere between a polishing compound and a heavy buffing compound.

    I hate taping off plastics and rubbers, but it's a necessary evil if you don't want difficult to remove white streaks. I like to do tight areas by hand first and give myself the longest, flattest runs possible for efficiency. I chose to work with the longest flattest panels first, i.e. the bed and tailgate. To get a clean polished line to tee into, I pulled the top bedrail covers and tailgate cover, used No. 7 compound by hand to do the top 2" of the bed side and tailgate. I polished that after, then waxed and reinstalled the top rails again. This opened some freedom when working the bedsides and tailgate, less effort to tape-off the plastic bits when working the full sides to avoid white streaks.

    After doing the small stuff, I pulled out my Rigid DA sander with 6.5" (roughly) hook-and-loop base to do the large panels because I don't need another bout of shoulder tendinitis but also don't want to drop $200-300 on a entry-level DA. I know this unit is intended for sanding, I normally use it for clearing frames, but it also works really well for polishing. I chose an orange pad (heavy correction) paired with Meguiar's "Ultimate Polish" to start. Note: All Meguiar's over-the-counter retail stuff is (or was, for years) clearcoat-safe, so I almost always pay the extra for their stuff. It's easy IMO to burn through paint on a long panel, thus Meguiar's is a no-brainer to safely polish.

    Started on the passenger's bed side with 3 light "hash" passes - each pass was up-over-down-repeat from end to end, followed by left-up-right-repeat from end to end across the same area. I prefer to squirt product on the pad and rub-in to pre-load, then I apply strategic lines across the panel to re-up along the way. Result was great - exceptional finish everywhere except the over-fender body line, that valley was hazed. I followed up with Meguiar's Ultimate Polish with a red foam pad (medium correction/polishing). Topped that off with wax. It looked good, but also made me think Compound was maybe a bit agressive.

    While I had the red foam on, for S&G, I hit a spot above the passenger door handle and with the DA 3-4 medium pressure passes, it shined right up. You can actually see the spot in my 'before' picture, notice there's a shiny spot above the handle? That was a red foam + polishing compound. After that I decided to switch to an orange heavy-correction pad with Ultimate Polish formula only, skipping the Compound totally. Heavy pad, lighter paint cutting seemed to be a good combo, results above speak for themselves. I could probably get away with red foam and Ultimate Polish, but I'd like to shave an hour or two of labor off using the stiffer foam and hitting the low areas it misses with a hand foam and elbow grease.

    I had to fill a 1" x 1" bare metal spot on the hood where a PO's rock guard tore thru the paint, two more rusty scratches on the tailgate from what looks like a trailering incident, and four rusty scratches under the passenger rear tail light where the PO tagged something, and pushed the bumper up into the bedside corner. For those, 2 quick treatments of Naval Jelly, 10 minutes set time, clean and clear. No. 7 compound on them after to clear them out after, then 3 light coats of touch-up paint I bought from AutomotiveTouchup. I did that work 2-3 months ago so the enamel had proper time to dry before I started cutting on it. Enamel seems to take eons to cure.

    That's it in a nutshell.

    I will say, it seems 1st Gen had some issue with clearcoat peelback on the roof, I've seen this a lot on trucks just above the windshield. I've seen it most frequently on one of the red metallic paint colors. Having single-stage paint is bittersweet: I'll never need to deal with clearcoat peel, which is significantly more difficult to fix, but there's a lot of effort in keeping up with waxing and sealing or your paint turns to chalk! I'm going to play around with some of the new hybrid wax/sealant stuff over the next year or two. Last truck I had with single-stage paint was nearly 10 years ago now.

    PS: The new SprayMax 2K clearcoats are phenomenal if you have one of the metallic colors but USE PROTECTION, that stuff is serious business and will annihilate your lungs. Paint can be easy enough for home jobs. The 100% most important thing is PREP. Prep your surfaces. Keep it clean and work in a dust-free area. The 2nd most important thing is RTFM (follow directions) especially understand your coat/recoat windows. Finally, you need to understand when and how to wet sand and polish. You can get a good paint outcome at home.
     
    Last edited: Feb 5, 2023
    Nicklovin, Dook55, NUDRAT and 3 others like this.
  15. Jul 6, 2020 at 10:57 AM
    robabeatle

    robabeatle New Member

    Joined:
    Jun 14, 2020
    Member:
    #47947
    Messages:
    856
    Gender:
    Male
    AZ
    Vehicle:
    2002 Tundra 4x4 LTD AC
    Bilstein 6112 & 5160, Katskinz, audio upgrades
    @shifty` : wow thank you for all of that. I happen to have the 1st gen red: roof is probably the worst but luckily out of sight mostly, the left front plastic fender is bad, and the hood could be redone. At some point I will likely try my hand at the fender first to see how it comes out. It is plastic so different prep, I believe. I need to read much more and watch more videos to feel confident in this. But I have seen some incredible work that people have done in their driveways. And as you say: prep work and good paint are key.
     
  16. Jul 6, 2020 at 11:03 AM
    robabeatle

    robabeatle New Member

    Joined:
    Jun 14, 2020
    Member:
    #47947
    Messages:
    856
    Gender:
    Male
    AZ
    Vehicle:
    2002 Tundra 4x4 LTD AC
    Bilstein 6112 & 5160, Katskinz, audio upgrades
    I just finished my audio install/acoustic work other than the sub which will go in when the box arrives. I have to sit down and collect my thoughts on it all. I will create a full write up in the audio section.

    But suffice it to say, that was a whole lot of work. I sat in the carport and did a simple tune through the HU and it is sounding really good, even without the low end from the sub. The new amp is killer. I am pretty proud of the acoustic isolation, amp wiring, and getting everything back together and fitting, mostly. I bought a few longer bolts like for the front two center console as the mlv and ccf dont allow the stock ones to reach. I also had to redo the cabin air filter that I made. (following direction on this site) as it was whining badly when the AC is running. I basically moved it from the output to the intake side of the fan under the passenger dash.

    Now how about that acoustic isolation?? I can say my truck weights nearly 100 pounds more with the mlv. I have not had a chance to really see what the results are so I will report back...

    Thank god I'm done as it is supposed to be 107 or 108 here today.
     
    Darkness and Lil Steve like this.
  17. Jul 6, 2020 at 11:21 AM
    04DCTundraMan

    04DCTundraMan Crimedog McGriff

    Joined:
    Jun 3, 2020
    Member:
    #47489
    Messages:
    289
    Gender:
    Male
    First Name:
    Ryan
    Vehicle:
    2004 Salsa Red Tundra Limited DC
    Sony Head Unit, Pioneer Speakers, Back up camera, Blacked out Emblems, SPC Control Arms, OME 2.5" front lift, 1.5" rear spacer, Flowmaster Super 44 muffler, LineX bedliner
    Im with you on this. I have the same problem spots with my paint. I bought a can of Salsa red pearl spray paint....havent had the guts to try it with all the rain were getting in GA and the wind in my area. nervous it will come out looking worse than the peeling does!
     
    bmf4069 and robabeatle[QUOTED] like this.
  18. Jul 6, 2020 at 12:01 PM
    shifty`

    shifty` I'm so tired sheep are counting me

    Joined:
    Jun 20, 2020
    Member:
    #48239
    Messages:
    24,925
    ATL
    Vehicle:
    '06 AC Limited V8/4WD
    (see signature for truck info)
    Dealing with peeling clear can be a PITA. My previous truck had clearcoat peel issues, bad, basically a total clearcoat failure on all horizontal surfaces except the bed floor. @robabeatle's fender flares are a good example of what I had on that truck, base coat was still great, clear was failed and chipping.. I didn't want to mess with re-basecoating, and I wouldn't want to deal with painting plastics, adhesion promoters were the only way I've ever gotten any auto paint to stick to plastic.

    On that truck I removed the bubbled clearcoat by any means necessary which translated to carefully chipping off as much as possible with a plastic spudger, then sanding the remaining bubbled stuff out. I feathered the edge of the good clearcoat, lightly wetsanded the base through to a 4-digit grit, then cleaned and hit it with a couple coats of 2K clear. After curing, I wetsanded again and polished. It wasn't perfect, but way better.

    To repaint the roof, hood and front fenders the cheapest local quote I got was $1800 even if I removed, sanded and prepped everything. That was half of a full repaint w/clear! For small parts like @robabeatle's fenders, if it's the only part seeing issues, might be better just to pop them off and have a shop do them. My 2¢

    I'm really curious what it is about the red metallic trucks that so many have clearcoat issues? Any other metallic colors have that problem?
     
  19. Jul 6, 2020 at 1:31 PM
    Festerw

    Festerw New Member

    Joined:
    May 7, 2017
    Member:
    #7600
    Messages:
    3,846
    Gender:
    Male
    Cambridge Springs, PA
    Vehicle:
    04 Tundra DC
    I'll make you feel better. Here's mine this afternoon.

    IMG_20200706_160723.jpg IMG_20200706_160807.jpg
     
    bmf4069, NUDRAT and Darkness like this.
  20. Jul 6, 2020 at 1:52 PM
    FirstGenVol

    FirstGenVol More Shifty than Shifty

    Joined:
    Dec 13, 2018
    Member:
    #22934
    Messages:
    13,741
    East TN
    Vehicle:
    2002 AC
  21. Jul 6, 2020 at 2:12 PM
    Festerw

    Festerw New Member

    Joined:
    May 7, 2017
    Member:
    #7600
    Messages:
    3,846
    Gender:
    Male
    Cambridge Springs, PA
    Vehicle:
    04 Tundra DC
    #DirtRoadLife

    It gets a wash when I get gas on the way to work every other week or so.
     
    NUDRAT, Darkness and oscardog86 like this.
  22. Jul 6, 2020 at 2:16 PM
    Roman

    Roman Toyota Parts Master Vendor

    Joined:
    Jan 14, 2015
    Member:
    #876
    Messages:
    3,113
    Gender:
    Male
    First Name:
    Roman
    Franklin, TN
    No can do. It is not available.
     
    jImmegart[QUOTED] likes this.
  23. Jul 6, 2020 at 2:59 PM
    Darkness

    Darkness Allergic to white

    Joined:
    Jul 23, 2018
    Member:
    #17315
    Messages:
    9,976
    Gender:
    Male
    First Name:
    Luis
    All over SoCal
    Vehicle:
    The darkest
    It's really dark
    If there was just a few stickers on the firewall I would guess that's my engine bay. :fistbump:
     
    Festerw[QUOTED] likes this.
  24. Jul 6, 2020 at 3:01 PM
    Professional Hand Model

    Professional Hand Model A.K.A ‘Golden Hands’

    Joined:
    Apr 29, 2018
    Member:
    #14878
    Messages:
    15,000
    Gender:
    Male
    First Name:
    Fred
    ‘Somewhere’... a State of Mind
    Vehicle:
    2002 Tundra SR5 4WD 4.7L AC Silver Metallica
    Hand Protectors
    Looks like poop!:rofl:
     
    Festerw[QUOTED] likes this.
  25. Jul 6, 2020 at 3:07 PM
    Festerw

    Festerw New Member

    Joined:
    May 7, 2017
    Member:
    #7600
    Messages:
    3,846
    Gender:
    Male
    Cambridge Springs, PA
    Vehicle:
    04 Tundra DC
    You're not wrong.


    Still looks better than an AC though:boink:
     
  26. Jul 6, 2020 at 3:07 PM
    04DCTundraMan

    04DCTundraMan Crimedog McGriff

    Joined:
    Jun 3, 2020
    Member:
    #47489
    Messages:
    289
    Gender:
    Male
    First Name:
    Ryan
    Vehicle:
    2004 Salsa Red Tundra Limited DC
    Sony Head Unit, Pioneer Speakers, Back up camera, Blacked out Emblems, SPC Control Arms, OME 2.5" front lift, 1.5" rear spacer, Flowmaster Super 44 muffler, LineX bedliner
    Thanks for the tips! I need to just take a shot at it. Mine is pretty rough on the roof, fenders, rock chips on the hood and scratches on the tailgate. Was planning to get quotes on a repaint before I go DIY. But this color makes it hard to match. The fenders I think I could take off and do. Same with the tailgate. Hood and roof may be a job for the pros.

    D786A795-CCF1-4AC8-B314-5509DA93B6DA.jpg
     
    bmf4069 likes this.
  27. Jul 6, 2020 at 5:14 PM
    robabeatle

    robabeatle New Member

    Joined:
    Jun 14, 2020
    Member:
    #47947
    Messages:
    856
    Gender:
    Male
    AZ
    Vehicle:
    2002 Tundra 4x4 LTD AC
    Bilstein 6112 & 5160, Katskinz, audio upgrades
    My roof looks quite similar. I figure if I give that part a shot and it comes out terrible, noone really sees it anyway.
     
    Darkness likes this.
  28. Jul 6, 2020 at 7:17 PM
    jImmegart

    jImmegart Second Youngest tundra owner in the west!

    Joined:
    Apr 8, 2019
    Member:
    #28798
    Messages:
    930
    Gender:
    Male
    First Name:
    Jonah
    California
    Vehicle:
    2003 Tundra TRD Sport
    FN Counter steer type X w/ 285/70r17 Geolanders JBA y-pipe and pro street 6000 muffler 2.5 king coilovers w/ total chaos uca and custom 2.0 king rears Skidrow front plate TRD Sport package W/ Factory rear swaybar and LSD
    Ive been trying to find a way to mount my corner clear lights for awhile, being the driver side clip was not right making it super lopsided. I saw today someone on tundra solutions cut the clip off the corner light and attached velcro strips to the headlight to keep it tight. I did that and while the velcro isnt fully touching I think it is enough to keep it steady. I also bought two nuts and bolts for both to secure the corners for coming loose. I had another depo normal corner on the way so if the velcro doesnt hold up I will switch the lends from the clear to the new depo light.

    FA7959A9-5586-414B-91AE-D7259E0B5E11.jpg
    DAFD8C3C-F8C2-483D-A0B2-57E36AD66427.jpg
    A37739EE-9AA5-47F3-B01A-11F676362E95.jpg
     
    abcinv, FirstGenVol and NUDRAT like this.
  29. Jul 6, 2020 at 8:11 PM
    Tundra2

    Tundra2 Zoinked

    Joined:
    Feb 10, 2019
    Member:
    #25875
    Messages:
    12,192
    Gender:
    Male
    First Name:
    Noah
    Western Kentucky
    Vehicle:
    '00 Tundra V8 SR5 '03 Corolla Virus
    Your truck is beautiful. Glad it sorta worked out for you!
     
    jImmegart[QUOTED] likes this.
  30. Jul 6, 2020 at 9:20 PM
    Thrussn

    Thrussn Plastidip Hoe

    Joined:
    Nov 10, 2016
    Member:
    #5163
    Messages:
    289
    Gender:
    Male
    First Name:
    Gabe
    NM
    Vehicle:
    Silver 2005 4.7L 4WD Access Cab
    Bilstein 5100s, SickHIDs projector housings, Plastidip everything, TRD Pro style rims, LEDs everywhere, SUPERBUMP bumpstops. Firestone Riderite air bag springs, Deaver G57s, Onboard VIAIR system, Backup Camera, light bar behind the bumper, CGS catback, Exhaust cutout after cats, JBA Shorty headers, JBA Y-Pipe, pioneer deck, pioneer speakers, kicker 10" sub w/ amp, door sound deadening, Dirtydeeds 12 pin injectors, UniChip, Skid Row Skidplate, EZ Oil Drain valve (Better than Fumoto), Oil Catch Can, & 4WD Conversion
    Took her out today to work a bit and get some mountain air.


    Bad news on the 4wd swap, the guys truck parts are from an 04 and not an 05, so all but the diff and front driveshaft are incompatible. :annoyed:
    I know of a guy in Texas if anyone wants 04 4wd drivetrain bits.
     

Products Discussed in

To Top