1. Welcome to Tundras.com!

    You are currently viewing as a guest! To get full-access, you need to register for a FREE account.

    As a registered member, you’ll be able to:
    • Participate in all Tundra discussion topics
    • Transfer over your build thread from a different forum to this one
    • Communicate privately with other Tundra owners from around the world
    • Post your own photos in our Members Gallery
    • Access all special features of the site

JPink's 05 DC SR5

Discussion in '1st Gen Builds (2000-2006)' started by jpink, Sep 30, 2020.

  1. Sep 30, 2020 at 9:27 AM
    #1
    jpink

    jpink [OP] Aspiring Shade Tree Mechanic

    Joined:
    Sep 25, 2020
    Member:
    #52763
    Messages:
    365
    Gender:
    Male
    First Name:
    John
    Knoxville
    Vehicle:
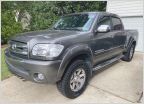
    05 Black Tundra DC SR5
    Legit a decade ago I borrowed my cousin's truck for some random couch acquisition or something. I don't remember exactly why, but I remember telling him, "If you ever sell that truck, let me know."

    So, flash forward to now, with 146,206 on the odometer:

    [​IMG]

    Some of the immediate things on my list to accomplish yet this year:
    1. It is missing any sort of skid plate underneath. I will likely go with the Skid Row Offroad plates.
    2. It needs an oil change, the sticker has Jiffy Lube in November of 2019 with a recommended mileage replacement of 147,000.
    3. I need to investigate the brake situation, as they're a bit spongy. A bleed, maybe some adjustments to the rear drums or the proportioning valve.
    4. The tailgate handle needs to be replaced, which is fine because I want to add a backup camera in there.
    5. I had never heard of Fluid Film until @FirstGenVol mentioned it and after 30 seconds of the Youtubes and Tundras.com searching I went and picked up 4 cans.
    6. It has some rattle noise coming from what I believe to be some pulleys around the S belt. More investigation to do. I tried to catch some of it with my phone the other night.
    7. Probably get some decent snow tires on it, living in Iowa.
    [​IMG]

    Today at some point I should be receiving the Kenwood Excelon DMX907S, Kenwood DRV-N520 Dash Cam, and iDatalink Maestro ADS-MSW from Crutchfield.

    I've done my own oil changes before, I've swapped out the headlight assemblies on the Honda Pilot, and I've put a Car PC in two previous cars I owned. That's about the extent of my "mechanical" experience, but I'm excited to learn and do more beginning with this Truck.

    Lots of knowledge already here on these forums. I've spent the last week falling asleep reading threads lol
     
    YardBird and FirstGenVol like this.
  2. Oct 1, 2020 at 12:15 PM
    #2
    jpink

    jpink [OP] Aspiring Shade Tree Mechanic

    Joined:
    Sep 25, 2020
    Member:
    #52763
    Messages:
    365
    Gender:
    Male
    First Name:
    John
    Knoxville
    Vehicle:
    05 Black Tundra DC SR5


    2021 Work:

    Jan 3rd 2021:
    (150,744) Post
    Removed the spare tire holder (without removing the bed), cleaned up a bunch of rust, started sound proofing with Noico 80mil & Noico 315mil. Replaced Window Controller in Driver Door Panel.

    Jan 15th 2021: (150,824) Post
    New BF Goodrich KO2 A/T (265/70 R 17) tires mounted on the PTR20-35110-BK TRD Wheels.

    June 26th 2021: (163,127) Post
    Replaced alternator, serpentine, tensioner, idler pulley, idler plate.

    August 1st 2021: (163,618) Post
    Suspension. All of it. PCV Valve. Rear diff drain/fill.
     
    Last edited: Aug 3, 2021
    w666 likes this.
  3. Oct 5, 2020 at 9:07 PM
    #3
    jpink

    jpink [OP] Aspiring Shade Tree Mechanic

    Joined:
    Sep 25, 2020
    Member:
    #52763
    Messages:
    365
    Gender:
    Male
    First Name:
    John
    Knoxville
    Vehicle:
    05 Black Tundra DC SR5
    So this past weekend I did a quick job on swapping the stereo out. I haven’t done a final microphone mount, I still need to add the dash cam and the backup cam.

    29C4B900-D898-4737-99FB-949C0C49F34F.jpg

    I did pay for the Crutchfield Ready Harness service, or whatever it’s called. However, the tech that crimped forgot to do a couple of them. I got it sorted and installed. The CarPlay has worked well thus far, and the microphone just wedged between the cluster and wheel has worked better than I expected.

    When I removed the controls to pull trim a retaining clip fell out of one. I also definitely have some lights to replace behind the controls. Will likely do some LEDs.

    04F3F733-2E85-49D0-8158-433F1A45518C.jpg

    One of the known issues I bought it with was the tailgate. The handle doesn’t release it. I purchased a replacement from RockAuto. Thanks to the lightning fast response from Roman I was able to find the correct stays and lock assemblies. Have those on order as well.

    For now I have a ratchet strap keeping the tailgate in place.

    8FEC3BED-23FC-4A81-9024-A3B4419DDB9F.jpg

    Cool Springs also already got me the filters I ordered, so she will get a long overdue oil change this weekend. If the stars align the tailgate repair, dash cam and backup cam will also happen.

    With the handle, I have spark plugs and an air filter coming. I will replace the air filter and do a MAF sensor/Throttle Body cleaning at the same time.

    In the meantime, lots more reading on these forums. Ya’ll a bunch of smarties, and I love it.
     
    w666 and Darkness like this.
  4. Oct 11, 2020 at 8:11 AM
    #4
    jpink

    jpink [OP] Aspiring Shade Tree Mechanic

    Joined:
    Sep 25, 2020
    Member:
    #52763
    Messages:
    365
    Gender:
    Male
    First Name:
    John
    Knoxville
    Vehicle:
    05 Black Tundra DC SR5
    Plan today was an oil change, spark plugs, air filter change, MAF Sensor and throttle body cleaning.

    I started off by pulling the oil drain plug and figured I could clean the MAF Sensor while the oil drained. Turns out, just looking at the MAF Sensor wrong could've caused it to split in two. So, even though it meant not driving for a couple days until a new one could arrive, I pulled it out in two pieces and then moved on to replacing the Air Filter quick.

    EC40C6E1-AD7C-4D6D-99D1-DD67FFF9D993.jpg

    B5AF8BE9-7D91-463B-8E07-272B55D63D0F.jpg

    BBA2D7A2-1FBE-4195-BC8C-2DD94304F85A.jpg


    Turns out that the housing will need some attention as well. Currently it's being held in place with a whole lot of pressure and a dash of prayer. The old air filter was quite a bit smaller than the new one.

    DE5B2251-9A93-41F1-A6D8-C247704262D4.jpg

    905C0FE7-0C88-49BD-B6DF-26DD1142A862.jpg


    I turned my attention back to the oil: Replaced the drain plug with a fresh washer, pulled the inferior Jiffy Lube filter (I'm sure it did just fine, calm down), and screwed in that nice Toyota YZZD3 filter. I refilled with Valvoline Maxlife Synthetic Blend. I'll likely switch to a Full Synthetic at the next change. The next change will likely be sooner rather than later, especially considering the time it's been since the last oil change, though it hasn't hit the mile threshold. Then I moved on to the spark plugs.

    jlube.jpg

    Filters.jpg

    valv.jpg


    For these I went with the NGK Laser Iridium. As I was pulling the ignition coils out I discovered that 6 of the 8 were cracked. No codes were being thrown, and I even had driven this bad boy down to St. Louis and back already.

    plugComp.jpg

    ngkliplug.jpg

    crackedcoils.jpg


    I finished swapping the plugs and placed the cracked coils back in just to keep things tidy for now.

    Nervous that 2/3 items touched so far required additional purchases....I turned my attention to the Throttle Body for some cleaning. I clamped the hoses, pulled the Throttle Body off the engine but couldn't get both hoses off so I ended up leaving them in place. I sprayed some q-tips with the Throttle Body cleaner and then just gave it a good rub down on both sides of the butterfly. Then secured it back in place and removed the clamps. In my haste to finish up, I forgot to take "after" photos.

    tbody.jpg

    tbodymount.jpg


    I was kind of surprised not to see a wire mesh filter at the end here. Maybe it's not on the 1st Gen. Will need to check. Also was surprised that one bolt did not remove, but rather was a "post". Oh well. For now, off to plan the MAF Sensor and ignition coil purchases.

    Parts Used Today:
    Air Filter - Denso 1433045
    Spark Plugs - NGK 4589 Laser Iridium
    Engine Oil - Valvoline MaxLife 5W-30
    Oil Filter - Toyota YZZD3
    Oil Plug Gasket - Toyota
    Throttle Body Cleaner - CRC Throttle Body Cleaner
     

    Attached Files:

    Last edited: Nov 4, 2020
  5. Oct 14, 2020 at 4:36 PM
    #5
    jpink

    jpink [OP] Aspiring Shade Tree Mechanic

    Joined:
    Sep 25, 2020
    Member:
    #52763
    Messages:
    365
    Gender:
    Male
    First Name:
    John
    Knoxville
    Vehicle:
    05 Black Tundra DC SR5
    With the Tundra sitting in the garage for three days, I decided this would be as good a time as any to also do the ATF Drain & Fill. All three plugs (Drain, Refill and Overflow) are all looking like they could use a fresh replacement, but for now I just snagged new crush washers and Toyota ATF WS.

    4 - L9U7NV6.jpg

    13 - yiGAiAj.jpg

    5 - okMUd6J.jpg


    The transmission oil has never been drained from this 2005 Toyota Tundra SR5 Double Cab (there's some SEO). With 147,000 miles on it, it should've been done at least once, maybe thrice. So, I figure I'll start with a simple Drain & Fill then I can move on to replacing the filter down the road.

    I'm going with the method @3.4Tundra posted. I didn't own a 24mm socket, so I picked one up when I purchased my IR Temp Gun from Lowe's. I dipped over to Harbor Freight and grabbed a fluid pump. I was able to pull the Refill Plug (marked with the rusty WS on the bolt) so I stuck my 4Qt pitcher under the Drain Plug and pulled that baby off. I let it drain for a while, and hit right about 3.5Qt removed. Put the Drain Plug back on and tightened it down to 15 lbf.

    5376D45D-0003-4FE6-A33C-2C5D39466E9E.jpg

    92598227-86B6-465E-8F7B-73C50D7E911C.jpg

    9360C91F-3770-4354-9C3A-3AA475C2801A.jpg

    The color wasn't BLACK coming out, it was odorless, and it looked better than some of the horror shows online. While it might not have been super necessary, I wanted to learn how to do it and it made my brain feel better knowing it was done. Also, with 147k miles on the truck, and the recommended interval at 60k-90k, I’d rather do it as a learning experience than wish I had done it sooner.

    I got a little ahead of myself and didn't pull the black "clip" from the end of the tube before I started pumping. I should have, and made a slight mess when trying to snag a photo and hold the tube. I also was not able to pump out the remaining 200mL of each quart. So I combined the remaining amounts into one bottle and went to (roughly) just north of 3.5qt back in. Had I thought for a moment longer I might have trimmed the longer straw that came with the bottle pump to fit the quarts better...rather than using the shorter straw. Next time.

    DF66300D-9459-468B-8AE6-B18244F979F4.jpg

    CD7233DD-E478-482D-B188-0EEF76B0DF70.jpg

    EE9387F5-DCF6-4ED6-9A11-48731F6F7ACD.jpg

    66FFEEAC-D2E4-4E38-ACF5-0AD5706AB62C.jpg

    Tightened the Refill Plug down to 29 lbf. Neat. Ready to idle, check temps, check Overflow, and move on!

    Now it's at this point that I tell you I got ahead of myself. I realized that when I pulled the Drain plug there was no washer. There was no gasket. There was only a bolt. I checked the pan, and nothing was left behind on there. The FSM definitely talks about a gasket on the Overflow, and a gasket on the Refill. Nary a mention on the Drain. But. There's gotta be. Right? Eff.

    Oh well. Onward. I've already pumped the fluid in. I've already cranked everything down. I'll just closely monitor for any leaks, be better prepared next time, and do it again at the next oil change.

    I slapped the MAF Sensor in, replaced the 8 coils, reconnected the battery and fired her up for the first time in days. The idle was high for some time as the computer reset from the battery disconnect and new sensor.

    2 - iZBii6W.jpg

    3 - 9rVJ4Rz.jpg

    1 - Xvtl5BW.jpg

    I let it idle for about 10-15 minutes and temps still weren't in that glorious 120-130 range. I shifted into each gear (while holding the brake), then back through to Park. Checked temps, and while they had risen we were still hovering around 105.

    So I went for a quick, gentle drive, parked and checked temps. DING! She's ready. Pulled the overflow and out poured a fair amount of ATF but I dropped the overflow plug into the pitcher. And my backup bucket was outside of arm's reach. So I just reached in, grabbed the plug and jammed it back in place as we were about to pass to that slow trickle.

    12 - 4qcCeV7.jpg

    I might have gone a little beyond the slow trickle, but not too far. I'll take it for now and, again, be better prepared for the next time. For now, she's running again. Oil and ATF are in a better situation. Now I can turn my attention back on the headunit, backup, and dash cam.

    Parts Used Today:
    Toyota ATF - WS (Local dealer) - Bottle Pump
    Denso 6731303 - Ignition Coils
    Toyota MAF Sensor - Hitatchi
     

    Attached Files:

    Last edited: Nov 4, 2020
    w666, Darkness, ktundra and 2 others like this.
  6. Nov 22, 2020 at 4:15 PM
    #6
    jpink

    jpink [OP] Aspiring Shade Tree Mechanic

    Joined:
    Sep 25, 2020
    Member:
    #52763
    Messages:
    365
    Gender:
    Male
    First Name:
    John
    Knoxville
    Vehicle:
    05 Black Tundra DC SR5
    The garage is just barely big enough for the Tundra. I parked it in the garage last night and this afternoon I gave it some attention.

    I drove it to Knoxville and back in late October, prior to that I did an oil change and ATF drain & fill. The oil was at least a year old and the ATF was factory. So I figured I would start today off with one more round before the tow to Knoxville in January.

    This time I used Mobil 1’s Extended Performance High Milage Full Synthetic. Mouthful. Honda washer. Honda filter. Thought I bought a new Oil Drain Bolt, nope, Chuck Testa.

    F2BFE664-558A-4FCB-9492-D2D6D83EAE05.jpg

    B2B9E620-4DB3-4DFF-98DB-A30720EBC6D1.jpg

    FB809BF2-3960-4D89-894D-CC1D3F626DBA.jpg


    Last time I did the ATF I didn’t have the crush washers on hand. No leaks, but I didn’t feel good about it. So this time I had the crush washers as well as shiny new bolts to replace. I thought I had purchased a new Refill Bolt, but apparently only the Drain and Overflow. I went with the Autozone bottle pump as well, instead of the Harbor Freight one. Mostly because of saving time, I was already there.

    I liked how clean and precise the Autozone one was, but it didn’t push as much fluid in a single pump as the Harbor Freight one. Same price. I think I would buy the Autozone again over the Harbor Freight.

    This ATF color was much closer to the expected pink. Which, with only a month and 3,000 miles it should be. Seems I failed to get the new Refill Bolt, but did get new Overflow and Drain bolts. I think in 50k miles I will do another but will drop pan, change out filter and give it a new gasket. Of course will have to replace the rusty bolts around the pan. Make it sparkle!

    682247CF-9428-406F-954C-2B89984A33F8.jpg

    522DF6FE-9109-4EA0-9FF2-AA1A310A7799.jpg

    C6E74C19-9CD8-47B2-B221-9B88F54B4A6A.jpg
    For those that know.

    AD6A4BAD-20D8-440F-B3F4-9FE353A94587.jpg

    I’m in the middle of the O2 sensor change now. I feel like the fronts went better than what @Professional Hand Model claims. Maybe I just have better hand moves? Doubtful. Maybe they just made it easier on the 05 than that old 02!

    More later. Will circle back and tag part numbers too and give photos of sensors. Love me some photos.

    Parts Used Today:
    Toyota ATF - WS (Local dealer)
    Oil Filter - Toyota YZZD3
    Oil Plug Gasket - Toyota
    Auto Zone - Quart/Gallon Fluid Pump
    Mobile 1 - Extended Performance High Mileage Full Synthetic
    Denso Upstream O2 Sensor x2 (Denso 2349051)
    ATF Drain Plug: Part #9034110011
    ATF Overflow Plug: Part #9034110021
    Crush Washers: Part #3517830010
     

    Attached Files:

    Last edited: Nov 22, 2020
    w666, Darkness, MS22 and 2 others like this.
  7. Nov 22, 2020 at 4:53 PM
    #7
    Professional Hand Model

    Professional Hand Model A.K.A ‘Golden Hands’

    Joined:
    Apr 29, 2018
    Member:
    #14878
    Messages:
    14,999
    Gender:
    Male
    First Name:
    Fred
    ‘Somewhere’... a State of Mind
    Vehicle:
    2002 Tundra SR5 4WD 4.7L AC Silver Metallica
    Hand Protectors
    Hows everything performing? Curious on your take with all new o2 Sensors feedback. Glad I don’t have that ‘sealed transmission’ headache. :D
     
  8. Nov 22, 2020 at 5:12 PM
    #8
    jpink

    jpink [OP] Aspiring Shade Tree Mechanic

    Joined:
    Sep 25, 2020
    Member:
    #52763
    Messages:
    365
    Gender:
    Male
    First Name:
    John
    Knoxville
    Vehicle:
    05 Black Tundra DC SR5
    Honestly my biggest issue is still the brakes. However that’s on the kill list later this week.

    26DE562D-B5A4-4D90-9D96-A2CDA4D83F61.jpg

    Karma already got me for besmirching the good name of Mr. PHM. These downstreams are not budging! Is there something I could spray on this without worry about killing myself in a fireball later? Upstreams were a dream to remove compared! The whole truck pulled forward at one point when trying to loosen!

    3784B056-86A4-4879-984D-42057B4782C8.jpg

    24911FEF-A2D6-4D76-ACB4-D8D0EFC7C909.jpg
     
    w666, Darkness, ktundra and 1 other person like this.
  9. Nov 22, 2020 at 5:19 PM
    #9
    Professional Hand Model

    Professional Hand Model A.K.A ‘Golden Hands’

    Joined:
    Apr 29, 2018
    Member:
    #14878
    Messages:
    14,999
    Gender:
    Male
    First Name:
    Fred
    ‘Somewhere’... a State of Mind
    Vehicle:
    2002 Tundra SR5 4WD 4.7L AC Silver Metallica
    Hand Protectors
    Ah! Grasshopper reaping Bad Karma. Hahaha.

    Seriously, I started on my rears which needed the nuts to be cut off with technical precision. By the time I got the front I was 3 hours in and the clip connections were a bear to remove without mangling so finesse was crucial.

    My rears look nothing like yours. Looks like a different animal on the 05.
     
    jpink[OP] and YardBird like this.
  10. Nov 22, 2020 at 7:16 PM
    #10
    jpink

    jpink [OP] Aspiring Shade Tree Mechanic

    Joined:
    Sep 25, 2020
    Member:
    #52763
    Messages:
    365
    Gender:
    Male
    First Name:
    John
    Knoxville
    Vehicle:
    05 Black Tundra DC SR5
    Soaked 'em with some PB Blaster, went back 20 minutes later and soaked again. Went back 20 minutes later, no budge. Karma sucks.
     
    w666 likes this.
  11. Nov 23, 2020 at 5:21 PM
    #11
    Arringtonpalmer

    Arringtonpalmer New Member

    Joined:
    Oct 3, 2020
    Member:
    #53095
    Messages:
    120
    Gender:
    Male
    First Name:
    Sam
    New Hampshire
    Vehicle:
    2004 Limited Double Cab
    ARB Bumper, Warn Evo, UTE H66 tray, OME 2884 and Nitrochargers.
    Oooof. Just did 3/4 of mine lees than an hour. O2 sensor socket with 3/8 ratchet and the smallest cheater pipe moved the forward sensors no problem like yors. No cheater for bank 2 sensor 2. Bank 2 sensor 1 is tomorrow night's adventure, I posted a picture of that little fucker in the 'what have you done today' thread a couple weeks back.
     
    jpink[OP] likes this.
  12. Nov 23, 2020 at 7:11 PM
    #12
    jpink

    jpink [OP] Aspiring Shade Tree Mechanic

    Joined:
    Sep 25, 2020
    Member:
    #52763
    Messages:
    365
    Gender:
    Male
    First Name:
    John
    Knoxville
    Vehicle:
    05 Black Tundra DC SR5
    I’ve likely either created a toxic mess under the Tundra, or have created an explosive fireball waiting to happen.

    I’ve now sprayed PB Blaster. CRC Freeze off. And Liquid Wrench. I’ve tried to tap it with flathead and hammer (no spark. Yet.). And I’ve tried to “rock it” by flipping between tighten/loosen.

    Might go the Hand Model way and cut into it but thinking maybe I will hit it with non flammable brake cleaner first? Just for good measure.

    62A3188D-3E6F-486A-AA80-2FDE63536B4F.jpg

    E49681E6-1B50-44F9-BBFE-27C8053720AE.jpg
     
    w666 likes this.
  13. Nov 24, 2020 at 5:23 PM
    #13
    FirstGenVol

    FirstGenVol Check the name tag. You're in my world now.

    Joined:
    Dec 13, 2018
    Member:
    #22934
    Messages:
    13,900
    East TN
    Vehicle:
    2002 AC
    Have you tried heating it? I think you're close to the last stage.. :D

    cb3ddaf71891d88a0f80d7d157f626ccb1688fcd62efb1ee0d99107de1db9439_1.jpg
     
  14. Nov 24, 2020 at 6:11 PM
    #14
    jpink

    jpink [OP] Aspiring Shade Tree Mechanic

    Joined:
    Sep 25, 2020
    Member:
    #52763
    Messages:
    365
    Gender:
    Male
    First Name:
    John
    Knoxville
    Vehicle:
    05 Black Tundra DC SR5
    @FirstGenVol It’s just gonna stay until Knoxville and then we’re gonna do a new exhaust lol
     
    Tundra2 and FirstGenVol like this.
  15. Nov 25, 2020 at 6:26 PM
    #15
    jpink

    jpink [OP] Aspiring Shade Tree Mechanic

    Joined:
    Sep 25, 2020
    Member:
    #52763
    Messages:
    365
    Gender:
    Male
    First Name:
    John
    Knoxville
    Vehicle:
    05 Black Tundra DC SR5
    Cleaned up the downstream sensor with some soappy wodder and then tried to melt it.

    No dice. It smoked. It didn’t move.

    DE1FBE4D-0A4C-4AAE-9CFA-46908D9915B0.jpg

    655308F0-CEA4-4DAF-89CC-8F3AC96F2FC0.jpg
     
  16. Nov 26, 2020 at 3:38 AM
    #16
    Professional Hand Model

    Professional Hand Model A.K.A ‘Golden Hands’

    Joined:
    Apr 29, 2018
    Member:
    #14878
    Messages:
    14,999
    Gender:
    Male
    First Name:
    Fred
    ‘Somewhere’... a State of Mind
    Vehicle:
    2002 Tundra SR5 4WD 4.7L AC Silver Metallica
    Hand Protectors
  17. Nov 26, 2020 at 6:16 AM
    #17
    jpink

    jpink [OP] Aspiring Shade Tree Mechanic

    Joined:
    Sep 25, 2020
    Member:
    #52763
    Messages:
    365
    Gender:
    Male
    First Name:
    John
    Knoxville
    Vehicle:
    05 Black Tundra DC SR5
    @Professional Hand Model thats quite the commitment you’re proposing.

    When I tested the upstreams I got a solid 0 ohms.
     
    w666 likes this.
  18. Nov 26, 2020 at 6:36 AM
    #18
    Professional Hand Model

    Professional Hand Model A.K.A ‘Golden Hands’

    Joined:
    Apr 29, 2018
    Member:
    #14878
    Messages:
    14,999
    Gender:
    Male
    First Name:
    Fred
    ‘Somewhere’... a State of Mind
    Vehicle:
    2002 Tundra SR5 4WD 4.7L AC Silver Metallica
    Hand Protectors
    Good job testing the Ohms. Proves you are on the right path back to Tundra greatness.

    I think a full round impact socket with sharp teeth will do you in this situation as the o2 Socket may not be giving you the bite to leverage. Cheater bar the thing. Some vibration or pounding with a chisel prior might work to break the crustys up.
     
  19. Nov 29, 2020 at 3:39 PM
    #19
    Arringtonpalmer

    Arringtonpalmer New Member

    Joined:
    Oct 3, 2020
    Member:
    #53095
    Messages:
    120
    Gender:
    Male
    First Name:
    Sam
    New Hampshire
    Vehicle:
    2004 Limited Double Cab
    ARB Bumper, Warn Evo, UTE H66 tray, OME 2884 and Nitrochargers.
    Glad to head in the other thread you got these out.

    My upstreams took the sensor socket, and it flexed open and skipped on the pass side sensor before I did a heat/cool cycle and got it off. Just can't get much purchase with those tools.

    Here's to not going 200k on these sensors.
     
    jpink[OP] likes this.
  20. Nov 29, 2020 at 6:37 PM
    #20
    jpink

    jpink [OP] Aspiring Shade Tree Mechanic

    Joined:
    Sep 25, 2020
    Member:
    #52763
    Messages:
    365
    Gender:
    Male
    First Name:
    John
    Knoxville
    Vehicle:
    05 Black Tundra DC SR5
    @Arringtonpalmer yeah I would not be surprised if these have never been touched honestly. I didn’t get a good picture, but I couldn’t even plug the new Downstreams into their wiring harness because of dirt and dust up in there.

    Imagine tapping your shoe upside down, after a stroll on the beach. That’s what it was like tapping these.

    Basically these should be done on ATF schedule. 60-90k

    After using PB Blaster, CRC Freeze Off and Liquid Wrench, with a combination of tapping and breaker bar... I cleaned the area up with Soappy Wodder and then did a couple different treatments of: heating with the torch, and spraying with cold water. Today I threw the breaker bar at it again and got a satisfying POP out of it.

    I got the old ones out. Chased the threads (initially couldn’t even tighten the chaser down all the way through) and slapped the new ones in.

    1900B591-5F1C-499F-91E8-58EDDAF5170B.jpg


    On Thursday (Thanksgiving) I started with the brakes. Started with the rear and got the new Wheeler’s stainless steel braid on. The hardest part here was popping the clip off. I used my flathead screwdriver to pry against the old line, since I was removing that anyway. Once removed I cleaned the clip and surface off.

    Out of curiosity I did look up the new clips. They’re about $2/each but the site claims they don’t fit. Maybe there’s a different model, but these weren’t soft rusty or bent beyond repair.

    92F28F4E-FF7B-4184-ADA6-F34A6DD0E449.jpg

    19D0B37B-FC68-4277-8CAF-5A4626254447.jpg

    FE193383-0B36-48AA-AF4F-B2C345F7881F.jpg

    11835B2C-FB60-445A-8677-329C91B56033.jpg


    I jacked the truck up for the first time after this. Until now I’ve been able to do everything without a jack. Kinda nice having a large vehicle, compared to the 04 Accord.

    I pulled the “old” drums off. These are actually in pretty decent shape, but they’re not Toyota and as part of my goal of “better brakes” I just decided to jump all in.

    5814BBDB-0C36-47CE-BBB0-276296D6E815.jpg

    A0C69E53-7FFA-4901-A903-E7CBEC601F72.jpg

    I didn’t see any gasket residue, so the previous brake job seemingly skipped that part.

    Hosed down the guts with brake cleaner and then pulled all the old stuff off. I debated getting a new backing plate due to the rust, but decided against it this go around. I regretted it when I had everything removed. Especially when I discovered the driver side had some bends in it.

    I did hit some self inflicted pain but worked through it. Monday I’m going to jack the truck up and re-inspect my grease points due to the PHM Peepers.


    8F895BA7-C8D8-4AE2-8D20-C4176FD8DEE5.jpg

    86CB6CA6-2717-4527-B39C-AFA53986F4FC.jpg

    AA978A96-1825-42F2-BF96-80D555A89822.jpg

    Checked the Master Cylinder and topped it off with the Bosch 5.1.

    Saturday I jacked the front end up but had some difficulty getting dead center when jacking. Seemed either Driver or Passenger side was just slightly raising more than the other. Worked through it. Jack stands in place with jack as a backup and tires as a third then a shake test and she was solid enough for who it was for (me).

    Gave the fronts a full treatment. Rotors and pads really weren’t in bad shape either but calipers were very rusty. I regretted not grabbing some brand new caliper bolts, and brand new dust shields here. Will add to the list for when I convince @FirstGenVol to....volunteer...some time helping me do new suspension.

    A26DAC11-2E1C-49A9-B8BE-6E1D7C71075A.jpg

    F11DE39F-1832-4E88-9775-7CF45F19EF05.jpg


    Once I had all this out of the way I did scrub down the rusty shields and pulled the old rubber lines. Gave the clips and brackets a scrub and placed the new stainless lines.

    3A102A91-EE96-40ED-99C3-4BC953D2E52B.jpg

    F4139B73-7926-41C3-9394-074738C1EFEC.jpg

    CD5A652E-7B7B-47E8-B1FD-C825A817D967.jpg

    7722DA82-F0E1-4ACE-9FE5-19D85B1DD0E4.jpg


    After each one I did top off Master Cylinder with more Bosch 5.1.

    Got the new rotors, calipers and pads in place. Replaced the tires. Lowered ‘er down. New wheels and tires are on the 2020 list. Red adds not only torque and MPG but lowers insurance. New wheels need to show that red off to improve gains.

    FAE97878-BB39-4DB1-8830-910F619D037F.jpg


    So things left to do with the brake job:

    1) Grease check the rears
    2) Bleed (Rear R, LSBPV, Rear L. Front R, Front L)
    3) Drive

    I still need to get ATF to temp and crack the overflow and I need to hose down the misc spots that got some brake fluid on them.

    My crossmember is in so the skid plate can happen. I’ve been hitting those crossmember bolts with some PB Blaster over the last week. Later this week I will sneak that from dealer so I can get that swapped out and done.
     
    Last edited: Nov 29, 2020
  21. Nov 29, 2020 at 6:41 PM
    #21
    FirstGenVol

    FirstGenVol Check the name tag. You're in my world now.

    Joined:
    Dec 13, 2018
    Member:
    #22934
    Messages:
    13,900
    East TN
    Vehicle:
    2002 AC
    Hey I'll do it. I've been waiting to meet someone here that actually works on their vehicles. When do you move to Knoxville?
     
    jpink[QUOTED][OP] likes this.
  22. Nov 29, 2020 at 6:46 PM
    #22
    jpink

    jpink [OP] Aspiring Shade Tree Mechanic

    Joined:
    Sep 25, 2020
    Member:
    #52763
    Messages:
    365
    Gender:
    Male
    First Name:
    John
    Knoxville
    Vehicle:
    05 Black Tundra DC SR5
    Jan 30th I take possession so my plan is to be there by the 29th.
     
    FirstGenVol[QUOTED] likes this.
  23. Nov 30, 2020 at 4:27 AM
    #23
    Professional Hand Model

    Professional Hand Model A.K.A ‘Golden Hands’

    Joined:
    Apr 29, 2018
    Member:
    #14878
    Messages:
    14,999
    Gender:
    Male
    First Name:
    Fred
    ‘Somewhere’... a State of Mind
    Vehicle:
    2002 Tundra SR5 4WD 4.7L AC Silver Metallica
    Hand Protectors
    Nice job on finally getting the rear o2 off.

    Should be cool hearing feedback on how the truck reacts to the optimization. The 4 new o2’s were a big improvement in torque and city gas mpg’s for me.

    Keep up the good work.
     
    jpink[OP] likes this.
  24. Dec 2, 2020 at 10:38 PM
    #24
    jpink

    jpink [OP] Aspiring Shade Tree Mechanic

    Joined:
    Sep 25, 2020
    Member:
    #52763
    Messages:
    365
    Gender:
    Male
    First Name:
    John
    Knoxville
    Vehicle:
    05 Black Tundra DC SR5
    Very little progress, but did get out today and pick up the new crossmember, ATF fill bolt and gasket, along with new brackets and bolts around the crossmember.

    The closest dealer that participates in the reduced parts price is a 54 minute drive away. And they close at six. And I work ‘til 5.

    I flew up there, grabbed the goods, then when I got home I started the brake bleed. Thanks to all the new brake hardware I already put a good 16 ounces of fresh Bosch DOT 5.1 in the system. The maintenance logs show the mechanic bled with DOT 3 fairly recently, so the fluid wasn’t bad.

    4CBE5A11-C8E0-4785-AA88-43CBFB0616AB.jpg

    I do wish I had just cracked a bleeder or two and checked the air before I did brakes. Just to see.

    When it came time to bleed the calipers it was 9:00 PM and for whatever stupid reason the PowerStop 13WL calipers are an 8mm bleeder. With a stupid very tight rubber cap.

    I discovered I did not own an 8mm wrench in any fashion. 8mm socket? Sure. No wrench. Not wanting to delay any further I went to AutoZone because they were guaranteed open until 10PM and it was now 9:38.

    Of course they were sold out of single serving 8mm wrenches. And the flare package. So $25 later I could now bleed the dumb calipers.

    A1876F80-E741-47E1-8586-5E740EADDC90.jpg

    66A87C25-A09E-4A2F-A677-8EBA108653AE.jpg

    I do need to replace, at the least, the rusty bleeder on the LSBPV next time I do a bleed.

    83F85416-39FB-4DF2-9707-E8592B328FBD.jpg

    So then I cleaned up and started looking at the crossmember replacement. Looks like I will need to remove the front bumper to get proper access. I started some of this but will finish tomorrow over lunch.

    8ED22586-6058-409E-A0E2-03E606F2D8E6.jpg


    Still need to satisfy @Professional Hand Model and do the remaining, proper grease points on drums. Still need to run the truck and deal with leveling out the ATF, and check oil level.

    Notices Power Steering fluid is at minimum Cold level. Coolant looks low as well. Washer fluid got topped off and noticed the clips holding that fill valve are cracked.

    Oh, and the stupid dumb overly stuck Downstream O2s tested properly. Technically didn’t need to replace them, I guess.

    Thursday Goals:
    • Front bumper removed
    • Inventory rusty screws for replacement.
    • New crossmember and brackets installed.
    • Skid plate installed.
    • Get greasy.
    • Test drive.
    • Replace WS Refill bolt.
    Parts Used:
    Bosch ESI6 DOT 5.1 Brake Fluid (Roughly 1QT)
     
    Last edited: Dec 4, 2020
  25. Dec 3, 2020 at 9:40 PM
    #25
    jpink

    jpink [OP] Aspiring Shade Tree Mechanic

    Joined:
    Sep 25, 2020
    Member:
    #52763
    Messages:
    365
    Gender:
    Male
    First Name:
    John
    Knoxville
    Vehicle:
    05 Black Tundra DC SR5
    Bought the Tundra from my cousin. He had some bad luck and hit two deer within three weeks of each other. Passenger side for both.

    The skid plate fell off on the highway when he was driving it. The crossmember is bent. Maybe from the deer. Maybe from the skid plate falling off at highway speeds. Who knows, maybe some of Column A and some of Column B. Today over lunch I removed headlight assemblies and the front bumper.

    02B2548E-6C96-4B5D-9316-52EC369A07AD.jpg

    45 minutes. Pretty pleased with myself. Nothing cracked. Nothing damaged. First try. Even got the “hidden” bolt up above the wheel.

    DD5429DD-230B-4253-9B24-745CCDC8AF1A.jpg


    The weld the body shop put on the crossmember (instead of welding new brackets and replacing the crossmember) rusted. They did this to compensate for not having a top bolt for the bracket, and you can’t add one because of how the frame behind this bracket is all sealed up.

    Passenger Side Bonk:

    AC704E81-4493-40BA-A723-701CA9297A67.jpg

    BC6A5788-6750-47CA-BAE2-381B38E9154D.jpg

    563523D4-9C45-4361-AF7A-8C58FB70BDF3.jpg

    FC677AE6-7BCB-4A74-8B21-B7095A8B1034.jpg

    461AB795-19AF-4062-B3CB-304BDDB8F623.jpg


    Driver Side, Non-bonk:

    D92C28D7-9C20-4DCB-AB39-19DDC418962B.jpg

    938AD94A-2A62-4FCB-B9CA-B8140B8CC83D.jpg

    Bent vs New:

    6D413C25-3803-4976-B967-623D1246BC17.jpg


    Two bolts are missing from the passenger bracket. They were able to thread a bolt in there but I don’t know if it was stripped before or if they cross threaded or what. But that sucker was toast when I pulled it out today.

    So then I thought. Okay, I will just go to Lowe’s and get a new bolt to stick in this spot and kind of “hodge podge” it for now. Proper fix later.

    CD1D4F5E-C4E7-4618-8DB0-248AE56E6F01.jpg

    B7A70D8F-4D71-4935-BAB2-732C9F5DD79B.jpg


    I set the bolt package down while looking at random other crap I didn’t need. Didn’t pick it up when I picked the other stuff back up, cause why grab a basket or a bucket. I just need a few things.

    Then it’s 9:08 PM and I can’t find the stupid bolts and I’m looking at the same dumb unattached frame that I was looking at two hours ago and the bolts aren’t on my receipt and now any hardware store that would have the bolt size I need is closed.

    Fine. Let’s at least get a victory of attaching the skid plate since that’s what started the current journey.

    So I pick up the 800# skid plate and lay it on my belly then slide under the truck and pull and wiggle and scootch into place. Attach the three front bolts to crossmember. Good. Attach, the... where the hell do these two bolts go? There’s nowhere to attach these two bolts. Am...am I in the right spot? I have to be. It’s the only spot that has the perfect spacing for the three front bolts. Let alone the only place that can support that weight.

    Apparently I’m either mistaken or I’m missing something else. Fine. I’ll remove it. Didn’t get a great photo. I’m assuming I’m doing something wrong here.

    A7DD17DA-9FFE-46A6-95D6-47204948EEED.jpg

    So. That’s still a thing. No closer. Further.

    Let’s clean up a bit, organize the tools and put whatever I can away. Shove the skid plate back into the backseat of the Tundra. Where it’s been for a solid month.

    Guess I will at least handle the drum brakes and grease the spots PHM noticed I missed. Annnnd can’t find the grease. Okay. More cleaning. More organizing. Can’t find the dumb grease.

    Fine. I can at least put the new ATF Refill Bolt in place. It’s shiny and new, small victory. Slide back out from under the Tundra and spot the dumb grease on the leaf springs. It’s now 10:30 PM. Obscenities follow. I’m going to bed.


    4F30E4F7-AA95-45E5-9A01-EABF6AD49CAA.jpg

    BD9D1646-BA5E-400B-8DFF-AFB315438050.jpg


    The “simple” project of adding a Skid Row skid plate has now added a few more days to the Garage Tundra.

    This is why I need a garage. To hide my shame.

    Parts Used Today:
    Toyota Frame Crossmember #510210C020
    Bumper Impact Bar Bracket (Left) #510360C010
    Bumper Impact Bar Bracket (Right) #510350C010
    Disc Brake Caliper Bracket Mounting Bolt (Rear) #91619B1225 (apparently also used in the Bumper Bracket)
    ATF Refill Drain Plug #9034118059
    ATF Refill Drain Plug Gasket #9030115004
     
    Last edited: Dec 4, 2020
  26. Dec 4, 2020 at 8:18 PM
    #26
    jpink

    jpink [OP] Aspiring Shade Tree Mechanic

    Joined:
    Sep 25, 2020
    Member:
    #52763
    Messages:
    365
    Gender:
    Male
    First Name:
    John
    Knoxville
    Vehicle:
    05 Black Tundra DC SR5
    So here's the best I can piece together at this point. Previous owner (my cousin) hit 2 deer in the course of 3 weeks. Both on the passenger side. @Tundra2 I'm lookin' at you buddy. This is what those deer will do to ya.

    Honestly, I'm pretty impressed with the overall level of damage to the frame. Obviously the "Bumper Cover" had to be replaced.

    Looking at these two diagrams:
    1. Front Bumper & Bumper Stay
    2. Frame
    I purchased the Crossmember, Left and Right Impact Brackets, Misc Bolts and Nuts. In looking at the Front Bumper & Bumper Stay diagram against what I have, the body shop did not replace the Bumper Impact Absorber (Front). The Right Impact Bar Bracket was damaged to the point that the factory bolts on it are just gone. There's no way to replace the upper one because of how the Bracket is welded to the frame. The body shop appears to have opted to weld the Bumper Impact Bar into the Bracket as a substitute for the missing upper bolt.

    I was able to pickup a "M10-1.25 x 40" bolt, threw a washer on it and slapped that bad boy in place. The Bumper Impact Bar is back on the Tundra and I don't think it'll go anywhere between now and when I have the new Impact Brackets welded on sometime next year when I revisit the front and add in fog lights.

    0E045C1E-8087-4829-9F56-51FC2EA74C46.jpg


    Life got in the way of doing anything else with the Tundra tonight, but at least tomorrow I can get the rest of the parts put back in place. In the meantime I did pick up some Peak 50/50 OET Asian Red/Pink Extended Life coolant from Autozone, because it was next to Lowe's when I got the bolt.

    I also picked up a steak and some taters to grill tomorrow as a reward for finally turning the Tundra over. Maybe I'll go for extra credit and get the PCV Valve replaced.

    209CCE13-4ACD-4BA4-8F1F-FF9D1407F7E8.jpg

    85E28243-65D0-4568-9496-A2A1CC5766D7.jpg
     
    w666 and Tundra2 like this.
  27. Dec 6, 2020 at 8:28 PM
    #27
    jpink

    jpink [OP] Aspiring Shade Tree Mechanic

    Joined:
    Sep 25, 2020
    Member:
    #52763
    Messages:
    365
    Gender:
    Male
    First Name:
    John
    Knoxville
    Vehicle:
    05 Black Tundra DC SR5
    So yesterday (Saturday) I did get the front bumper re-attached, the headlights all in and somehow lost the three bolts that go on top the bumper to hold it in place.

    The other thing I noticed is how many things are out of place on the front here from the deer. It seems there should be some more clips that go on underneath, but they’re missing because it no longer lines up.

    0D51856B-77C4-4390-B907-735DC3C10632.jpg


    I also discovered that the windshield washer fluid fill tube leaks. I topped it off while in there and then came back a little later to a small pool on the ground. It isn’t clipped into the retaining piece either so I will need to investigate that further.

    I took the drums apart, finally, and added in some grease per the Eagle Eyed and Experienced PHM.

    Put them back together. Put the tires on, torqued everything down, and then I noticed the small leak coming from the Wheeler’s brake line I installed. I must have not tightened it enough and the brake pumping I did during the bleed pushed some out. Not a lot, but just enough.

    8F8C2CCC-4206-4E8B-9B93-459AAD03DA8B.jpg

    82F5EAF0-1233-404A-AEA3-6FCDDA81D8A9.jpg


    Eff. So I accepted my fate and took it apart. I cleaned the area up, put it back together and for grins threw a few pumps at the brakes. Then I called it a night.

    I started today (Sunday) off by bleeding the brakes. Again. Despite having the experience and basically ready to go with it, it is still time consuming. I am glad I purchased 2 QTs of the Bosch 5.1 when I did, assuming I’d screw something up. I have just under a half quart left I believe.

    Also, can we talk about how stupidly soft the brand new PowerStop bleeders are? Annoying. I do need to get a flared 8mm wrench but even on the box-end I still hated myself.

    With that done I turned my attention again to the skid plate area. It seems some sort of mortar or concrete got where it didn’t belong and is now blocking any hope of me attaching the skid plate anyway. Good Lord.

    742C5A83-7CC2-45A3-B159-856DA8FD02C2.jpg


    Had some life slow me down, ran out and grabbed some M8 bolts and washers (and a magnetic tray) as a temporary measure until I get the proper ones to replace the 3 I lost, but I wanted to. I needed to, get this thing started.

    Got the bolts in place, oh and had noticed the coolant was low so I just topped off with some Peak 50/50 from Autozone.

    576D0F09-BD8E-4182-AE83-904BD6763D9F.jpg


    Double checked I had all tools from underneath cleared out. Nothing left somewhere dumb. Made my list of things to do:
    1. Get ATF to temp, check for leaks, shift through gears. Last time had to do a short drive to get to temp before I could check fluid level.
    2. During short drive I will need to test brakes and break-in accordingly. Check for leaks.
    3. Check oil level and for leaks.
    4. Too bad my sense of smell is still gone. Won’t be able to smell the exhaust to experience what PHM described post-O2 Sensor replacement.
    So now I’m ready to fire this baby up. Turn the key, nothing. Immediately I wonder what I screwed up. Could it be from O2? No the upstreams tested at 0 and it still ran. Eff. Battery. All the door open, lights on, during the double bleeding. Let’s test the battery. 9volts. Farts.

    Okay. I could jump it, but it’s 5 years+

    26B5992A-7C8A-4C5A-A6C5-5141895482C8.jpg


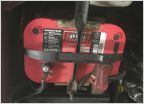
    So, check around and I’ve got a nearby Autozone with an AGM 710CCA battery in stock. But it’s a 24F and not a 35. Whatever. I’ve gotta get this thing running. Tuesday it goes in for the tint cleanup/redo.

    With Autozone closing earlier on Sundays I didn’t take time to pull old battery ahead of time but when I got back I cleaned the area up...as best I could for now. I will have to pull this another time and get more into it.

    E7450CE2-7D98-4527-98CF-BCEF7E37099F.jpg

    F01045BD-DA48-44A9-9441-02747CCC082F.jpg

    12ED567A-AEC4-4EFA-8E05-0CC194617AC3.jpg

    C9CD1C21-BA76-4827-8664-45C3F9A6E062.jpg

    Now one of the things the previous mechanic bragged about was fabricating a battery holder.

    This new battery has a little ridge that prevents the fabricated battery holder from fitting into place proper. Eff.

    71678742-4B72-4D91-BCD1-DA550403C452.jpg

    So. I left it as is for now. Going to shower and call it a night.

    Damnit.
     
    Last edited: Dec 6, 2020
    MS22 and Tundra2 like this.
  28. Dec 7, 2020 at 12:35 PM
    #28
    FirstGenVol

    FirstGenVol Check the name tag. You're in my world now.

    Joined:
    Dec 13, 2018
    Member:
    #22934
    Messages:
    13,900
    East TN
    Vehicle:
    2002 AC
    That area under the battery is a breeding ground for rust. You get props for listing all those part numbers you purchased. Nice job!
     
  29. Dec 7, 2020 at 12:43 PM
    #29
    jpink

    jpink [OP] Aspiring Shade Tree Mechanic

    Joined:
    Sep 25, 2020
    Member:
    #52763
    Messages:
    365
    Gender:
    Male
    First Name:
    John
    Knoxville
    Vehicle:
    05 Black Tundra DC SR5
    I'll need to clean and sand the area up and give it a nice coat. I am going to order a new battery tray (which of course is part number 744310C010) as well. Will do it all when I get the spiffy new battery hold down from @Coupe
     
  30. Dec 9, 2020 at 8:27 PM
    #30
    jpink

    jpink [OP] Aspiring Shade Tree Mechanic

    Joined:
    Sep 25, 2020
    Member:
    #52763
    Messages:
    365
    Gender:
    Male
    First Name:
    John
    Knoxville
    Vehicle:
    05 Black Tundra DC SR5
    So quick update on a few things.

    I made sure to tighten the Self Adjuster on the shoes to the point I couldn’t get the drums on. Then I backed it off just enough to slip the drums over, but they didn’t touch shoes. So basically closest without going over.

    @FirstGenVol rightly pointed out the LSPV is closer than rear driver, but I didn’t feel like a 3rd bleed in a week.

    I was able to get the ATF to temp by driving during the day (50F outside, unseasonably warm) and then as soon as I got back I popped the hood and threw a folded rag (in a plastic bag) down and under, and up and over the transmission cooler. Jumped underneath, it was at that magic temp and so I cracked the overflow bolt and let it get down to a slow trickle then threw the new bolt and crush washer on at 15lbf.


    93506421-BE44-413B-BE47-B0B4DAE924FE.jpg

    The last time I did this I didn’t have a new crush washer ready and I put the gross rusty bolt back on. I also dropped the bolt and didn’t like how much extra fluid came out before I got it back on.

    I feel good having back to back oil and ATF jobs done. The oil had gone a year and the ATF was likely factory fluid.

    The brakes are basically what I would consider the same. The only improvement is that while I had everything in the garage I got the parking brake tightened down. Now, if I engage the parking brake and shift to drive the truck doesn’t move. It takes a decent pedal push to move now. This was not the case before.

    I’m contemplating attempting a Master Cylinder replacement.

    When I push the brake pedal it feels like a long travel, but if I let off slightly and push again it’s more stiff the second time. Still not near as great and after years of driving vehicles that don’t have this “mush” I would really like to figure it out.

    This Saturday the forecast calls for 3”-6” of snow. I need to get my Fluid Film app done. @FirstGenVol come to Iowa and help a brotha out. It’s only 20hrs of driving.
     
    w666 and FirstGenVol like this.

Products Discussed in

To Top