1. Welcome to Tundras.com!

    You are currently viewing as a guest! To get full-access, you need to register for a FREE account.

    As a registered member, you’ll be able to:
    • Participate in all Tundra discussion topics
    • Transfer over your build thread from a different forum to this one
    • Communicate privately with other Tundra owners from around the world
    • Post your own photos in our Members Gallery
    • Access all special features of the site

Mike's desert adventure toy build - 4x4 AC

Discussion in '1st Gen Builds (2000-2006)' started by MHulsebos, Sep 24, 2021.

  1. Sep 24, 2021 at 9:27 PM
    #1
    MHulsebos

    MHulsebos [OP] New Member

    Joined:
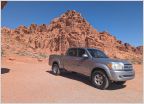
    Sep 24, 2021
    Member:
    #68506
    Messages:
    30
    Arizona
    Vehicle:
    2000 Tundra AC 4x4
    I've been looking to get into a Tundra for a reliable desert toy for some time, and after selling our last house and buying an older home that needs some work, the need for a pickup has grown tremendously. We have a handful of other "Toyotas", including a Lexus Gs400, Prius, and my Lexus Sc300 race car project, so I'm fairly familiar with the brand, love the known reliability of a properly maintained Toyota, and not afraid to get my hands dirty with them.

    I found this 2000 AC 4x4 Sr5 with 212k miles cruising Craigslist one morning at work. It had no photos, but the price was right so I reached out to the seller to see if they could provide some. At first, I saw pictures and dismissed the truck altogether, but given the current market for trucks in my area I thought, what the heck, I can put in a little work, I'll just go look at it and see how it looks in person. It's a little rough around the edges, but after looking it over, seems to run well, and the price was right. It has also had the frame replaced under the recall, so while there is some rusting in a few areas, particularly the bed, the frame is in good shape. We decided to pull the trigger and took it home.

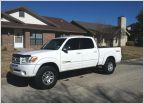
    I'm really looking forward to getting this thing back into shape, and really just wanted to start a build thread so I can keep track of progress on it moving forward. As of now, I will be doing a minor lift/level, and will be replacing the whole front end on it so it's fresh. I've already ordered some OME front struts with 885 springs, JBA upper arms, Wheelers rear 3 leaf progressive AAL, bilstein 5100 rears, and all the regular maintenance stuff associated like LBJ, new LCA's and tie rod ends.

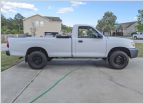
    Here's how the truck looks as of today. I already threw LED's into all the interior lights because I couldn't see anything with the dim bulbs that were in there.

    20210903_180820.jpg 20210912_115436.jpg 20210912_213157.jpg
     
  2. Sep 24, 2021 at 9:29 PM
    #2
    MHulsebos

    MHulsebos [OP] New Member

    Joined:
    Sep 24, 2021
    Member:
    #68506
    Messages:
    30
    Arizona
    Vehicle:
    2000 Tundra AC 4x4
    Over the weekend I did the valve cover gaskets and timing belt replacement. I'm not sure if this one has ever been done, so after pulling a timing cover last week I parked the truck until I got this addressed. Replaced with a full Aisin TKT021 kit, and did the fan bracket and clutch while I was at it. I also replaced the accessory drive tensioner and belt.

    The old parts were definitely showing their age
    20210918_164435.jpg 20210918_164424.jpg 20210918_164455.jpg
     
  3. Sep 24, 2021 at 9:29 PM
    #3
    MHulsebos

    MHulsebos [OP] New Member

    Joined:
    Sep 24, 2021
    Member:
    #68506
    Messages:
    30
    Arizona
    Vehicle:
    2000 Tundra AC 4x4
    My rear window latch inner folding arms were broken, and one of the main latch handles was missing altogether so I swung by my local junkyard and found only one latch handle available. It was from a truck with a tan interior, and mine is grey. This would have left me with mismatched latch handles so I decided I'd dye them both black with RIT dye, then put everything back together, replacing the inner arms with black aluminum replacements I got online. It's a small item, but the repair resulted an an oem look, with improved function and security, so I'm happy.
    20210920_160908.jpg 20210920_160857.jpg
     
    Hotwire and Rica25 like this.
  4. Sep 24, 2021 at 9:33 PM
    #4
    Tundra2

    Tundra2 Zoinked

    Joined:
    Feb 10, 2019
    Member:
    #25875
    Messages:
    12,272
    Gender:
    Male
    First Name:
    Noah
    Western Kentucky
    Vehicle:
    '00 Tundra V8 SR5 '03 Corolla Virus
  5. Sep 24, 2021 at 9:36 PM
    #5
    Darkness

    Darkness Allergic to white

    Joined:
    Jul 23, 2018
    Member:
    #17315
    Messages:
    9,976
    Gender:
    Male
    First Name:
    Luis
    All over SoCal
    Vehicle:
    The darkest
    It's really dark
    Welcome! It's black!
    [​IMG]
     
  6. Sep 24, 2021 at 9:39 PM
    #6
    MHulsebos

    MHulsebos [OP] New Member

    Joined:
    Sep 24, 2021
    Member:
    #68506
    Messages:
    30
    Arizona
    Vehicle:
    2000 Tundra AC 4x4
    Thanks, and yes! All 4 of our "Toyotas" are black! The three pictured, plus my SC in the garage. :D
     
    Darkness[QUOTED] and Rica25 like this.
  7. Sep 25, 2021 at 5:08 PM
    #7
    MHulsebos

    MHulsebos [OP] New Member

    Joined:
    Sep 24, 2021
    Member:
    #68506
    Messages:
    30
    Arizona
    Vehicle:
    2000 Tundra AC 4x4
    Did my plugs the other night and when I was done the truck sounded like it had a misfire. After tinkering I found that one of the welds on the resonator had cracked so it was leaking on one inlet. I knew the exhaust had been pieced together poorly, so I wasn't horribly surprised by this, just threw me off because I had just done plugs. It must have cracked when I pulled it into the driveway just before working on it. Anyway, I ran it up to the local muffler shop for a quote, then drove it home since they were booked for the day. As I pulled it in, the hanger broke, and the left pipe fell to the ground. :censored: Looking at it again, the other side of the resonator had cracked up as well so it sounded quite poor and too loud. It was obvious this needed immediate replacement.
    20210924_172237.jpg
    Derp.

    Anyway, took it back to the muffler shop today and they replaced everything from the cats back, as it was a junky mess. I forgot to take pictures of the original mess that was down there, but it was pretty haggard, rusty, and poorly welded. New setup is a simple 2-1 with Flowmaster Super 40 and they threw some random tip on it. I'll probably replace the tip since it's not really my style, but otherwise it's a tremendous improvement. It sounds nice, welded nice, and hopefully won't fall off on me again :rofl:
    20210925_163352.jpg 20210925_163410.jpg
    Side note, if anyone in AZ has a tailgate in good shape, holler :D
     
  8. Oct 1, 2021 at 10:11 PM
    #8
    MHulsebos

    MHulsebos [OP] New Member

    Joined:
    Sep 24, 2021
    Member:
    #68506
    Messages:
    30
    Arizona
    Vehicle:
    2000 Tundra AC 4x4
    Threw my Bilstein 5100 struts in the rear tonight. I've taken the past couple days to soak everything in my favorite penetrant, acetone and ATF.
    20211001_214745.jpg

    I've read post after post about people taking hours fighting the upper nut on their rusted old struts, so I was dreading this a bit, especially since I have back problems and wasn't really thrilled about working the struts at an odd angle for an extended period of time. I spent about 5 minutes tinkering, realized this was going to take as long as I'd heard, and decided I wasn't going to torture myself with this any longer.

    Enter my friend: ol faithful :D
    20211001_193552.jpg
    With a 12" Diablo blade, I was able to easily reach the upper strut nuts and cut both sides off in about 2 minutes flat. This was the way to go, hands down. After cutting the uppers I undid the lower bolts, which came out easily, thanks to soaking in penetrant for days prior to this, and everything popped out as it should.
    20211001_194513.jpg

    The rest of the install was pretty straightforward. I greased the new strut bushings with lithium grease before install to avoid squeaking in the future, and tightened everything up. Done for tonight as its already later than expected. The AAL should go in tomorrow, replacing the Hellwig helper leaf. Just a quick drive with just the rear struts is a tremendous difference, as the old struts were not providing much dampening any more, so I'm really excited to get the rest of the suspension, front and rear, together this weekend.
    20211001_205200.jpg
     
    Kimosabe and Tundra2 like this.
  9. Oct 2, 2021 at 12:15 AM
    #9
    empty_lord

    empty_lord They see me rollin'

    Joined:
    Feb 1, 2019
    Member:
    #25441
    Messages:
    10,100
    Gender:
    Male
    First Name:
    Dan
    Indiana, Chicagoland
    Vehicle:
    05 rollover special
    custom body work, Billies with taco ARB springs, Icon AAL, TRD FJ trail team wheels, 2019 Toyota 86 radio, Blacked out interior, Added factory power everything, heater mirrors, ETC
    If you pop the tailgate inspection plate I bet you could beat out most of that dent
     
    Tundra2 likes this.
  10. Oct 2, 2021 at 5:42 AM
    #10
    MHulsebos

    MHulsebos [OP] New Member

    Joined:
    Sep 24, 2021
    Member:
    #68506
    Messages:
    30
    Arizona
    Vehicle:
    2000 Tundra AC 4x4
    I actually did that the other day. I'd still like to replace it, as I couldn't get to all of it, but it looks quite a bit better for now.
    20210926_144801.jpg
     
  11. Oct 3, 2021 at 4:49 PM
    #11
    MHulsebos

    MHulsebos [OP] New Member

    Joined:
    Sep 24, 2021
    Member:
    #68506
    Messages:
    30
    Arizona
    Vehicle:
    2000 Tundra AC 4x4
    Got the rear finished Saturday and started on the front, which is where the real fun began. There is quite a bit of corrosion on the front end components, so I knew I was in for a bit of wrestling. I also overlooked a few things, so burned up more time than I'd like to have, running around and getting the right tools to get everything done. In the end, most everything came out ok. I did use my Sawzall to cut out the lower control arm, and the bolt from the upper, and I had replacement bolts ready. I also ended up breaking one of the bolts that held in the lower ball joint, so that was fun drilling and tapping that.

    At the end of my weekend, I have the rear completed, and only the passenger side done on the front. I'm pretty bummed I wasn't able to get this fully completed on both sides this weekend. I'll have to put the drivers side off for a couple days, or maybe until next weekend. Fortunately I have my GS to drive for work until I'm done.

    Passenger side components together.
    20211003_152821.jpg

    It's nice to see it from this side so I can get an idea of how everything will look. Obviously it'll still settle a bit, so we'll have to wait until I can get the drivers side finished, get it aligned, get my new wheels onto it, and get some miles on it.
    20211003_153445.jpg
     
  12. Oct 5, 2021 at 5:54 PM
    #12
    MHulsebos

    MHulsebos [OP] New Member

    Joined:
    Sep 24, 2021
    Member:
    #68506
    Messages:
    30
    Arizona
    Vehicle:
    2000 Tundra AC 4x4
    Got the lift wrapped up last night after work. Fortunately the drivers side didn't give me as much guff as the passenger side, despite having more corrosion. The truck looks much better, and has a bit more clearance. Ignore my cam bolt alignment, it will go in on Friday for alignment and they're only a block away from the house, so the truck won't be driven until then.
    20211005_173345.jpg 20211005_173045.jpg 20211005_173857.jpg

    I also did my did my diff drop while I was at it.
    20211005_173149.jpg

    I'll be calling Discount in the morning to order tires for these TRD Pro wheels I got for a deal on Labor Day. Plan is a 285/70/17 BFG K02.
    20210909_180740.jpg
     
  13. Oct 6, 2021 at 6:41 AM
    #13
    des2mtn

    des2mtn On the scenery looking at the road

    Joined:
    Jul 1, 2020
    Member:
    #48721
    Messages:
    4,281
    SW
    Vehicle:
    2004 Black DC Limited 4x4
    Tonto cover
    Looking great!
     
    MHulsebos[OP] likes this.
  14. Oct 9, 2021 at 11:00 PM
    #14
    MHulsebos

    MHulsebos [OP] New Member

    Joined:
    Sep 24, 2021
    Member:
    #68506
    Messages:
    30
    Arizona
    Vehicle:
    2000 Tundra AC 4x4
    Finally got the truck aligned on Friday, so that was nice. This morning I was able to get my tires mounted on my wheels, and I'm stoked on how it came out. Drives great and looks great. I'm pretty happy with how this truck is coming along.
    20211009_165259.jpg 20211009_171724.jpg
     
  15. Nov 6, 2021 at 2:04 PM
    #15
    MHulsebos

    MHulsebos [OP] New Member

    Joined:
    Sep 24, 2021
    Member:
    #68506
    Messages:
    30
    Arizona
    Vehicle:
    2000 Tundra AC 4x4
    When I initially did the lift, I completely overlooked my rear bump stop situation, or lack thereof, until it was install time. Since I had already gotten everything apart before I left my brain haze and realized my rear stops were 100% deteriorated, I proceeded with the lift and figured I'd just add some later.

    Anyway, I got my stops in and installed them this week. I went with the Durobumps after hearing that they were decent for offroad purposes. Super quick and easy install, only took a few minutes really.

    What remained of my old stops. Just the plates LOL.
    20211106_134842.jpg

    New Durobumps
    20211106_132825.jpg

    Installed
    20211106_134802.jpg
    20211106_134753.jpg

    Also took the truck out just before these came in so I took it pretty easy as I didn't want to blow out a new strut, so I'll have to get it back out and actually drive it a bit harder to see what these Durobumps are all about. Anyway, here's a few pics of the last time out.

    20211030_132050.jpg

    20211030_133618.jpg

    20211030_143031.jpg
     
  16. Nov 6, 2021 at 7:19 PM
    #16
    MHulsebos

    MHulsebos [OP] New Member

    Joined:
    Sep 24, 2021
    Member:
    #68506
    Messages:
    30
    Arizona
    Vehicle:
    2000 Tundra AC 4x4
    Well, I was looking under the front to try to determine how rusty my existing front bump stops are, as I want to upgrade my fronts to the Durobumps as well, but I found I have a torn CV boot on the drivers side. Le sigh :frusty:

    20211106_191029.jpg

    So I've ordered the 930 EMPI boots and have them rushing shipping. I have plans to go hit a trail with a buddy next weekend so I'm hoping I can reboot these this week before that trip so I don't get dirt into the innards of the CV. Fortunately it doesn't look like they're covered in dirt now, so I'm hoping this occurred sometime this week during my work week, after I was in the desert last week. No clicking or anything yet, so fingers crossed they're in good enough shape for a simple reboot next week.

    My brand new swaybar endlink is back there like :rofl:
     
    Last edited: Nov 6, 2021
  17. Nov 21, 2021 at 7:51 PM
    #17
    MHulsebos

    MHulsebos [OP] New Member

    Joined:
    Sep 24, 2021
    Member:
    #68506
    Messages:
    30
    Arizona
    Vehicle:
    2000 Tundra AC 4x4
    Well, I dont have much for pics of my CV repair, but I ended up just putting in a new axle for now, as I didn't get the right boot. I bought a boot for the inner, but my tear was on the outer. Brain fart moment I guess, so I just put a NAPA unit in for the time being while I got new boots.
    20211113_110212.jpg

    All went well there, and we had a great time out. Ended up taking a 27 mile trip around 4 peaks, which put us right near the shooting spot my buddy and I frequent. Brought the ladies along as my copilots :D
    20211114_132659.jpg
    20211114_132832.jpg 20211114_144552.jpg 20211114_155251.jpg

    The day after this trip, I could gear some clunking around up front so I started inspecting. Everything seemed tight until I pulled on the rack, and I realized my bushings were pretty shot. Threw the camera under the truck and gave it a wiggle and confirmed that I had a bit of play here.


    Raising it up, I found that I had a lil clicking from the rack, and I have a lil leak on the passenger side. I decided to just bite the bullet and buy a new rack from Toyota, and ordered new oem tie rod ends while I was at it. Why not. :censored:
    20211121_123852.jpg

    Old rack out. I also ordered polyurethane bushings to put into the new rack so I don't have to worry about the crappy oem bushings failing again down the line. Nothing like modifying brand new parts and voiding warranties :D
    20211121_124534.jpg 20211121_125051.jpg
    20211121_131136.jpg
    20211121_134406.jpg

    Just a comparison on the oem and poly bushings. Mind you, the ends of the oem are cut off on one side to remove them easier. The oem bushings have a lot of open space, and are made to allow quite a bit of movement, which I'm not a fan of. The full contact of the Poly makes it not only longer lasting, but makes steering considerably more responsive.
    20211121_125042.jpg
    20211121_124311.jpg

    Anyway. New rack and tie rods are in. I think I got my measurements damn close to the alignment specs, as it drives fine for now, but I'm still taking it in for an alignment tomorrow.
    20211121_204925.jpg
     
    Last edited: Nov 21, 2021
  18. Nov 21, 2021 at 8:27 PM
    #18
    1stgentundradriver

    1stgentundradriver Each sticker adds at least 5hp

    Joined:
    Jul 23, 2020
    Member:
    #49798
    Messages:
    422
    Gender:
    Male
    First Name:
    Josh
    Silverdale Washington
    Vehicle:
    2006 DC 4x4 Limited
    A few
    That is a lot of work but it seems to be paying off! Sweet ride!
     
    Tundra2 likes this.
  19. Nov 21, 2021 at 8:41 PM
    #19
    MHulsebos

    MHulsebos [OP] New Member

    Joined:
    Sep 24, 2021
    Member:
    #68506
    Messages:
    30
    Arizona
    Vehicle:
    2000 Tundra AC 4x4
    Thanks!

    It's funny, I joke with the wife that someday I'll buy a nice new truck that doesn't need rehab like everything else that I buy. She says I'll just end up being bored. The reality is that I actually enjoy doing a full rehab on my vehicles, and both of my Lexus', plus this truck, have undergone a ton of work, not to mention all the other cars/trucks I've owned over the years. There's something nice about them all once they're dialed in, and you got to put everything together just the way you like.
     
    Last edited: Nov 21, 2021
  20. Nov 21, 2021 at 10:24 PM
    #20
    1stgentundradriver

    1stgentundradriver Each sticker adds at least 5hp

    Joined:
    Jul 23, 2020
    Member:
    #49798
    Messages:
    422
    Gender:
    Male
    First Name:
    Josh
    Silverdale Washington
    Vehicle:
    2006 DC 4x4 Limited
    A few
    That’s awesome. For some reason suspension work bothers me and I’ve been wanting to replace my lower ball joints lately…and I don’t want to pay someone else to do it. How easy would you say it is to replace these with a garage and basic hand tools with a Jack and Jack stands?
     
    Tundra2 likes this.
  21. Nov 22, 2021 at 5:55 AM
    #21
    Black@Blue19

    Black@Blue19 Old Salt

    Joined:
    Dec 16, 2018
    Member:
    #23066
    Messages:
    4,261
    Gender:
    Male
    First Name:
    Ken
    SE Texas
    Vehicle:
    25 Ram LoneStar Edition Night/BigHorn packages 4x4 Crewcab
    Door sills black WeatherTech, spray on bedliner, side steps, Katzkin Black Leather with matching Ram stitching, door latch protectors, PPF door edges, door cups
    Way nice and now sounds like a dependable ride!!! Good job!!:)
     
    Last edited: Nov 22, 2021
    MHulsebos[OP] likes this.
  22. Nov 22, 2021 at 7:31 AM
    #22
    MHulsebos

    MHulsebos [OP] New Member

    Joined:
    Sep 24, 2021
    Member:
    #68506
    Messages:
    30
    Arizona
    Vehicle:
    2000 Tundra AC 4x4
    This can be a pretty straightforward job if you have the right tools and your truck isn't as corroded as mine. Outside of regular hand tools, I'd recommend a torque wrench and ball joint puller. Unfortunately, on mine, one of my bolts broke in removal, so it took a bit longer after needing to drill and tap my knuckle.
     
  23. Nov 22, 2021 at 6:46 PM
    #23
    1stgentundradriver

    1stgentundradriver Each sticker adds at least 5hp

    Joined:
    Jul 23, 2020
    Member:
    #49798
    Messages:
    422
    Gender:
    Male
    First Name:
    Josh
    Silverdale Washington
    Vehicle:
    2006 DC 4x4 Limited
    A few
    Cool. I have everything except the ball joint puller. Thank you!
     
    MHulsebos[QUOTED][OP] likes this.
  24. Nov 25, 2021 at 4:53 PM
    #24
    0h6SR5

    0h6SR5 New Member

    Joined:
    Oct 22, 2021
    Member:
    #69709
    Messages:
    76
    Gender:
    Male
    Vehicle:
    2006 Phantom Grey Tundra
    3 inch OME with AAL wheels and tires. 285 70 17
    This thing looks great!
     
    MHulsebos[QUOTED][OP] likes this.
  25. Nov 25, 2021 at 10:55 PM
    #25
    MHulsebos

    MHulsebos [OP] New Member

    Joined:
    Sep 24, 2021
    Member:
    #68506
    Messages:
    30
    Arizona
    Vehicle:
    2000 Tundra AC 4x4
    Thank you! Not too shabby for an old beater :p

    20211116_173047.jpg
     
  26. Nov 28, 2021 at 11:09 AM
    #26
    MHulsebos

    MHulsebos [OP] New Member

    Joined:
    Sep 24, 2021
    Member:
    #68506
    Messages:
    30
    Arizona
    Vehicle:
    2000 Tundra AC 4x4
    Upgraded my front bump stops today. I did the durobumps for the front to pair with my set in the rear. The Durobumps only take the place of the rear bumpstops. Coachbuilder recommends bumpstop extensions for more than one spacer used. I've seen people use washers, as well as some smaller spacers cut from 1/4 plate for this. I didn't think the much larger spacers I've seen would be necessary as I am not running a huge spacer lift, and am just running a couple of the Coachbuilder plates. Anyway, I picked up some large washers from my local ACE and spaced both front and rear bumpstops with two washers each, which is about the thickness of one coachbuilder spacer, so I'm hoping this will be sufficient.

    Before
    20211128_104957.jpg

    Old/New side by side 20211128_110248.jpg

    With washers and loctite
    20211128_105500.jpg

    Installed
    20211128_105732.jpg

    Both sides with spacers
    20211128_114445.jpg

    Both sides after putting the truck back on the ground. You can still see there's quite a bit of space. I'm open to opinions as to whether I need more spacer than this, or if this is enough.
    20211128_114531.jpg

    I guess the next move is to go drive the hell out of the truck in the desert and see how they feel :D
     
    Last edited: Nov 28, 2021
  27. Nov 28, 2021 at 11:27 AM
    #27
    Redcon41318

    Redcon41318 New Member

    Joined:
    Apr 8, 2020
    Member:
    #44790
    Messages:
    483
    Nice i always like first gen tundras!
     
    MHulsebos[OP] likes this.
  28. Dec 2, 2021 at 6:18 PM
    #28
    MHulsebos

    MHulsebos [OP] New Member

    Joined:
    Sep 24, 2021
    Member:
    #68506
    Messages:
    30
    Arizona
    Vehicle:
    2000 Tundra AC 4x4
    Went to the shooting spot today. Then stopped on the way home and picked up a camper shell that was for sale. I'm still kinda undecided on whether I really want this or not. I love the functional side of it, as the cab has been getting a little full with tools, inflator, extra clothes, etc, and I could actually camp with this. I'm just not sure I like the look, even if I did paint it, which I intend to. I'll keep it on for a few days and see how I feel about it after a bit. If anything, I may just keep it on my side yard unless I'm using it.

    20211202_164558.jpg

    20211202_173716.jpg

    20211202_184201.jpg
     
  29. Dec 2, 2021 at 6:26 PM
    #29
    FrenchToasty

    FrenchToasty The Desert rat, 6 lug enthusiast

    Joined:
    Sep 15, 2019
    Member:
    #36156
    Messages:
    17,755
    First Name:
    Mo
    The SoAz….. big surprise
    Vehicle:
    2006 DC 4.88s Elocker and some other trippy stuff
    Bone stock
    If I could have a easier way to remove mine, I might think about taking it off when I’m not using it, but that’s hard to do right now. 44E74644-D2A6-42B1-A795-9E7CD4D3545C.jpg
    You can fit a lot in, but it also makes it really difficult to load in a tight Tetris fashion, I take my tailgate off to load and unload usually.
     
    MHulsebos[QUOTED][OP] likes this.
  30. Dec 2, 2021 at 7:40 PM
    #30
    MHulsebos

    MHulsebos [OP] New Member

    Joined:
    Sep 24, 2021
    Member:
    #68506
    Messages:
    30
    Arizona
    Vehicle:
    2000 Tundra AC 4x4
    Yeah, I dont know if it's realistic to expect to remove it regularly or not. Fortunately I dont carry that much. I just don't like leaving anything exposed in the bed, as I live in the city. I'd have honestly bought a Sequoia if I didn't expect to have an occasional need for a bed, so this is a decent compromise I think.
     
To Top