1. Welcome to Tundras.com!

    You are currently viewing as a guest! To get full-access, you need to register for a FREE account.

    As a registered member, you’ll be able to:
    • Participate in all Tundra discussion topics
    • Transfer over your build thread from a different forum to this one
    • Communicate privately with other Tundra owners from around the world
    • Post your own photos in our Members Gallery
    • Access all special features of the site

Bilstein 6112’s and Dobinsons 1.75” springs/shocks

Discussion in 'Sequoia Builds' started by farnsrocket, Oct 9, 2021.

  1. Oct 9, 2021 at 7:30 PM
    #1
    farnsrocket

    farnsrocket [OP] New Member

    Joined:
    Feb 14, 2021
    Member:
    #59103
    Messages:
    350
    Gender:
    Male
    Finally got them installed!
    Bilstein 6112’s and 1.75” Dobinsons rear springs/shocks.
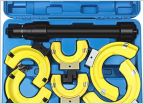
    Dealer wanted $700 just to install the rear springs so I started researching spring compressors. It’s really hard to find any good spring install tutorials for the 2nd Gen Sequoia. I finally came across this compressor, mine is from Eastwood and there are other brands out there just like it. Paid $125 shipped with a sale they had.
    Jacked the truck up, wheel off and removed the rear shock. This let the lower arm come down some. I put a little bottle jack on top of the knuckle and under the lip where the bump stop is mounted and “jacked” it open about 2” or so……..this pressed the lower control arm even more and allowed me to remove the stock spring with my spring compressor. This compressor is amazing and really took no effort to use……..so satisfied with this purchase! The only thing I really had to pay attention to was how the new spring would line up correctly in the lower arm cup and be sure the compressor was positioned on the spring at the right spot so it wouldn’t hit the control arm once I put the spring in and started “uncompressing” it.
    The new spring is so beefy compared to the stock one, but the compressor made quick work of it and in no time I had it compressed enough to put in. I used a 1/2” ratchet to compress it because the maker says don’t use an impact gun, probably for “safety” reasons. I used an impact gun on the other side and it worked great and I didn’t die!
    I had read so much about people removing ball joints, disconnecting the knuckle, loosening the control arm bolts and disconnecting the sway bar but one guy told me he didn’t do any of that, just pressed the control arm down to make enough room.
    I did have to open the bottle jack a little more……..about another inch to make more room for the new spring. It went in easier than I ever thought it would after reading all the horror stories of these springs flexing outward. I decompressed the compressor carefully, making sure the bottom of the spring was lined up in the lower arm cup and it was in!! Took the compressor off and lowered the bottle jack and removed it. Installed the shock, bottom first, then used a small suitcase jack to raise the lower arm until the top of the shock lined up with it’s mounting holes and secured the bolt…….done, just like that, I was so happy it worked! I did the other side even faster and started on my fronts.
    I thought the fronts would be easier but they were harder!!
    I have these 6112’s set on the 2nd notch up from the bottom which should be a 2.7” lift.
    Jacked up the truck, wheel off and I removed the 4 nuts at the top of the strut. I disconnected the sway bar and removed the lower strut bolt. The strut extended down into its little mounting point. I tried to push the lower arm down but it barely budged, even with an extra jack handle, I pryed in between the arm and body. What to do? I disconnected the upper control arm at the ball joint and this helped and I pryed the arm down enough with the jack handle and got the strut out but it was difficult. I knew the new strut/spring was gonna be tough to get in. I installed the strut/spring at the top and secured the 4 nuts. The bottom of the strut was well below its mounting point which is like an enclosed metal box on the lower arm. For the love of me I could not push the arm down low enough, prying and pushing, it wouldn’t go!! I watched a YouTube video where a guy disconnected the lower ball joint and loosened the control arm bolts and the whole arm swung down! So I connected the upper control arm back to the knuckle and started on the lower ball joint. The nice thing about our Sequoia’s, I noticed, is they have two big bolts that secure the knuckle to the lower control arm………I didn’t have to disconnect the ball joint and just removed those two huge bolts. This freed up the lower arm and I then loosened both ginormous (24mm) bolts that secure the lower control arm to the frame. I then took my jack handle and pryed down on the lower control arm and the whole arm swung down! I got the bottom of the strut in and meticulously lined up the mounting bolt, suitcase jacked the arm back up and secured the sway bar and secured the two big bolts that held the lower arm to the knuckle back. The two big bolts took a lot of fine motor skills to line up and screw back in. And that was it! I got the wheel back on and did the other side, obviously much faster than the first side. I got the truck lowered and went underneath and tightened the control arm bolts, sway bar bolts and both lower strut mounting bolts while they were under the full weight of the truck. I did this to the two rear upper and lower mounting bolts for rear shock as well.
    Took it out for its maiden voyage down the road and was very impressed with the ride! It’s definitely stiffer, very firm but not to firm, really nice! It’s not bouncy at all either. It’s a very well controlled suspension for sure! I can’t wait to feel it on the highway and in turns and long sweepers at speed.
    Pictures coming!
     
    Last edited: Jun 24, 2023
  2. Oct 9, 2021 at 7:34 PM
    #2
    farnsrocket

    farnsrocket [OP] New Member

    Joined:
    Feb 14, 2021
    Member:
    #59103
    Messages:
    350
    Gender:
    Male
  3. Oct 9, 2021 at 7:35 PM
    #3
    farnsrocket

    farnsrocket [OP] New Member

    Joined:
    Feb 14, 2021
    Member:
    #59103
    Messages:
    350
    Gender:
    Male
  4. Oct 9, 2021 at 8:09 PM
    #4
    equin

    equin Texarican Tundra

    Joined:
    Dec 11, 2015
    Member:
    #2230
    Messages:
    1,892
    Gender:
    Male
    First Name:
    Ed
    DFW, TX
    Vehicle:
    2015 Silver Sky DC SR5 5.7L 4x4 TSS Package
    TRD Rear Anti-sway bar, TRD Pro skid plate, Bedrug bed mat, 17" Icon Rebounds, 315/70/17 BFG AT/K02, Bilstein 6112s front (for now), Fox 2.5 Remote Reservoirs rear, Diamondback SE, Dirtydeeds Industries 8" stainless BAMuffler, aFe dry air filter, TRD air intake accelerator
    That’s one of the coolest Sequioas I’ve seen.
     
  5. Oct 21, 2021 at 6:12 AM
    #5
    MSU Tundra

    MSU Tundra Numerous rodeos experienced

    Joined:
    Mar 2, 2019
    Member:
    #26927
    Messages:
    424
    Mississippi
    Vehicle:
    2017 Tundra and 2013 LC200
    Great job! Hope you like that suspension set up as much as I do.
     
    farnsrocket[OP] likes this.
  6. Oct 21, 2021 at 6:36 AM
    #6
    farnsrocket

    farnsrocket [OP] New Member

    Joined:
    Feb 14, 2021
    Member:
    #59103
    Messages:
    350
    Gender:
    Male
    Thanks! It is really nice, feels so much better, less squat when accelerating and feels planted. I just did a TRD rear sway bar too!
    Got it aligned at the dealer the other day.
    They told me my right front lower control arm was seized and they couldn't get the caster all the way right.......it's not a wear issue and it's only like a 1/2 a degree off so not a big deal. I asked them what that actually meant, and they said a bolt was seized. I guess they didn't want to get into it trying to fix it.
    [​IMG]
     
  7. Nov 30, 2021 at 5:00 AM
    #7
    e30cabrio

    e30cabrio I'm e30cabrio, I'm a modaholic

    Joined:
    Oct 20, 2017
    Member:
    #10410
    Messages:
    5,617
    Gender:
    Male
    West Valley, Phoenix, Az.
    Vehicle:
    Boosted 2013 Sequoia TRD FAUX
    Maggy, Dobinsons, TRD PRO conversion, 18+ lights & cluster too much more to list
    Great write up. I wish I had found that compressor. The clamshell was a massive pita.
     
    farnsrocket[OP] likes this.
  8. Nov 30, 2021 at 12:36 PM
    #8
    angkorstrong

    angkorstrong New Member

    Joined:
    Sep 4, 2020
    Member:
    #51784
    Messages:
    121
    Gender:
    Male
    Vehicle:
    2020 Sequoia TRD Pro
    lookin good, gotta invest in that style spring compressor next time around.
     
    farnsrocket[OP] likes this.
  9. Jan 31, 2023 at 5:57 AM
    #9
    e30cabrio

    e30cabrio I'm e30cabrio, I'm a modaholic

    Joined:
    Oct 20, 2017
    Member:
    #10410
    Messages:
    5,617
    Gender:
    Male
    West Valley, Phoenix, Az.
    Vehicle:
    Boosted 2013 Sequoia TRD FAUX
    Maggy, Dobinsons, TRD PRO conversion, 18+ lights & cluster too much more to list
    What tires do you have & how do you like them? Picking up 2 used TRD Pro rims & ordering the pn (there's soooo many) so almost ready for tires.
     
    farnsrocket[OP] likes this.
  10. Jan 31, 2023 at 6:29 AM
    #10
    farnsrocket

    farnsrocket [OP] New Member

    Joined:
    Feb 14, 2021
    Member:
    #59103
    Messages:
    350
    Gender:
    Male
    I bought these a couple of years ago when I got my rims and they were $177 apiece! All my buddies teased me saying they were cheap Gambler 500 Chinese tires (Thailand actually) but I have had nothing but positive experiences with them! Rain, snow, noise level…..they balanced fine and have been a great tire!

    Venom Power Terra Hunter X/T XT All-Terrain Mud Light Truck Radial Tire-LT275/70R18 275/70/18 275/70-18 125/122R Load Range E LRE 10-Ply BSW Black Side Wall https://a.co/d/1otuRoa
     
    e30cabrio likes this.
  11. Jan 31, 2023 at 6:37 AM
    #11
    e30cabrio

    e30cabrio I'm e30cabrio, I'm a modaholic

    Joined:
    Oct 20, 2017
    Member:
    #10410
    Messages:
    5,617
    Gender:
    Male
    West Valley, Phoenix, Az.
    Vehicle:
    Boosted 2013 Sequoia TRD FAUX
    Maggy, Dobinsons, TRD PRO conversion, 18+ lights & cluster too much more to list
    Thanks!
     
    farnsrocket[OP] likes this.
  12. Jul 14, 2023 at 2:22 PM
    #12
    jmjack

    jmjack New Member

    Joined:
    Jul 14, 2023
    Member:
    #100223
    Messages:
    3
    First Name:
    Joe
    Vehicle:
    08 Toyota Sequoia
    @farmsrocket - Did you feel the front and back are pretty level? I am thinking about going the same route in the front but with Dobinson/5100s in the rear.
     
  13. Jul 14, 2023 at 2:45 PM
    #13
    farnsrocket

    farnsrocket [OP] New Member

    Joined:
    Feb 14, 2021
    Member:
    #59103
    Messages:
    350
    Gender:
    Male
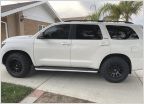
    That’s funny you ask! In my one pic up top it looks good but my driveway has that downward slope. On flat ground it looked high in the front. I kept telling myself it was fine but the more I looked at it coming out of a store or anywhere on level ground it definitely looked too high. So I finally found some time and took of the front Bilsteins and set them to the first notch which is 2.1”…………much better!! Here a before and after pic:
    [​IMG]

    [​IMG]
     
    equin likes this.
  14. Jul 14, 2023 at 2:50 PM
    #14
    jmjack

    jmjack New Member

    Joined:
    Jul 14, 2023
    Member:
    #100223
    Messages:
    3
    First Name:
    Joe
    Vehicle:
    08 Toyota Sequoia
    Agree, looks really good on the first notch for the front. How do you like the setup overall? Do you occasionally tow a trailer?
     
    farnsrocket[OP] likes this.
  15. Jul 14, 2023 at 3:31 PM
    #15
    farnsrocket

    farnsrocket [OP] New Member

    Joined:
    Feb 14, 2021
    Member:
    #59103
    Messages:
    350
    Gender:
    Male
    Thanks! Love them! Just a great solid feel, not too stiff (the wife and kids haven’t said a word after several Florida and out of state trips) To me it’s the way this truck should have come from the factory. No towing here but I think the rear Dobinsons are pretty stout. Loaded down with the wife and 2 boys, suitcases, Thule box on top and a few inflatable paddleboards, canopy and rod holder......the truck is solid.
     
    Last edited: Jul 15, 2023
  16. Jul 15, 2023 at 6:41 AM
    #16
    jmjack

    jmjack New Member

    Joined:
    Jul 14, 2023
    Member:
    #100223
    Messages:
    3
    First Name:
    Joe
    Vehicle:
    08 Toyota Sequoia
    Awesome! Sounds like many more miles of fun ahead with your Sequoia build! Enjoy the family time, it goes fast. All my kids are grown and out of the house but I miss the days of trips and camping with them. Great times. Really appreciate the feedback! Take care!
     
    farnsrocket[OP] likes this.
  17. Jul 15, 2023 at 6:55 AM
    #17
    farnsrocket

    farnsrocket [OP] New Member

    Joined:
    Feb 14, 2021
    Member:
    #59103
    Messages:
    350
    Gender:
    Male
    Thanks man, take care!
     
  18. Jul 18, 2023 at 3:58 PM
    #18
    jalam321

    jalam321 New Member

    Joined:
    Mar 20, 2020
    Member:
    #44118
    Messages:
    359
    Gender:
    Male
    Houston, TX
    Vehicle:
    2018 Tundra CM Platinum 4x4 and Sequoia Platinum 4x4
    That looks good! Did you happen to get before and after measurments? I plan to put on bilstein 6112 also. Or I also have a set of front bilstein TRD pro shocks/springs off a 2017 Tundra TRD Pro that I might use.
     
    farnsrocket[OP] likes this.
  19. Jul 18, 2023 at 5:31 PM
    #19
    farnsrocket

    farnsrocket [OP] New Member

    Joined:
    Feb 14, 2021
    Member:
    #59103
    Messages:
    350
    Gender:
    Male
    Thanks!
    I did but can’t find them. :confused:
    I just measured recently, 22 1/2” from center of hub to the fender all around.
     
To Top