

-
Welcome to Tundras.com!
You are currently viewing as a guest! To get full-access, you need to register for a FREE account.
As a registered member, you’ll be able to:- Participate in all Tundra discussion topics
- Transfer over your build thread from a different forum to this one
- Communicate privately with other Tundra owners from around the world
- Post your own photos in our Members Gallery
- Access all special features of the site
 DIY changing the oil and now i have a massive leak....???
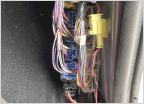 Power Tailgate Lock: Wiring Splice > 2013 Tundra Plat
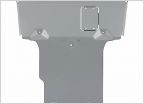 Skid Plate 2nd Gen Tundra
 Recommendation for drop step bars
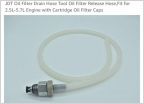 First time self oil change. Tips/advice?
 Big Brake Kits
how to completely remove intake manifold??
Discussion in '2nd Gen Tundras (2007-2013)' started by SlowOldMan, Jun 21, 2022.


