

-
Welcome to Tundras.com!
You are currently viewing as a guest! To get full-access, you need to register for a FREE account.
As a registered member, you’ll be able to:- Participate in all Tundra discussion topics
- Transfer over your build thread from a different forum to this one
- Communicate privately with other Tundra owners from around the world
- Post your own photos in our Members Gallery
- Access all special features of the site
 Bed Extender question for 1st Gen 2001 Tundra
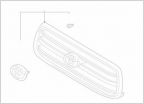 First Gen Grille Options
 Help! Swapped headunit, truck not starting. Immobilizer?
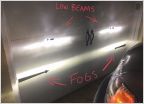 05 Double Cab headlights help
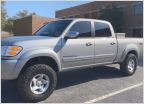 2004 tundra SR5 DC passenger power lock not working
 Hyper Flashing Led Turn Signals. Yet Again
2006 Tundra Lucchese #42 (I've got issues)
Discussion in '1st Gen Tundras (2000-2006)' started by Lexmunk, Jun 2, 2024.
Page 2 of 6
Page 2 of 6
Products Discussed in


