1. Welcome to Tundras.com!

    You are currently viewing as a guest! To get full-access, you need to register for a FREE account.

    As a registered member, you’ll be able to:
    • Participate in all Tundra discussion topics
    • Transfer over your build thread from a different forum to this one
    • Communicate privately with other Tundra owners from around the world
    • Post your own photos in our Members Gallery
    • Access all special features of the site

BayAreaTruckin - '24 Platinum Hybrid

Discussion in '3rd Gen Builds (2022+)' started by BayAreaTruckin, Jul 23, 2024.

  1. Jul 23, 2024 at 9:46 PM
    #1
    BayAreaTruckin

    BayAreaTruckin [OP] New Member

    Joined:
    Mar 3, 2022
    Member:
    #75350
    Messages:
    63
    Gender:
    Male
    San Francisco, CA
    BUILD THREAD - BAYAREATRUCKIN

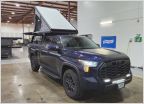
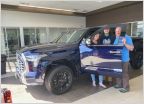
    Welcome to my build thread! This is my first Toyota—specifically, a 2024 Toyota Tundra Platinum iForce Max in Blueprint with the advanced package (including power bed steps, HUD, AVS/LLRAS). I picked it up on February 27, 2024, from a dealership in San Bruno, California. Unfortunately, the buying experience was less than ideal, and I can’t recommend San Bruno Toyota, but that’s a story for another day!

    To give you a bit of background, my last truck was a 2013 Ford F-150, so moving over to a Tundra is a big change for me. In addition to my passion for trucks, I’m an avid motorcyclist, with a small fleet of bikes, including a 2016 Ducati Multistrada, a 2013 Suzuki Boulevard, and a 2013 Triumph Daytona 675R that I use for track days. It’s safe to say I enjoy tinkering with all things mechanical, whether it's a two-wheeler or four.

    This thread will document the journey of transforming my Tundra from stock to something more unique. I’ll be combining off-the-shelf aftermarket parts with custom, homemade components to fit my specific needs and style. Metal fabrication is one of my passions, and I’ve spent a lot of time in the shop working with everything from basic welding to more advanced techniques like CNC milling.

    Expect to see a mix of functional upgrades for off-road capability, as well as some creative customizations that reflect my own style. I hope to share my progress, challenges, and successes, and I welcome any feedback or suggestions from fellow truck enthusiasts.

    Mod List & Table of Contents

    Mod #1: Window Tint - 3M Crystalline
    Mod #2: Dash Cam - Viofo A229 2Ch
    Mod #3: Wheels, Tires, & Lift
    Mod #4: Roof Rack - Go-Rhino Cerros (no drill)
    Mod #5: Dash Mat
    Mod #6: HAM Radio Install
    Current Build Photo

    truck_final.jpg
     
    Last edited: Mar 15, 2025
  2. Jul 25, 2024 at 3:11 PM
    #2
    BayAreaTruckin

    BayAreaTruckin [OP] New Member

    Joined:
    Mar 3, 2022
    Member:
    #75350
    Messages:
    63
    Gender:
    Male
    San Francisco, CA
    Window Tinting
    Went and got my windows tinted today - such an improvement! I went with 3M Crystalline, after comparing it against the Llumar Formula One Stratos. In my area, there are many more installers, and much more competitive pricing, for the 3M products. For similar levels of tint on the same windows, the best quote I received for the Llumar was ~$1,200, whereas the lowest-cost 3M installer offered ~$680. I ended up going with a shop at the ~$760 range, based on referrals and photos of their prior work.

    As for the level of tint, I wanted the front and back side windows to look the same. Unfortunately, the front driver and passenger side window are darker than I would like; driving at night is not all to fun. The windshield is fine, and I do not notice any reduced visibility, and I have a digital rearview mirror, so the rear window tint is not impactful.

    Windshield: 50%
    Front Driver & Passenger: 35% + 35% (2 layers of film; ~12.25% total)
    Rear Driver & Passenger: 35%
    Rearview Window: 35%

    Here is a picture of the tint in direct sunlight:

    DID01145_final.jpg
     
    Last edited: Sep 1, 2024
  3. Jul 25, 2024 at 3:16 PM
    #3
    BayAreaTruckin

    BayAreaTruckin [OP] New Member

    Joined:
    Mar 3, 2022
    Member:
    #75350
    Messages:
    63
    Gender:
    Male
    San Francisco, CA
    Dash Cam Install

    Parts & tools:
    Step 1: Unbox and Test Dashcam / Set out Tools

    Before any installation, unbox and test the dashcam. Make sure that it records from both channels, there are no camera issues, bluetooth and all other features work. Nothing worse than getting all the way through the install, just to find out that the camera is not working. Also a good idea, set out everything you will use for the install. Here are the tools (minus the heat shrink & heat gun) that I used.​


    Step 2: Remove Front Dome Light Console

    This is much easier than I expected it to be. There are 2 red push clips in the front (towards the windshield) and 2 retaining posts in the back. To take it out, open the sunglass holder, and hold the inside while pulling firmly down. Otherwise, use a trim tool under the edge and pull it down. Be careful not to push against the headliner, because you will damage it, and always pull the front (windshield side) down first. Once the red clips pop out, angle the front down out of the cavity and slide the back retaining posts out. The console will drop out.​


    Step 3: Run the Rear Camera Wire

    This was the hardest part of the install. Please note, I am not a mechanic, nor am I a professional installer. Using the cable snake, I first tried a single run from the back edge of the headliner, by the rear window, around the moonroof, and into the dome light cavity. Naturally, that failed.

    The best was I figured out to do this was take it step by step. I routed the wire in the following order: Dome light cavity -> driver's door -> rear driver side door -> rear dome light cavity -> out the rear window headliner. ​

    Following this pattern, first step is to remove the weather stripping on the driver's door. Very easy, just grab and pull - there is no adhesive, just a groove that affixes it to the seam weld and holds the headliner. This will expose the top of the headliner, and airbag.​


    Run the wire fish above the airbag, and into the front dome light cavity. Once you can see the end of the wire fish, pull it through and use tape (electrical or painters) to tie the USB-C cable to the fish. Then, simply pull the fish out. ​


    Once the wire is at the driver's side door, it is very simple to get it over the passenger side door. Pull the weather stripping down further, and do the same for the rear passenger side door. Just like you already have, run the wire fish through, starting at the rear door and into the front door. Affix the cable to the fish, and pull through. ​


    Now, you will have to get from the rear dome light to the rear door. This rear dome light has 4 spring metal tabs that are grooved to press against the headliner/mounting points in the roof. In order to remove this, you need to gently pull down on the rear dome light, by sliding a trim tool under the outer lip and using it as a lever to create space, then sliding another trim tool into the space and pushing upwards and inwards on each spring metal tab until the headliner is out of the groove, and free of the clip. Once all tabs are moved up, the rear dome light will drop freely with no resistance. ​


    I wasn't able to get the fish into this cavity and through to the rear door. I ended up going from the rear door into the rear dome light cavity, taping the wire to the fish at the rear door, and pushing it further into the cavity instead of pulling. A little tricky, because the tape liked to slide along the smooth metal fish, but it worked. ​


    Now that your cable is at the rear dome light, you just need to get it to poke out of the rear headliner. Toyota made a very inconvenient ridge near the back, the best way I was able to do this was using a trim tool to lever down on the headliner, running the fish in at an angle just to get around the ridge, then straighten it out to get into the rear dome light cavity. I wasn't able to get a good picture of this, since it already takes 3 hands, but this is how to push down on the headliner. NOTE: I do not suggest removing the rear window weather stripping. (1) you don't need to and (2) it is glued on, and you may damage it, but at a minimum will need to re-glue it. ​


    Once your wire is poking out of the back headliner, you have completed this step. ​

    Step 4: Locate and Attach the Dongar Connector

    The connector you are looking for is located on the driver's side of the front dome light cavity, and held in place by a small plastic clip. ​


    Slide the connector forward to free it, and drop it out of the cavity. Plug in the male end of the Dongar connector into the truck, and clip the Dongar female plug back into the retaining clip to avoid rattle. ​


    Plug the USB-A end of the dashcam power cable into the Dongar microcontroller. Optionally, heat shrink this connection to prevent accidental disconnection. ​


    Run both your dashcam power cable and the rear camera connection cable through the front lip of the headliner and onto the windshield. Then, zip tie your excess cable and tuck it into the cavity to prevent rattle and keep everything organized. ​


    Step 5: Finish Install

    With your wires exposed, front and back, push both dome lights back into the roof cavities. I recommend using the attached static stickers on your windshield, especially if you have tint, rather than mounting your dashcam directly to the glass/film. Make sure to clean the area with isopropyl alcohol (which is tint safe) first, and do not get trapped air bubbles when applying the static sticker. Follow the rest of the Viofo install instructions in regards to securing the cam with 3M tape and powering it up. ​

    Mounting the Rear Dashcam

    There are a lot of options for mounting a rear dashcam, but I didn't like any of them. I ended up fabricating my own bracket, which is basically a magnet on a spacer, with a slope that matches the *very annoying* ridge that Toyota has added near the rear window. I understand that this is not the most practical for most people, but there are commercial options out there. Pics of the one that I made. ​


    nastycucumber, J&ATundra and dano9258 like this.
  4. Aug 29, 2024 at 4:46 PM
    #4
    BayAreaTruckin

    BayAreaTruckin [OP] New Member

    Joined:
    Mar 3, 2022
    Member:
    #75350
    Messages:
    63
    Gender:
    Male
    San Francisco, CA
    Wheels, Tires, & Lift Kit
    Got my wheels and tires installed today. These are 37X12.5R-17 Cooper Discoverer AT3 XLTs wrapped around Motegi MR150 Traillights (17X8.5 6X5.5). I chose both of these options due to the light weight - I have not noticed a very minor decrease in responsiveness, but the truck still has plenty of "oomph" to get up and go when needed. Turning radius, already abysmal in these trucks, was not impacted in a noticeable way.

    To fit these, I decided to go with the Westcott Designs Lift Kit - AVS/Air Ride w/ Tokico Shocks. I was going back and forth on the decision to replace the shocks or use a spacer kit. Ultimately, I decided to go this route to retain the factory functionality of the AVS/Air Ride components that came on the truck. Overall I am happy with the kit. I have not experienced any ride quality issues, nor any other issues with fitment. The body mount chop is a must, along with minor trimming of the fender liners. I went with the alignment specs provided by Westcott, and everything runs straight.

    In addition to the lift kit, I also added the extended brake lines by YotaMafia. After looking at the flex with the stock brake lines, I decided to go ahead and upgrade because I was not comfortable with the lack of slack in the lines.

    I also checked the CV joint angle and, while flexed, seems to have enough range of motion without needing to be upgraded. I will, at some point, upgrade the bump stops.

    truck_final 4.jpg

    truck_final 6.jpg
     
    Last edited: Jan 18, 2025
    CarolinaBlue likes this.
  5. Aug 29, 2024 at 5:23 PM
    #5
    BayAreaTruckin

    BayAreaTruckin [OP] New Member

    Joined:
    Mar 3, 2022
    Member:
    #75350
    Messages:
    63
    Gender:
    Male
    San Francisco, CA
    Roof Rack

    Assembled and installed the Go-Rhino Cerros (no drill) roof rack. This thing was a pain to put together, and took me the better part of a day. Part of the problem is that everything is designed to be modular, so Go-Rhino can produce less model-specific parts and have it work on more models of trucks.

    Instructions suck, but it is fairly self explanatory. Basically, this works by having 4 independent mounting brackets - one at each corner - which clamp onto the roof by squeezing the side of the door frame with the outer edge of the drain channel. Not a lot of area for the clamping surface, but it seems to hold strong. The actual rack then installs on top of the 4 mounting points. After getting it up, it took several hours and a lot of back-and-forth measuring with a tape and calipers to get it aligned. As it sits, everything is within 1/16 of an inch, and square.

    truck_final 2.jpg

    truck_final 3.jpg
     
    Last edited: Jan 18, 2025
    SnowToy likes this.
  6. Jan 18, 2025 at 4:58 PM
    #6
    BayAreaTruckin

    BayAreaTruckin [OP] New Member

    Joined:
    Mar 3, 2022
    Member:
    #75350
    Messages:
    63
    Gender:
    Male
    San Francisco, CA
    Dash Mat
    Not a huge fan of dash mats - now or prior to installing this. Had to go this route to prevent reflections in the dashcam. It fills that purpose nicely, and keep glare off the screen. It does also help prevent UV damage to the dash - not that much UV is coming through the tint - but I am not a fan of how messy it looks. This is the nicest one that I found, a Covercraft SuedeMat Dash Cover in black.

    Install is fairly simple - the whole underside is a fabric that will connect with velcro. The mat ships with several long strips of adhesive-backed velcro, which can be cut into 1-inch long strips and applied to the the top of the Tundra dash. Then, the mat can be pressed down onto the dash and kept in place. A bit finicky, but it works; I used a steam wand to help flatten the fabric.

    truck_final 8.jpg
     
  7. Jan 18, 2025 at 5:08 PM
    #7
    BayAreaTruckin

    BayAreaTruckin [OP] New Member

    Joined:
    Mar 3, 2022
    Member:
    #75350
    Messages:
    63
    Gender:
    Male
    San Francisco, CA
    HAM Radio Install
    So, I am working on my HAM license but wanted to get a jump on the mobile installation. Working in public safety, I also wanted the ability to monitor my work frequencies and transmit if necessary, so I ended up going with a Part 90 radio.

    This install is more applicable to the hybrid models, as the 12V battery is located under the rear passenger seat. However, the passthroughs and wire routing locations should be the same.

    Parts & Tools
    • Radio: Powerwerx DB-750X
    • Antenna: Midland MXTA26 6DB VHF/UHF radio
    • Voltage Disconnect: Powerwerx APS-12 Automatic Power Disconnect
    • Head Unit Mount: Bulletpoint Mounting Solutions RubiGrid 2022+ Toyota Tundra
    • Cables & Mounting:
      • DHT Electronics PL-259 to Coax F adapter
      • 20ft RG6 Coax F
      • 25ft Cat8 Ethernet cable
      • 1.5ft Cat8 Ethernet cable
      • NMO L-mount bracket
      • RJ45 Panel Mount Passthrough
      • RJ45 Female-Female adapter
    • Zipties
    • Heatshrink & heat gun
    • Soldering iron & solder
    • (2) 3/8th ring connectors
    I also had 2 3D printed brackets that I used for this project. One secured the radio body under the rear seat, and the second was used to hold the head unit to the 20mm ball arm adapter arm. Neither of these are necessary, the body can be secured with zip ties, and Powerwerx sells a Front Panel Remote Separation Kit. I have no experience with it, but it seems like it will work with the bulletpoint mount.

    Also, this installation presumes that you have a bed or roof rack. If you don't, use another (magnetic? suction?) antenna mounting solution.

    Overview

    Basically, the body to the radio will sit behind in an empty cavity with fuses, behind under the rear seat. The head unit is mounted to the dash, and the antenna is mounted to a roof rack. Ethernet wires are routed between the body & head unit, and head unit & mic. Coax will run between the body & antenna. Power wires will run between the 12V battery and body.

    STEP 1: Remove Interior Panels

    First, you will need to remove the following interior panels:
    • Front Passenger & Rear Passenger door sill plates
      • These have several downward clips, and will release by just pulling up
    • Rear battery compartment access panels & passenger side battery air vent (with cover)
      • Remove the plastic pins around the top perimeter of the battery by pushing inwards on the center of each pin, then pulling them up. Remove the front plastic panel, then the passenger side corner panel, followed finally by the side air vent tunnel.
    • Dashboard storage bin
      • Pull upwards on the back (closest to the infotainment screen) side, then side housing backwards towards you as the locating pins come out.
    • Driver's side A-pillar panel
      • Unscrew the grab handle, pull the trim outwards and then backwards towards you. Be careful not to damage the small speaker in the front

    1.jpg

    2.jpg

    3.jpg

    STEP 2: Install Bulletpoint Mount & RJ45 Panel Mount

    Install the bulletpoint mount in the front dashboard storage bin, following their instructions. Additionally, drill an extra hole in the dashboard storage bin and install an RJ45 panel mount connector. Note, there is a mounting bracket on the backside of the dash that will prevent the dashboard storage bin from sliding back into place, and will require some trimming. Use a sharp razor and go slowly, to avoid cutting the dash.

    4.jpg

    7.jpg

    8.jpg

    STEP 3: Route Cables

    This is the hardest part. You will have to do the following routing:
    • Power cable from 12V battery to radio body
    • Ethernet from the body to the dashboard storage bin
    • Ethernet from the storage bin to head unit
    • Ethernet from the storage bin to A-pilar
    • Coax from the body to the bedrack/antenna
    Power cable from 12V battery to radio body
    Fairly simple - pop the access panels to the 12V battery (driver side) and run a wire fish between the battery compartment (driver side) and fuse block (passenger side). Use the wire fish to run the power cables. Solder ring terminals onto the power cable, and connect to the battery. Optionally, cut the wires at a convenient point, and run them both into the powerwerx auto-power disconnect.
    9.jpg


    10.jpg

    Ethernet from the body to the dashboard storage bin

    Run the Ethernet cable from the body, underneath the air vent, under the doorsills, and up behind the glovebox. Easiest way to run it behind the glove box is pushing a wire fish down from the hole in the dash where the storage bin is located. This will plug into the backside of the RJ45 panel mount connector.
    11.jpg

    Ethernet from the storage bin to head unit
    Super easy - one side plugs into the front side of the RJ45 panel mount, and the other side plugs into the head unit.

    Ethernet from the storage bin to A-pilar
    Run a wire fish from the hole in the dash where the dashboard storage bin above the infotainment unit and above the display cluster. Push it all the way across, and use it to pull the ethernet cable across. This ethernet cable will emerge from underneath the dashboard storage bin. On the other end, connect the female-female connector, plug the mic into it, and stick the cable underneath the A-pilar trim. This will connect the mic to the head unit.

    Coax from the body to the bedrack/antenna

    Connect one PL-259 adapter to the radio, and run the coax from the radio body to the antenna, via a pressure vent behind the rear bulkhead. Access this vent by removing the back plastics (3 - 10mm screws by the jack) and it pops off. Gently push the insulation to the side, and run the coax out. Then run it up the side of the bedrack.

    STEP 4: Install Head Unit Mount

    Mount the head unit

    STEP 5: Install Antenna

    Use whatever solution is best for your setup. This is a simple L-bracket, with NMO mount and heat shrink for waterproofing.

    PXL_20250226_020225463.jpg

    STEP 6: Install Radio

    Connect all the wires to your radio, and enjoy!
     
    Last edited: Mar 15, 2025
  8. Feb 20, 2025 at 3:01 PM
    #8
    SnowToy

    SnowToy New Member

    Joined:
    Dec 7, 2024
    Member:
    #126992
    Messages:
    77
    Gender:
    Male
    Vehicle:
    2023 Tundra TRD Pro - build in the works...
    295/70/18 Duratracs - more mods being researched...
    can you really fit a 40" bar in this ? debating one as option instead of drilling a perfectly good roof.... how is noise at speed ?
     
  9. Feb 21, 2025 at 6:46 PM
    #9
    BayAreaTruckin

    BayAreaTruckin [OP] New Member

    Joined:
    Mar 3, 2022
    Member:
    #75350
    Messages:
    63
    Gender:
    Male
    San Francisco, CA
    I was looking at it today, the opening does look like it is under 40". I will measure it tomorrow and check.

    Funny you mention wind noise - initially I didn't notice anything, but recently I have started to notice pronounced wind noise at or above 72 MPH. Will have to try blocking the gap underneath the front lip to see if that's what is causing it.
     
  10. Feb 24, 2025 at 6:24 PM
    #10
    BayAreaTruckin

    BayAreaTruckin [OP] New Member

    Joined:
    Mar 3, 2022
    Member:
    #75350
    Messages:
    63
    Gender:
    Male
    San Francisco, CA
    The opening measured at 36" along the top, and 33" along the bottom. You can fit a 40" bar, but it wont all be visible
     
  11. Feb 25, 2025 at 12:13 PM
    #11
    SnowToy

    SnowToy New Member

    Joined:
    Dec 7, 2024
    Member:
    #126992
    Messages:
    77
    Gender:
    Male
    Vehicle:
    2023 Tundra TRD Pro - build in the works...
    295/70/18 Duratracs - more mods being researched...
    that's unfortunate...... moving a cab rack to a lower spot on my build list for a bit..... thank you you for the response !
     
  12. Feb 25, 2025 at 1:17 PM
    #12
    BayAreaTruckin

    BayAreaTruckin [OP] New Member

    Joined:
    Mar 3, 2022
    Member:
    #75350
    Messages:
    63
    Gender:
    Male
    San Francisco, CA
    No worries, happy to help. It looks optimized to run the circular light pods, not a bar - I think it might fit 5 or 6 of the 6 led Road Shock pods from Harbor Freight well. When I get my electrical set up, I will try that first and see how it performs
     
To Top