

-
Welcome to Tundras.com!
You are currently viewing as a guest! To get full-access, you need to register for a FREE account.
As a registered member, you’ll be able to:- Participate in all Tundra discussion topics
- Transfer over your build thread from a different forum to this one
- Communicate privately with other Tundra owners from around the world
- Post your own photos in our Members Gallery
- Access all special features of the site
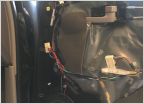 06 DC JBL front speakers
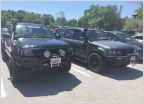 Where to mount auxiliary lights?
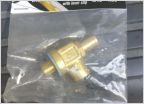 Fumoto Valve Installation
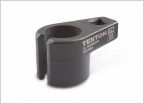 Check engine light - P2195 and C1241 codes...new battery fixes it?
 Oil filters
 Front Differential Fluid/Transfer Case Fluid
[1st gen] Darrell Waltrip / FMS grille info dump
Discussion in '1st Gen Tundras (2000-2006)' started by shifty`, Aug 26, 2024.


