

-
Welcome to Tundras.com!
You are currently viewing as a guest! To get full-access, you need to register for a FREE account.
As a registered member, you’ll be able to:- Participate in all Tundra discussion topics
- Transfer over your build thread from a different forum to this one
- Communicate privately with other Tundra owners from around the world
- Post your own photos in our Members Gallery
- Access all special features of the site
 Cheap Fix for a Plastic Gas Tank Vent Pipe with a Few Small Holes???
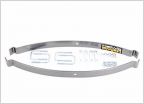 Hellwig helper springs or similar solution?
 Lost 2006 Tundra key and Fob
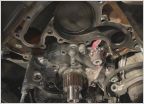 Good Timing
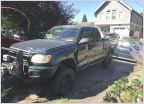 After the auction - new to me tundra
 Bmf's big bumpin bonanza
Air Conditioning DIY or let the dealership do it?
Discussion in '1st Gen Tundras (2000-2006)' started by tacoguybill, Jan 24, 2022.


