-
Welcome to Tundras.com!
You are currently viewing as a guest! To get full-access, you need to register for a FREE account.
As a registered member, you’ll be able to:- Participate in all Tundra discussion topics
- Transfer over your build thread from a different forum to this one
- Communicate privately with other Tundra owners from around the world
- Post your own photos in our Members Gallery
- Access all special features of the site
 2018 Platinum Battery?
 COOL cheap LED bed light option! $28
 Part number for tie down hooks ,bed rail
 CB mic mount without drilling?
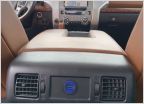 First mod complete.
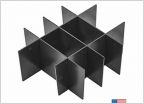 Console Safe Half Tray?
Anyone have issues with Bushwacker OE fender flares not seating right?
Discussion in '2.5 Gen Tundras (2014-2021)' started by BlazingBluePlatinumFatMan, Mar 14, 2021.