

-
Welcome to Tundras.com!
You are currently viewing as a guest! To get full-access, you need to register for a FREE account.
As a registered member, you’ll be able to:- Participate in all Tundra discussion topics
- Transfer over your build thread from a different forum to this one
- Communicate privately with other Tundra owners from around the world
- Post your own photos in our Members Gallery
- Access all special features of the site
 Need help deciding on tires, BFG KO2 (Load E) vs Goodyear Duratrac (Load D)
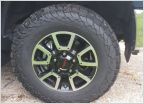 Help me choose tires and rims
 Method roost for $133 at 4WP
 TPMS Relearn Tool
 OEM Black Lug Nuts
 Had blowout, need new tire advice
Best way to fix tire rub.
Discussion in 'Wheels & Tires' started by Sanguiniux, Oct 21, 2020.


