-
Welcome to Tundras.com!
You are currently viewing as a guest! To get full-access, you need to register for a FREE account.
As a registered member, you’ll be able to:- Participate in all Tundra discussion topics
- Transfer over your build thread from a different forum to this one
- Communicate privately with other Tundra owners from around the world
- Post your own photos in our Members Gallery
- Access all special features of the site
 Best deal for torque wrench up to at least 200lbs
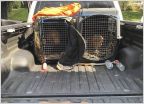 Dog Travel
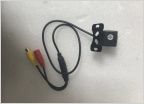 Bad Rear Camera 2008 Tundra
 Brown dots on my 2024 white Toyota tundra
 OIL FILTERS & OIL CHANGE THREAD
 PSA: Amazon has husky liners on sale
Decent DIY Wheel Painting
Discussion in 'General Tundra Discussion' started by AlrightAlrightAlright, May 21, 2022.