1. Welcome to Tundras.com!

    You are currently viewing as a guest! To get full-access, you need to register for a FREE account.

    As a registered member, you’ll be able to:
    • Participate in all Tundra discussion topics
    • Transfer over your build thread from a different forum to this one
    • Communicate privately with other Tundra owners from around the world
    • Post your own photos in our Members Gallery
    • Access all special features of the site

Flatbed Ute Build - 02 AC

Discussion in '1st Gen Builds (2000-2006)' started by ldrodrig, Jul 17, 2023.

  1. Jul 17, 2023 at 2:50 PM
    #1
    ldrodrig

    ldrodrig [OP] New Member

    Joined:
    Jul 17, 2023
    Member:
    #100378
    Messages:
    36
    Vehicle:
    2002 Tundra AC Limited 4x4
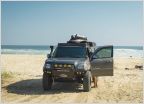
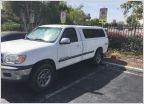
    It's finally time to convert my truck to a flatbed. Here we go!

    2002 AC 4x4
    312,XXX miles


    [​IMG]


    [​IMG]
    [​IMG]


    [​IMG]


    The ol girl has taken me a lot of places and seen some real shit. Time for an upgrade
     
  2. Jul 17, 2023 at 2:51 PM
    #2
    ldrodrig

    ldrodrig [OP] New Member

    Joined:
    Jul 17, 2023
    Member:
    #100378
    Messages:
    36
    Vehicle:
    2002 Tundra AC Limited 4x4
    Prelude:
    I am a longtime lurker who has been quietly modifying my Tundra and building my fabrication skills as a hands-on mechanical engineer. I recently helped convert a friend's 3rd Gen Tacoma into a fully welded aluminum flatbed, based on the classic ute. The design used aluminum Unistrut channel as attachment rails in the decking and on the tray perimeter. This tray will be the basis of my design, with some major changes.

    [​IMG]


    [​IMG]


    [​IMG]
     
  3. Jul 17, 2023 at 2:52 PM
    #3
    MedCityMoto

    MedCityMoto SciTech Nerd

    Joined:
    Aug 29, 2022
    Member:
    #82569
    Messages:
    1,041
    Gender:
    Male
    Vehicle:
    2.5gen CM SR5 TRD OffRoad
    312k? Just getting broken in!
     
    ldrodrig[OP] likes this.
  4. Jul 17, 2023 at 2:52 PM
    #4
    ldrodrig

    ldrodrig [OP] New Member

    Joined:
    Jul 17, 2023
    Member:
    #100378
    Messages:
    36
    Vehicle:
    2002 Tundra AC Limited 4x4
    Now it's my turn! For this one, we are going to use T-slot extrusions (Misumi) combined with welded steel brackets in order to maximize strength and simplify the fabrication.

    [​IMG]


    The basic frame parts have been ordered, and now we wait!


    [​IMG]

    The concept is to make it as easy to assemble and modify as possible. I use my truck for many different types of activities in any given year, so having the ability to modify the tray to suit my changing needs is crucial.
     
    Warreng, DZ_ and Mr.bee like this.
  5. Jul 17, 2023 at 3:12 PM
    #5
    Tundra2

    Tundra2 Zoinked

    Joined:
    Feb 10, 2019
    Member:
    #25875
    Messages:
    12,412
    Gender:
    Male
    First Name:
    Noah
    Western Kentucky
    Vehicle:
    '00 Tundra V8 SR5 '03 Corolla Virus
    Looking good! Did you break an axle shaft or???
     
    FrenchToasty likes this.
  6. Jul 17, 2023 at 6:28 PM
    #6
    ldrodrig

    ldrodrig [OP] New Member

    Joined:
    Jul 17, 2023
    Member:
    #100378
    Messages:
    36
    Vehicle:
    2002 Tundra AC Limited 4x4
    It's a long and sad story, but the abridged version is this:

    My rear diff started grinding during a road trip, but it was the middle of the night in rural Nevada on a holiday weekend, so I kept going. I listened to it eat itself for the next couple hours, hoping to just make it there so I could tow it to a shop on my way back out. It then started really sounding bad, so I pulled the rear driveshaft and went in 4x4, hoping to put less stress on the busted rear diff. The noises subsided and I made it within 3 miles of the destination when suddenly the rear dropped and I skidded to a stop. To my disbelief, a flaming (!) wheel assembly rolled past me and into the ditch on the side of the road. The whole wheel & axle shaft assembly had worked its way out of the axle housing and the burning gear oil caught fire. Luckily I was able to put out the fire, but overall it was quite a low point as a truck owner.

    The story continues from here with another 1.5 years of issues related to that night, but I will save that for a different thread :)
     
    FirstGenVol, MedCityMoto and Cruzer like this.
  7. Jul 17, 2023 at 6:34 PM
    #7
    Cruzer

    Cruzer Wheeling Full Size

    Joined:
    Oct 12, 2020
    Member:
    #53461
    Messages:
    3,246
    Gender:
    Male
    First Name:
    Cruz
    Sunnyvale, CA
    Vehicle:
    Build Page: Cruzer's Re-Build for the Rubicon
    I can relate... to the wheel passing by :rofl:glad you survived to tell the tale.
     
  8. Jul 17, 2023 at 6:39 PM
    #8
    MedCityMoto

    MedCityMoto SciTech Nerd

    Joined:
    Aug 29, 2022
    Member:
    #82569
    Messages:
    1,041
    Gender:
    Male
    Vehicle:
    2.5gen CM SR5 TRD OffRoad
    Ok now I'm invested. Make your thread, I'll pop the popcorn! :popcorn:
     
  9. Jul 18, 2023 at 2:08 PM
    #9
    ldrodrig

    ldrodrig [OP] New Member

    Joined:
    Jul 17, 2023
    Member:
    #100378
    Messages:
    36
    Vehicle:
    2002 Tundra AC Limited 4x4
    The waterjet bracket parts came in, and now I'm welding up the corner brackets and frame mounts. Went with 3/16" steel on these.

    [​IMG]

    [​IMG]
     
    DZ_ likes this.
  10. Jul 18, 2023 at 3:06 PM
    #10
    DZ_

    DZ_ New Member

    Joined:
    May 31, 2019
    Member:
    #31242
    Messages:
    529
    Frederick Co., MD
    Vehicle:
    2019 Tundra Crewmax Limited TRD DadWagon
    Where are you having your parts cut?
     
  11. Jul 18, 2023 at 5:06 PM
    #11
    ldrodrig

    ldrodrig [OP] New Member

    Joined:
    Jul 17, 2023
    Member:
    #100378
    Messages:
    36
    Vehicle:
    2002 Tundra AC Limited 4x4
    I am getting them cut at a local (Los Angeles, CA) waterjet vendor: http://www.charismadesign.com/
     
    DZ_[QUOTED] likes this.
  12. Mar 10, 2024 at 1:31 PM
    #12
    ldrodrig

    ldrodrig [OP] New Member

    Joined:
    Jul 17, 2023
    Member:
    #100378
    Messages:
    36
    Vehicle:
    2002 Tundra AC Limited 4x4
    Lots of work has gone down since the last post!

    First thing was pulling the bed off, took about 10 minutes with one person and a harbor freight gantry crane. Could easily be done with 3 friends instead of the gantry.
    IMG_4759.jpg
     
    The Black Mamba likes this.
  13. Mar 10, 2024 at 1:35 PM
    #13
    ldrodrig

    ldrodrig [OP] New Member

    Joined:
    Jul 17, 2023
    Member:
    #100378
    Messages:
    36
    Vehicle:
    2002 Tundra AC Limited 4x4
    Set the height using my state-of-the-art bed height calculator.

    3B7BDF8A-EF14-466A-A073-1E3F96932338_1_105_c.jpg


    82E11303-B102-4DD3-A37B-0E866ABA82F7_1_105_c.jpg

    Tray height and rake was set using the front and rear mounts, the center mounts got added later.

    EEB52E52-C738-4E64-9252-6BFDBCCEEDCA_1_105_c.jpg
     
  14. Mar 10, 2024 at 1:37 PM
    #14
    ldrodrig

    ldrodrig [OP] New Member

    Joined:
    Jul 17, 2023
    Member:
    #100378
    Messages:
    36
    Vehicle:
    2002 Tundra AC Limited 4x4
    Framed out the rest of the platform and slapped on lights/plate to get legal.

    IMG_4784.jpg


    The tray with its first load! lol
    IMG_4790.jpg
     
  15. Mar 10, 2024 at 1:38 PM
    #15
    ldrodrig

    ldrodrig [OP] New Member

    Joined:
    Jul 17, 2023
    Member:
    #100378
    Messages:
    36
    Vehicle:
    2002 Tundra AC Limited 4x4
    Then the decking boards were installed. Went with TimberTech/Azek PVC boards since they don't absorb moisture, stay cooler to the touch, and are light weight compared to other options. Timbertech has a 50/year warranty on this material so should last, and boards can easily be replaced if damaged.

    IMG_5996 (1).jpg
     
  16. Mar 10, 2024 at 1:39 PM
    #16
    ldrodrig

    ldrodrig [OP] New Member

    Joined:
    Jul 17, 2023
    Member:
    #100378
    Messages:
    36
    Vehicle:
    2002 Tundra AC Limited 4x4
    Next, the rack started to come together using extrusions and a mix of custom brackets and off-shelf Tslot parts. This design made it super easy for me to frame out a rack however I wanted. My idea was to have an open bed on the passenger side and full-length box on the driver side, with a rack to mount skis/bikes/whatever above the long box


    IMG_5207.jpg IMG_5231.jpg


    Tray with its second load :)

    IMG_5233.jpg
     
    The Black Mamba likes this.
  17. Mar 10, 2024 at 1:41 PM
    #17
    ldrodrig

    ldrodrig [OP] New Member

    Joined:
    Jul 17, 2023
    Member:
    #100378
    Messages:
    36
    Vehicle:
    2002 Tundra AC Limited 4x4
    Now time for doors! I first made some cheapo doors using 1/2" recycled HDPE and a flat extrusion piece on the outside for more rigidity. Easily attached with hardware store strap hinges. The driver side is open here since I was waiting for a big 6' RC industries box to arrive.

    IMG_5303.jpg IMG_5338 (1).jpg IMG_5311.jpg
     
  18. Mar 10, 2024 at 1:42 PM
    #18
    ldrodrig

    ldrodrig [OP] New Member

    Joined:
    Jul 17, 2023
    Member:
    #100378
    Messages:
    36
    Vehicle:
    2002 Tundra AC Limited 4x4
    Added some steel tubing on the sides to be used as steps and to hold the mudflaps. Bent the tubes with the Affordable Bender, highly recommend that product for simple tube bending. https://www.affordablebender.com/


    IMG_5339.jpg

    IMG_5345 (1).jpg
     
  19. Mar 10, 2024 at 1:44 PM
    #19
    ldrodrig

    ldrodrig [OP] New Member

    Joined:
    Jul 17, 2023
    Member:
    #100378
    Messages:
    36
    Vehicle:
    2002 Tundra AC Limited 4x4
    Moving more small toys
    IMG_5359.jpg

    IMG_5417.jpg
     
  20. Mar 10, 2024 at 1:46 PM
    #20
    FrenchToasty

    FrenchToasty The Desert rat, SSEM #5/25, 6 lug enthusiast

    Joined:
    Sep 15, 2019
    Member:
    #36156
    Messages:
    18,320
    First Name:
    Mo
    The SoAz….. big surprise
    Vehicle:
    2006 DC 4.88s Elocker and some other trippy stuff
    Bone stock
    These decking boards….. how thick are they, and how big can you get them in?
    I’m trying to skin/deck a utility/camping trailer, and looking for options.
     
  21. Mar 10, 2024 at 1:46 PM
    #21
    ldrodrig

    ldrodrig [OP] New Member

    Joined:
    Jul 17, 2023
    Member:
    #100378
    Messages:
    36
    Vehicle:
    2002 Tundra AC Limited 4x4
    Then the box came! This thing is sturdy 1/8" aluminum, 18"x18"x72" with nice hardware and powdercoat finish. Highly recommend RC Industries for boxes :thumbsup:

    IMG_5617 (1).jpg

    IMG_6009.jpg
     
  22. Mar 10, 2024 at 1:48 PM
    #22
    ldrodrig

    ldrodrig [OP] New Member

    Joined:
    Jul 17, 2023
    Member:
    #100378
    Messages:
    36
    Vehicle:
    2002 Tundra AC Limited 4x4
    they're 1" nominal (I think they came in at 7/8" thick), and I bought them in 20' lengths. Here's the website link: https://www.timbertech.com/products/decking-overview/pvc/

    Lots of color options, most lumber yards can order whatever you want
     
    FrenchToasty[QUOTED] likes this.
  23. Mar 10, 2024 at 1:52 PM
    #23
    ldrodrig

    ldrodrig [OP] New Member

    Joined:
    Jul 17, 2023
    Member:
    #100378
    Messages:
    36
    Vehicle:
    2002 Tundra AC Limited 4x4
    More photos of some light-duty usageIMG_6239.jpg

    IMG_6059.jpg
    IMG_6198.jpg
     
  24. Mar 10, 2024 at 1:53 PM
    #24
    ldrodrig

    ldrodrig [OP] New Member

    Joined:
    Jul 17, 2023
    Member:
    #100378
    Messages:
    36
    Vehicle:
    2002 Tundra AC Limited 4x4
    Then back to building! First I sized up a headboard frame to match the body lines and cab height

    IMG_6474.jpg


    72335215427__24D6471D-BA0D-43DE-9B26-E34F826721BC.jpg
     
    The Black Mamba likes this.
  25. Mar 10, 2024 at 1:56 PM
    #25
    ldrodrig

    ldrodrig [OP] New Member

    Joined:
    Jul 17, 2023
    Member:
    #100378
    Messages:
    36
    Vehicle:
    2002 Tundra AC Limited 4x4
    I decided to replace the doors, starting with the rear. I got an original Toyota truck tailgate from rock auto and replaced the rear door with it, perfect fit! I made simple latch catches and the OEM latch so it would open with the center handle.IMG_6477.jpg IMG_6476.jpg
     
  26. Mar 10, 2024 at 1:57 PM
    #26
    ldrodrig

    ldrodrig [OP] New Member

    Joined:
    Jul 17, 2023
    Member:
    #100378
    Messages:
    36
    Vehicle:
    2002 Tundra AC Limited 4x4
    I added a couple pelican cases underneath to hold recovery gear, tie downs, and first aid. Easily strapped underneath with E-track mounts bolted to the T-slot channels

    IMG_6476 (1).jpg
     
    The Black Mamba likes this.
  27. Mar 10, 2024 at 1:57 PM
    #27
    ldrodrig

    ldrodrig [OP] New Member

    Joined:
    Jul 17, 2023
    Member:
    #100378
    Messages:
    36
    Vehicle:
    2002 Tundra AC Limited 4x4
    For fun I pulled off the rack/box and put on a friend's camper to check fit and mounting points. Took less than 10 minutes to pull the rack and box off.

    Also, it was this day that I realized my driver side leaf spring was flat, hence why I'm riding the bump-stop here. Went with some Deaver springs to replace


    IMG_6595.jpg
     
  28. Mar 10, 2024 at 2:00 PM
    #28
    ldrodrig

    ldrodrig [OP] New Member

    Joined:
    Jul 17, 2023
    Member:
    #100378
    Messages:
    36
    Vehicle:
    2002 Tundra AC Limited 4x4
    Next, I replaced the side door and rear panel with some 3/16" aluminum sheet and extrusions made to hold panels from Misumi. . This door is super rigid and able to support the full weight of 2 people sitting. I also moved this week, and the tray made that really easy.


    IMG_6969.jpg IMG_6968.jpg

    IMG_7081.jpg


    IMG_7006.jpg
     
    The Black Mamba and FrenchToasty like this.
  29. Mar 10, 2024 at 2:05 PM
    #29
    ldrodrig

    ldrodrig [OP] New Member

    Joined:
    Jul 17, 2023
    Member:
    #100378
    Messages:
    36
    Vehicle:
    2002 Tundra AC Limited 4x4
    Took a break from my slow build to make one for a friend with a 3rd gen taco. Made more brackets and this build was assembled all in 1 day. He is running a mid-travel setup with 14" rear shocks, and we were able to mount the top shock support to the tray. Build came out real nice looking

    IMG_7174.jpg

    This build had some sheet metal doors and had a local vendor bend/powdercoat. I definitely like the sheet metal doors for aesthetics and weight savings. But because I'm pretty prone to destroying things and want to be able to modify as I go, I think I'll stick to the panel door I made, at least for now.

    Also built a simple rear bumper using an off-shelf bumper tube as a base: 44" Universal Weld-On Hitch Center Section, 2" Receiver (No Side Plates)


    IMG_0194 (1).jpg


    IMG_0716.jpg
     
  30. Mar 10, 2024 at 2:06 PM
    #30
    ldrodrig

    ldrodrig [OP] New Member

    Joined:
    Jul 17, 2023
    Member:
    #100378
    Messages:
    36
    Vehicle:
    2002 Tundra AC Limited 4x4
    Then I tore my ACL skiing, had surgery, and took a break from building. Also I had to spend more time at my day job in order to not get fired.

    Picture1.png
     

Products Discussed in

To Top