1. Welcome to Tundras.com!

    You are currently viewing as a guest! To get full-access, you need to register for a FREE account.

    As a registered member, you’ll be able to:
    • Participate in all Tundra discussion topics
    • Transfer over your build thread from a different forum to this one
    • Communicate privately with other Tundra owners from around the world
    • Post your own photos in our Members Gallery
    • Access all special features of the site

Heated seat install wiring question

Discussion in '2.5 Gen Tundras (2014-2021)' started by theomedic, Dec 6, 2020.

  1. Dec 6, 2020 at 12:50 PM
    #1
    theomedic

    theomedic [OP] New Member

    Joined:
    Jul 21, 2020
    Member:
    #49681
    Messages:
    9
    Gender:
    Male
    First Name:
    Theo
    Vehicle:
    2016 Tundra SR5
    Stock so far
    I’m installing heated seats on my 2016 Tundra, I’ve heard people splicing into the power outlets instead of running power from the fuse box. Has any done this and if so, did you have any problems with this setup?
    Also looking for best place to wire the switches.
    Thanks!
     
  2. Dec 6, 2020 at 12:54 PM
    #2
    timsp8

    timsp8 Former Tundra owner for 13 years

    Joined:
    May 11, 2018
    Member:
    #15231
    Messages:
    3,533
    Gender:
    Male
    First Name:
    Tim
    NY
    Vehicle:
    2018 Tundra Limited Crewmax - Traded In
    I did seat heat for the back seat and spliced the wire to the rear power outlet. Works good so far.
     
    panicman likes this.
  3. Dec 6, 2020 at 12:55 PM
    #3
    theomedic

    theomedic [OP] New Member

    Joined:
    Jul 21, 2020
    Member:
    #49681
    Messages:
    9
    Gender:
    Male
    First Name:
    Theo
    Vehicle:
    2016 Tundra SR5
    Stock so far
    Thanks, I had heard it has been done, but wasn’t sure if it caused any problems.
     
  4. Dec 6, 2020 at 12:57 PM
    #4
    timsp8

    timsp8 Former Tundra owner for 13 years

    Joined:
    May 11, 2018
    Member:
    #15231
    Messages:
    3,533
    Gender:
    Male
    First Name:
    Tim
    NY
    Vehicle:
    2018 Tundra Limited Crewmax - Traded In
    Im pretty sure it gets enough power. It can’t take as much power as some of things you can plug in to the socket. That one rarely gets used too. Maybe plug yours in to the one in the console if you don’t use it much.
     
  5. Dec 6, 2020 at 1:00 PM
    #5
    Toptalktoyota

    Toptalktoyota New Member

    Joined:
    Oct 8, 2020
    Member:
    #53289
    Messages:
    159
    Gender:
    Male
    Vehicle:
    2020 DC SX
    I've installed quite a few seat heaters using power outlet. I separate driver and passenger side with separate fuses, never had a problem.
    Really don't want to go off constant power from fuse box in case you forget to turn them off.
     
    panicman likes this.
  6. Dec 9, 2020 at 6:15 PM
    #6
    theomedic

    theomedic [OP] New Member

    Joined:
    Jul 21, 2020
    Member:
    #49681
    Messages:
    9
    Gender:
    Male
    First Name:
    Theo
    Vehicle:
    2016 Tundra SR5
    Stock so far
    I used the power outlets, everything works great so far! thanks for the help!!
     
  7. Dec 9, 2020 at 6:31 PM
    #7
    Trdracer87

    Trdracer87 New Member

    Joined:
    Sep 19, 2020
    Member:
    #52486
    Messages:
    114
    Gender:
    Male
    Beaverton, OR
    Vehicle:
    2021 Cement TRD OR
    Ironman Foam Cell Pro 3.5, Methods, Decked, Diode Dynamics, N-Fab
    Is there a write up for the back seats?
     
  8. Dec 9, 2020 at 6:36 PM
    #8
    timsp8

    timsp8 Former Tundra owner for 13 years

    Joined:
    May 11, 2018
    Member:
    #15231
    Messages:
    3,533
    Gender:
    Male
    First Name:
    Tim
    NY
    Vehicle:
    2018 Tundra Limited Crewmax - Traded In
    I didn’t but I can give more details tomorrow and take some pics.
     
    panicman likes this.
  9. Dec 9, 2020 at 7:43 PM
    #9
    Trdracer87

    Trdracer87 New Member

    Joined:
    Sep 19, 2020
    Member:
    #52486
    Messages:
    114
    Gender:
    Male
    Beaverton, OR
    Vehicle:
    2021 Cement TRD OR
    Ironman Foam Cell Pro 3.5, Methods, Decked, Diode Dynamics, N-Fab
    Sweet, that be great!
     
  10. Dec 9, 2020 at 8:55 PM
    #10
    panicman

    panicman Everyone remain calm.

    Joined:
    Mar 28, 2018
    Member:
    #13960
    Messages:
    1,840
    Gender:
    Male
    First Name:
    Eric
    PNW
    Vehicle:
    2018 SR5 CM TRDoffroad MGM
    Thank you guys!
    @timsp8 i wired mine off the fuse box and I hate having to check them after my kids ride. Please post!!

    Thanks OP for asking!
     
  11. Dec 9, 2020 at 9:53 PM
    #11
    1lowlife

    1lowlife Toxic prick and pavement princess..

    Joined:
    May 4, 2016
    Member:
    #3296
    Messages:
    9,886
    First Name:
    DADA
    THE GREAT STATE OF TEXAS
    Vehicle:
    2014 MGM DC SR5
    I ran mine off the 12v power outlet.
    Been fine for 3 years..
    Each side has it's own inline fuse.

    corwv1ob_zpsdajt4wcz_462bed37e2173f955c03f2c98065b25c25891bd3.jpg

    I found since installing my Katzkins it takes longer to heat up than the thin factory Limited leather.
     
    Taco-Spike and panicman like this.
  12. Dec 9, 2020 at 10:23 PM
    #12
    panicman

    panicman Everyone remain calm.

    Joined:
    Mar 28, 2018
    Member:
    #13960
    Messages:
    1,840
    Gender:
    Male
    First Name:
    Eric
    PNW
    Vehicle:
    2018 SR5 CM TRDoffroad MGM
    Hey, lowlife! That looks sharp. That’s the kit I have in my back seat. My front kit has a single button with separate controls for each side.

    You spliced into the 12v power... do you have a pic of how you spliced in? I’d love to do the same and get my add-a-fuse out of the fuse block. I hardly use the 12v socket in the console, so I’d probably tap into that.
     
  13. Dec 9, 2020 at 10:45 PM
    #13
    1lowlife

    1lowlife Toxic prick and pavement princess..

    Joined:
    May 4, 2016
    Member:
    #3296
    Messages:
    9,886
    First Name:
    DADA
    THE GREAT STATE OF TEXAS
    Vehicle:
    2014 MGM DC SR5

    I don't have a pic.
    I'd have to take my console apart to take one.

    Pretty sure I just tapped into the line that goes to the 12volt plug in the console and the rear of the console.
    Split that lead into the two front seat sides.
    I can take a pic this weekend if you need me to..
     
  14. Dec 9, 2020 at 11:11 PM
    #14
    Tundyfundy

    Tundyfundy Petunia The Tundra, and her sidekick Colbie

    Joined:
    May 5, 2017
    Member:
    #7567
    Messages:
    2,705
    Gender:
    Male
    Bay Area, CA
    Vehicle:
    Magnetic Grey DC SR5 4x4 2016
    SUSPENSION: Bilstein 6112 coilover (1.9") w/ Powder Coated Springs and Spring Perch (TRD Red), JBA Upper Control Arms, Bilstein 5160's w/Billet Aluminium Reservoir Brackets, +2 Coachbuilder Shackles, Diff Drop Kit, Carrier Bearing Drop Kit, Brakeline Extensions, ABS Extension, Poly Bushings for Leafs, Coachbuilder Shims (2 Each Side), Coachbuilder Bumpstop Extensions, TRD Rear Sway Bar, TRD Front Sway Bar, Air Lift 5000 airbags w jounce bumpers, Daystar Airbag Cradles WHEELS AND TIRES: BF Goodrich KO2's 275/70/r18, BORA wheel spacers 1.25", TRD Wheel Caps,TRD Valve Stem Caps, Spare Tire Lock PERFORMANCE: Bullydog GT Tuner(Performance Tune), TRD Intake, TRD Dual Exhaust (with Modified Exhaust Hangers for Levelling Tail Pipe),TRD Brake Pads, TRD Oil Cap (US), TRD Radiator Cap, TRD Oil Filter, Optima Yellow Top Battery,GP Battery Distribution Blocks, StopTech Slotted Cryo Treated Rotors, Goodridge G-Stop Steel Braided Brake Line Kit PROTECTION: PNP Engineering Type 4 Rock Sliders (With Full Dimple Plate) ,ADD Stealth Fighter Rear Bumper w Red/Blk Shackles and Custom Stomp Pad, TRD Skid Plate with ReadyLift Spacer Kit, Victory 4x4 LCA Skid Plates, JOMAX ABS Sensor Armor, Rear Diff Breather Mod, ARK splash guards INTERIOR: Husky Liners X-Act (Front and Full Coverage Rear and Front Weather Beater Trans Hump), Interior LED Bulbs, WheelSkins Genuine Leather Steering Wheel Cover(EuroPerf), Clazzio Genuine Leather Seat Covers(BLK/DRK GRYwith custom stitching and embroidered headrests), Clazzio Seat Heaters (Front and Rear), Entune Startup Screen MOD, Entune Off Screen Mod, Tinted Windows with Windshield Visor, AJT Key Fobs,Eagle Claws Floor Mat Clips, Bodyglove Visor Organizer,Custom Door Cup Inserts, Glass Break Sensor,AJT Radio Knobs, Custom Dior Cup Inserts EXTERIOR: Full Debadge, LED Brake Light Bulbs, LED Rear Turns, LED Reverse, LED Plate Lights, LED Cargo Lights, LED Third Brake Lights, LED Front Marker Lights, LED Fog Light Bulbs, Lamin-X Fog Light Covers (Amber),2018 OEM LED Headlights, iHacker harness, VLED Universal Puddle Lights, VLED Interior Footwell Lighting (Front and Rear),VLED Extreme Amber Fornt Turns, NSV Knight Rider Light bar, Baja Designs Sport Squadron Pods in Rear Bumper (Driving/wide), Painted Red Tow-hooks, Bed Rail System, Blind Spot Mirrors, Hitch-safe, Tail-gate lock, EAG Raptor Grille, Custom Grille Badge,Full Vinyl Wrap (Matte Black/Matte Pine Green Mettalic), Charvonia Designs Tie Bed Tie-Downs, Bull Ring Bed Rail Anchors, Line-X, Tundra Bed Mat, Bakflip F1 Bed Cover SOUND: Noico 80Mil Sound Deadening and Noico 170 Mil Thermal Insulation (All 4 Doors, Roof, Floors, Rear Panel, Dash). Hertz Uno K170's Component Speakers (Front Doors with Upgraded Sail Panels), Hertz Uno K170 Coaxial Speakers (Rear Doors), JBL C1-075ct Tweeters (Total 4) in Side Dash and Center Speaker, JBL Stadium 5 Amp w/Remote Bass Adjustment Knob and Amp Rack, 12" Infinity Reference Subwoofer in Custom Enclosure w/ “TUNDRA” Logo, Fast Rings Foam Speaker Rings System(4 Doors), Fix 86 DSP
    I went to the fuse box under the dash. There is an accessory slot labeled for seat heaters. the kit I bought draws 12 amps or so at full power with both heaters at high. I'm not really versed in electrical so I didn't want to run the risk of blowing the fuses when using high amp accessories like an inverter or my air compressor. As all have stated Im sure youll be okay.
     
    NewImprovedRon likes this.
  15. Dec 10, 2020 at 3:54 AM
    #15
    Toptalktoyota

    Toptalktoyota New Member

    Joined:
    Oct 8, 2020
    Member:
    #53289
    Messages:
    159
    Gender:
    Male
    Vehicle:
    2020 DC SX
    You can use a relay tapped into an accessory wire and still use your constant power. The relay will only feed power when they key is on.
     
    NewImprovedRon likes this.
  16. Dec 10, 2020 at 2:07 PM
    #16
    timsp8

    timsp8 Former Tundra owner for 13 years

    Joined:
    May 11, 2018
    Member:
    #15231
    Messages:
    3,533
    Gender:
    Male
    First Name:
    Tim
    NY
    Vehicle:
    2018 Tundra Limited Crewmax - Traded In
    Here’s a few pics and description. I didn’t take pictures while I was doing it, but it’s not that hard. Worst part for me was getting the seats back in with the esp storage box.

    Take the seats out with the 4 bolts each. Remember, one is threaded differently. Carry them inside so you can watch football while doing it.

    Pull off the plastic piece on the side that covers the device that raises the seats. One of the straps loops around it.

    D59A885E-AD83-43B3-A885-710F5B8C3008.jpg

    Remove the straps that hold the leather. They are like elastic bands. They just loop around parts of the seat.

    I only did the back because I didn’t want to fully remove the leather. I was able to easily push the heat pad up by only removing the bottom straps. I pushed it all the way up to the stitching. For the butt part, the stitching was too close to push the pad in very far. I can go back later if I feel like taking the leather off.

    CA4AB5CF-8AEA-4D3A-BD2C-CDDB3CEB3B58.jpg

    I ran the wire under the carpet near the hump. I already had it pulled up because I was running other wires for an inverter and cell booster, but it’s not hard to pull up. Just a few clips under the door kick panel and remove the seat belt bolt and rear panel.

    127E2D78-5826-406B-A3F8-431502CBA049.jpg

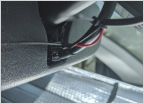
    Take the rear of the console off. It’s all 1 piece and slides up and back. 4 clips hold it in. I tapped in to the outlet power and used a box cutter to cut the hole out for the switch. You can see I slipped with the box cutter and cut the plastic some.

    3DEA484C-4696-4630-A1A4-FC6F45FE2EF7.jpg

    I was doing a lot of stuff at once so I might not remember everything exactly, but once you get the seats out it’s pretty easy to do.

    It’s in the back so I can’t see if it’s off, but I’ve told the kids to make sure it’s off when they get out. I can reach back too and move the switches up to turn it off. They say it works good, even without the butt piece.

    I ordered it off Amazon. I just looked for it and the page from my order won’t come up. I guess they don’t sell it anymore. It was definitely Chinese as the instructions were broken English. This is about the same. I think the only difference between the ones on Amazon is the switch. I wanted 2 in 1 type switch.

    https://www.amazon.com/WATERCARBON-...it&qid=1607638693&sprefix=watercarbin&sr=8-11
     
    Last edited: Dec 10, 2020
    Trdracer87 likes this.
  17. Dec 10, 2020 at 2:59 PM
    #17
    panicman

    panicman Everyone remain calm.

    Joined:
    Mar 28, 2018
    Member:
    #13960
    Messages:
    1,840
    Gender:
    Male
    First Name:
    Eric
    PNW
    Vehicle:
    2018 SR5 CM TRDoffroad MGM
    Tundy, they discontinued that slot in 2016 or 2017... definitely does not exist on 2018’s.
     
  18. Dec 10, 2020 at 3:16 PM
    #18
    Tundyfundy

    Tundyfundy Petunia The Tundra, and her sidekick Colbie

    Joined:
    May 5, 2017
    Member:
    #7567
    Messages:
    2,705
    Gender:
    Male
    Bay Area, CA
    Vehicle:
    Magnetic Grey DC SR5 4x4 2016
    SUSPENSION: Bilstein 6112 coilover (1.9") w/ Powder Coated Springs and Spring Perch (TRD Red), JBA Upper Control Arms, Bilstein 5160's w/Billet Aluminium Reservoir Brackets, +2 Coachbuilder Shackles, Diff Drop Kit, Carrier Bearing Drop Kit, Brakeline Extensions, ABS Extension, Poly Bushings for Leafs, Coachbuilder Shims (2 Each Side), Coachbuilder Bumpstop Extensions, TRD Rear Sway Bar, TRD Front Sway Bar, Air Lift 5000 airbags w jounce bumpers, Daystar Airbag Cradles WHEELS AND TIRES: BF Goodrich KO2's 275/70/r18, BORA wheel spacers 1.25", TRD Wheel Caps,TRD Valve Stem Caps, Spare Tire Lock PERFORMANCE: Bullydog GT Tuner(Performance Tune), TRD Intake, TRD Dual Exhaust (with Modified Exhaust Hangers for Levelling Tail Pipe),TRD Brake Pads, TRD Oil Cap (US), TRD Radiator Cap, TRD Oil Filter, Optima Yellow Top Battery,GP Battery Distribution Blocks, StopTech Slotted Cryo Treated Rotors, Goodridge G-Stop Steel Braided Brake Line Kit PROTECTION: PNP Engineering Type 4 Rock Sliders (With Full Dimple Plate) ,ADD Stealth Fighter Rear Bumper w Red/Blk Shackles and Custom Stomp Pad, TRD Skid Plate with ReadyLift Spacer Kit, Victory 4x4 LCA Skid Plates, JOMAX ABS Sensor Armor, Rear Diff Breather Mod, ARK splash guards INTERIOR: Husky Liners X-Act (Front and Full Coverage Rear and Front Weather Beater Trans Hump), Interior LED Bulbs, WheelSkins Genuine Leather Steering Wheel Cover(EuroPerf), Clazzio Genuine Leather Seat Covers(BLK/DRK GRYwith custom stitching and embroidered headrests), Clazzio Seat Heaters (Front and Rear), Entune Startup Screen MOD, Entune Off Screen Mod, Tinted Windows with Windshield Visor, AJT Key Fobs,Eagle Claws Floor Mat Clips, Bodyglove Visor Organizer,Custom Door Cup Inserts, Glass Break Sensor,AJT Radio Knobs, Custom Dior Cup Inserts EXTERIOR: Full Debadge, LED Brake Light Bulbs, LED Rear Turns, LED Reverse, LED Plate Lights, LED Cargo Lights, LED Third Brake Lights, LED Front Marker Lights, LED Fog Light Bulbs, Lamin-X Fog Light Covers (Amber),2018 OEM LED Headlights, iHacker harness, VLED Universal Puddle Lights, VLED Interior Footwell Lighting (Front and Rear),VLED Extreme Amber Fornt Turns, NSV Knight Rider Light bar, Baja Designs Sport Squadron Pods in Rear Bumper (Driving/wide), Painted Red Tow-hooks, Bed Rail System, Blind Spot Mirrors, Hitch-safe, Tail-gate lock, EAG Raptor Grille, Custom Grille Badge,Full Vinyl Wrap (Matte Black/Matte Pine Green Mettalic), Charvonia Designs Tie Bed Tie-Downs, Bull Ring Bed Rail Anchors, Line-X, Tundra Bed Mat, Bakflip F1 Bed Cover SOUND: Noico 80Mil Sound Deadening and Noico 170 Mil Thermal Insulation (All 4 Doors, Roof, Floors, Rear Panel, Dash). Hertz Uno K170's Component Speakers (Front Doors with Upgraded Sail Panels), Hertz Uno K170 Coaxial Speakers (Rear Doors), JBL C1-075ct Tweeters (Total 4) in Side Dash and Center Speaker, JBL Stadium 5 Amp w/Remote Bass Adjustment Knob and Amp Rack, 12" Infinity Reference Subwoofer in Custom Enclosure w/ “TUNDRA” Logo, Fast Rings Foam Speaker Rings System(4 Doors), Fix 86 DSP
    Gotcha. Yeah I have a 2016. Thanks for the info.
     
  19. Nov 4, 2022 at 4:52 AM
    #19
    ChrisLopez

    ChrisLopez New Member

    Joined:
    Sep 22, 2020
    Member:
    #52630
    Messages:
    222
    Gender:
    Male
    First Name:
    Christian
    Chicago,Illinois
    Vehicle:
    2018 Tundra SR5 TRD off road Crew max
    I’m looking into doing this just ordered the kit. To wire I’ll use red power wire from kit to power wire from cig outlet and ground to any ground? Also what size drill bit for the circular heat switch? Says 20mm but can’t seem to find drill but that size.
     
  20. Nov 4, 2022 at 5:12 AM
    #20
    Jaypown

    Jaypown New Member

    Joined:
    Aug 19, 2019
    Member:
    #34878
    Messages:
    2,016
    Gender:
    Male
    First Name:
    Justin
    Rubber City
    Vehicle:
    2020 Tundra TRD Sport CM 4x4 MGM
    Are you talking about these switches? I just used a step drill bit until the hole was big enough. multiple tests too.

    Also not my picture. Just a googled one.
    [​IMG]
     
    Patch999 likes this.
  21. Nov 4, 2022 at 5:47 AM
    #21
    ChrisLopez

    ChrisLopez New Member

    Joined:
    Sep 22, 2020
    Member:
    #52630
    Messages:
    222
    Gender:
    Male
    First Name:
    Christian
    Chicago,Illinois
    Vehicle:
    2018 Tundra SR5 TRD off road Crew max
    those are the ones, thanks!


  22. Nov 4, 2022 at 5:52 AM
    #22
    Jaypown

    Jaypown New Member

    Joined:
    Aug 19, 2019
    Member:
    #34878
    Messages:
    2,016
    Gender:
    Male
    First Name:
    Justin
    Rubber City
    Vehicle:
    2020 Tundra TRD Sport CM 4x4 MGM
    yep we just step drilled it. step drill bit was slightly too small so we ended up snipping those tabs on the side just enough to force them in the hole nice and snug. Also, used the power from the 12 volt in the arm rest.
     
  23. Nov 4, 2022 at 10:24 AM
    #23
    ChrisLopez

    ChrisLopez New Member

    Joined:
    Sep 22, 2020
    Member:
    #52630
    Messages:
    222
    Gender:
    Male
    First Name:
    Christian
    Chicago,Illinois
    Vehicle:
    2018 Tundra SR5 TRD off road Crew max
    Thanks for the advice. I’m planning on putting the switches on the silver trim around the head unit. I know I will have to do some good amount of disassembly. My project for next weekend while the wife is out of town.

     
  24. Nov 4, 2022 at 10:32 AM
    #24
    Patch999

    Patch999 SSEM #17 You are what you do when it counts

    Joined:
    Jul 28, 2018
    Member:
    #17466
    Messages:
    3,672
    Gender:
    Male
    First Name:
    Kyle
    TX
    Vehicle:
    2017 Bad@$$ TRD Pro
    Here is where I put mine. They are out of the way and easy to route.
    EOVU2790.jpg
     
  25. Nov 4, 2022 at 11:38 AM
    #25
    Jaypown

    Jaypown New Member

    Joined:
    Aug 19, 2019
    Member:
    #34878
    Messages:
    2,016
    Gender:
    Male
    First Name:
    Justin
    Rubber City
    Vehicle:
    2020 Tundra TRD Sport CM 4x4 MGM
    I almost went your route after seeing it a few months back. I ended up going on the flat spots the sides. I do like the sleek look your version is though
     
    Patch999[QUOTED] likes this.
  26. Nov 4, 2022 at 12:32 PM
    #26
    ChrisLopez

    ChrisLopez New Member

    Joined:
    Sep 22, 2020
    Member:
    #52630
    Messages:
    222
    Gender:
    Male
    First Name:
    Christian
    Chicago,Illinois
    Vehicle:
    2018 Tundra SR5 TRD off road Crew max
    I like this spot too. Definitely have some thinking to do
     
    Patch999[QUOTED] likes this.
  27. Nov 4, 2022 at 12:48 PM
    #27
    Jaypown

    Jaypown New Member

    Joined:
    Aug 19, 2019
    Member:
    #34878
    Messages:
    2,016
    Gender:
    Male
    First Name:
    Justin
    Rubber City
    Vehicle:
    2020 Tundra TRD Sport CM 4x4 MGM
    I went this route. I like the hidden look but more functional to me to have them up top. Ignore the dirt. I have a 7 month old lol

    34972F62-334E-46B0-8634-BD39C8BD69FD.jpg
     
    Patch999 likes this.
  28. Nov 4, 2022 at 7:22 PM
    #28
    Toptalktoyota

    Toptalktoyota New Member

    Joined:
    Oct 8, 2020
    Member:
    #53289
    Messages:
    159
    Gender:
    Male
    Vehicle:
    2020 DC SX
  29. Nov 6, 2022 at 3:58 PM
    #29
    ChrisLopez

    ChrisLopez New Member

    Joined:
    Sep 22, 2020
    Member:
    #52630
    Messages:
    222
    Gender:
    Male
    First Name:
    Christian
    Chicago,Illinois
    Vehicle:
    2018 Tundra SR5 TRD off road Crew max
    Alright guys just received my kit. I have a black ground, a yellow and 2 reds. One with a 15amp fuse to bolt somewhere and one to tap into a wire. How would I do this install?

    ECDF5DF4-6FD9-451F-BCC7-947BA79B6973.jpg
    0E4588C2-6778-44E6-A362-27E956935BE9.jpg
    C529F683-879D-4685-8D01-57110BE0E8CD.jpg
     

    Attached Files:

Products Discussed in

To Top