-
Welcome to Tundras.com!
You are currently viewing as a guest! To get full-access, you need to register for a FREE account.
As a registered member, you’ll be able to:- Participate in all Tundra discussion topics
- Transfer over your build thread from a different forum to this one
- Communicate privately with other Tundra owners from around the world
- Post your own photos in our Members Gallery
- Access all special features of the site
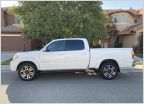 Suggestions on a front leveling kit and tires for 2006 Tundra DC
 Can anyone help me diagnose this leak under the drivers side axle?
 Trying not to tear up fan
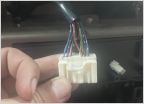 Stock head unit wiring
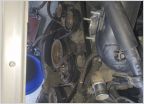 Pulleys and play - how much is normal?
 04 Tundra timing belt kits
How much does a timing belt stretch in its normal lifespan?
Discussion in '1st Gen Tundras (2000-2006)' started by Weagle, Jul 15, 2024.