

-
Welcome to Tundras.com!
You are currently viewing as a guest! To get full-access, you need to register for a FREE account.
As a registered member, you’ll be able to:- Participate in all Tundra discussion topics
- Transfer over your build thread from a different forum to this one
- Communicate privately with other Tundra owners from around the world
- Post your own photos in our Members Gallery
- Access all special features of the site
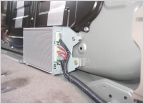 2004 limited doublecab iforce JBL radio harness Saturday headbanger
 Timing Belt & Tune up coming
 Just bought a 2005 DC 4X4 w/ 85k miles - Newbie questions
 Best/brightest headlight bulb swap with no mods???
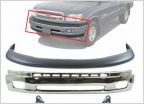 00-02 Steel bumper replacement
 Normal brakes are possible!
I pulled my axle in half while removing the knuckle.. now what?
Discussion in '1st Gen Tundras (2000-2006)' started by Green00SR5, May 4, 2024.
Page 1 of 2
Page 1 of 2


