1. Welcome to Tundras.com!

    You are currently viewing as a guest! To get full-access, you need to register for a FREE account.

    As a registered member, you’ll be able to:
    • Participate in all Tundra discussion topics
    • Transfer over your build thread from a different forum to this one
    • Communicate privately with other Tundra owners from around the world
    • Post your own photos in our Members Gallery
    • Access all special features of the site

Installing Leveling Kit

Discussion in 'Suspension' started by 20-Yoda, Oct 25, 2021.

  1. Oct 25, 2021 at 4:31 PM
    #1
    20-Yoda

    20-Yoda [OP] New Member

    Joined:
    Aug 10, 2020
    Member:
    #50616
    Messages:
    14
    Gender:
    Male
    First Name:
    Chris
    Vehicle:
    2020 Tundra Limited Crew Max 4x4
    Hi all-
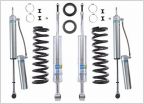
    I am trying to swap my factory Limited struts and shocks with a 2500 mile TRD Off-road set I got ( for a steal ). It came with a 2.5-3 inch rough country leveling kit and is already assembled with springs and all, good to go- or not, here is where I need advice-

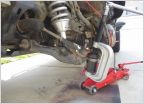
    I dropped the lower control arm by removing the wheel hub from the ball joint/crown nut from the UCA and didn’t have enough room to get the shock into the slot, was odd by MAYBE 1/8 of an inch! If I drop the lower control arm by disconnecting it from the hub assembly will the lower control arm have just a little more play than doing it from the top?
     
  2. Oct 25, 2021 at 5:07 PM
    #2
    Danman34

    Danman34 New Member

    Joined:
    Sep 19, 2018
    Member:
    #19579
    Messages:
    2,636
    Gender:
    Male
    First Name:
    Danny
    Vehicle:
    2018 White Tundra TRD Sport
    You shouldn’t have disconnected the spindle at the uca. That’s a good way to pull the axles out from the differential from the unsupported weight of the hub. You need to disconnect the spindle from the lca at the bottom, leaving the uca connected to the spindle. From there you need to loosen the cam bolt and you can push the lca down more than enough.
     
    Last edited: Oct 25, 2021
    toyofan87 likes this.
  3. Oct 25, 2021 at 6:14 PM
    #3
    Jhon

    Jhon New Member

    Joined:
    Aug 15, 2021
    Member:
    #66794
    Messages:
    219
    Gender:
    Male
    On the Oregon Trail
    Vehicle:
    2021 SR5 TRD OR


    This is by far the best video on YouTube on swapping coilovers. I've used this method twice on a 2nd gen Tacoma and a 5th gen 4Runner and it works awesome.

    Reader's digest version:

    1. Raise truck on jack stands. I prefer really big ones.
    2. Remove wheels
    3. Disconnect sway bar at the lower control arm.
    4. Disconnect lower coilover bolt at the lower control.
    5. Disconnect lower ball joint from knuckle by removing the two lower ball joint nuts. No need to separate the joints.
    6. Mark the alignment cam positions and loosen them. This can be a pain in the dick depending on the age of the truck and salt. I would recommend a healthy soaking with Kroil in the days before you attempt this. I would also suggest pulling the cams and coating them with anti-seize to keep them from seizing to the bushings in the LCA. Swing the LCA out of the way.
    7. Remove the 4 bolts on the top of the coilover and then pull it out the bottom.
    8. Reverse for install.
    I haven't done upper control arms at the same time as a lift but I would use the same method as above if I did to keep the CV shaft from being pulled out or damaging the wheel speed sensor wire. ViktorG has a good video on swapping the UCA out.

     
    dpast88 likes this.

Products Discussed in

To Top