

-
Welcome to Tundras.com!
You are currently viewing as a guest! To get full-access, you need to register for a FREE account.
As a registered member, you’ll be able to:- Participate in all Tundra discussion topics
- Transfer over your build thread from a different forum to this one
- Communicate privately with other Tundra owners from around the world
- Post your own photos in our Members Gallery
- Access all special features of the site
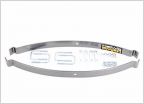 Hellwig helper springs or similar solution?
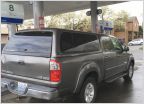 Canopy: keep for future or sell?
 1st Gen steering wheel radio/phone controls - INFO DUMP
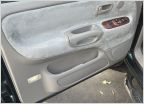 Door panel recover easy DIY
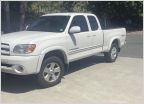 Help me change my all white 2004 limited’s whiteness
 1-1.5” lift for 265/75R16 tires
Passenger seat belt buckle removal on a 70/30 split seat.
Discussion in '1st Gen Tundras (2000-2006)' started by RustyBirf, Sep 10, 2024.


