1. Welcome to Tundras.com!

    You are currently viewing as a guest! To get full-access, you need to register for a FREE account.

    As a registered member, you’ll be able to:
    • Participate in all Tundra discussion topics
    • Transfer over your build thread from a different forum to this one
    • Communicate privately with other Tundra owners from around the world
    • Post your own photos in our Members Gallery
    • Access all special features of the site

Question about front shock/strut installation

Discussion in 'Suspension' started by a522467, Mar 28, 2022.

  1. Mar 28, 2022 at 8:08 AM
    #1
    a522467

    a522467 [OP] Life’s short. Live now.

    Joined:
    Nov 22, 2020
    Member:
    #55238
    Messages:
    237
    Gender:
    Female
    First Name:
    Michelle
    Ohio
    Vehicle:
    2020 Black Tundra Doublecab 4X4 SR5 with SX pkg
    Rear spring upgrade, rear shock upgrade, front & rear sway bars, bed step, bed mat, console organizer & tray, black lug nut covers, rear underseat storage box, black seat covers, Bluetooth CarPlay adapter, LED fogs, blue footwell lighting, LED cargo, reverse, tail, and stop bulbs, tinted tail and 3rd stop/cargo lights, tinted glass all around, tinted front emblem, matte black tailgate emblem inserts, retractable tonneau cover w/trac system and load bars, front facing camera, 8” exhaust upgrade, LED bed lights, 8-ball shifter knob, shifter boot, LED headlights, custom wheel center caps, 3”x30’ tow recovery strap, bed rail clamps, LED puddle lights, phone mount, OBD2 scanner, touchscreen glass protector/overlay, trailer hitch lock, tire traction aid, tinted license plate cover, power relay module, 6-way fuse block with cover, stainless mesh cowl screens, LT265/70R18 A/T tires, driver’s side swing case toolbox, dual air horn kit, rear Husky Liner, cat converter theft deterrent covers, front & rear dash cam, LED tail light bar, trailer plug wiring harness, locking fuel door, matte black interior door handles, glovebox & fuel door keyhole decals, TUNDRA sill plates decals, chalk bag cup holder / trash can, HD Roadmaster active suspension kit, HD front struts, Backlit window control panel, tailgate gap cover, matte black radio surround. https://www.tundras.com/threads/740-yota-2020-sr5-4x4-dc-w-sx-pkg.79742/
    Hi. :wave:
    I want to put Bilstein 5100s on the front to level my truck. I’ve watched a few “how to” videos. They are all a little different. I don’t think I’m physically able to get 220 ft/lbs on the lower ball joint bolts, so I’m trying to avoid that route. Looks like some folks took the upper ball joint apart instead. I’m wondering if it might be easier to just throw a couple spring compressors on and leave both ball joints assembled, if there’s enough room to get the spring/shock assembly out and back in. Maybe too risky/dangerous? Has anyone tried that?
    :notsure:
    Any advice and/or links to good install videos are welcomed. Thanks.
     
  2. Mar 28, 2022 at 8:13 AM
    #2
    des2mtn

    des2mtn On the scenery looking at the road

    Joined:
    Jul 1, 2020
    Member:
    #48721
    Messages:
    4,423
    SW
    Vehicle:
    2004 Black DC Limited 4x4
    Tonto cover
    a522467[OP] likes this.
  3. Mar 28, 2022 at 8:24 AM
    #3
    JLS in WA

    JLS in WA New Member

    Joined:
    Jan 1, 2020
    Member:
    #40610
    Messages:
    1,376
    Gender:
    Male
    Somewhere in the basalt rocks with my dogs
    Vehicle:
    2008 White DC Limited 4x4
    Drahthaar Transport Unit
    Last time I did it I freed up the UCA. First time I did the LCA. I think the UCA is easier.

    Don’t think there is any way it’s coming out without doing one of them.

    Speaking for myself, there is NFW I’m trying to move around a strut with a spring compressor on. I’m getting that baby assembled and then getting it off.
     
    AggiePhil, a522467[OP] and Black Wolf like this.
  4. Mar 28, 2022 at 8:27 AM
    #4
    BroTun13

    BroTun13 New Member

    Joined:
    Jan 7, 2021
    Member:
    #57262
    Messages:
    349
    Gender:
    Male
    First Name:
    Erik
    Beaumont, CA
    Vehicle:
    2021 White Tundra SR5
    The lower ball joint route is easiest in my opinion. It's shouldn't be to hard to get 220 lbs on the lower bolts with a breaker bar or torque wrench. I'm 165 lbs soaking wet and it was a breeze. It's all about leverage.
     
    2mchfun and a522467[OP] like this.
  5. Mar 28, 2022 at 9:03 AM
    #5
    a522467

    a522467 [OP] Life’s short. Live now.

    Joined:
    Nov 22, 2020
    Member:
    #55238
    Messages:
    237
    Gender:
    Female
    First Name:
    Michelle
    Ohio
    Vehicle:
    2020 Black Tundra Doublecab 4X4 SR5 with SX pkg
    Rear spring upgrade, rear shock upgrade, front & rear sway bars, bed step, bed mat, console organizer & tray, black lug nut covers, rear underseat storage box, black seat covers, Bluetooth CarPlay adapter, LED fogs, blue footwell lighting, LED cargo, reverse, tail, and stop bulbs, tinted tail and 3rd stop/cargo lights, tinted glass all around, tinted front emblem, matte black tailgate emblem inserts, retractable tonneau cover w/trac system and load bars, front facing camera, 8” exhaust upgrade, LED bed lights, 8-ball shifter knob, shifter boot, LED headlights, custom wheel center caps, 3”x30’ tow recovery strap, bed rail clamps, LED puddle lights, phone mount, OBD2 scanner, touchscreen glass protector/overlay, trailer hitch lock, tire traction aid, tinted license plate cover, power relay module, 6-way fuse block with cover, stainless mesh cowl screens, LT265/70R18 A/T tires, driver’s side swing case toolbox, dual air horn kit, rear Husky Liner, cat converter theft deterrent covers, front & rear dash cam, LED tail light bar, trailer plug wiring harness, locking fuel door, matte black interior door handles, glovebox & fuel door keyhole decals, TUNDRA sill plates decals, chalk bag cup holder / trash can, HD Roadmaster active suspension kit, HD front struts, Backlit window control panel, tailgate gap cover, matte black radio surround. https://www.tundras.com/threads/740-yota-2020-sr5-4x4-dc-w-sx-pkg.79742/
    Maybe so, but I’m only a 100 lb weakling. I know my limitations.
     
    AggiePhil and BroTun13[QUOTED] like this.
  6. Mar 28, 2022 at 9:15 AM
    #6
    BroTun13

    BroTun13 New Member

    Joined:
    Jan 7, 2021
    Member:
    #57262
    Messages:
    349
    Gender:
    Male
    First Name:
    Erik
    Beaumont, CA
    Vehicle:
    2021 White Tundra SR5
    I think you'll be surprised what a 4' breaker bar can do with the proper technique. I personally had a tougher time positioning the coilovers into place one handed than breaking the ball joint loose. Good luck which ever route you take!
     
    2mchfun and a522467[QUOTED][OP] like this.
  7. Mar 28, 2022 at 9:54 AM
    #7
    a522467

    a522467 [OP] Life’s short. Live now.

    Joined:
    Nov 22, 2020
    Member:
    #55238
    Messages:
    237
    Gender:
    Female
    First Name:
    Michelle
    Ohio
    Vehicle:
    2020 Black Tundra Doublecab 4X4 SR5 with SX pkg
    Rear spring upgrade, rear shock upgrade, front & rear sway bars, bed step, bed mat, console organizer & tray, black lug nut covers, rear underseat storage box, black seat covers, Bluetooth CarPlay adapter, LED fogs, blue footwell lighting, LED cargo, reverse, tail, and stop bulbs, tinted tail and 3rd stop/cargo lights, tinted glass all around, tinted front emblem, matte black tailgate emblem inserts, retractable tonneau cover w/trac system and load bars, front facing camera, 8” exhaust upgrade, LED bed lights, 8-ball shifter knob, shifter boot, LED headlights, custom wheel center caps, 3”x30’ tow recovery strap, bed rail clamps, LED puddle lights, phone mount, OBD2 scanner, touchscreen glass protector/overlay, trailer hitch lock, tire traction aid, tinted license plate cover, power relay module, 6-way fuse block with cover, stainless mesh cowl screens, LT265/70R18 A/T tires, driver’s side swing case toolbox, dual air horn kit, rear Husky Liner, cat converter theft deterrent covers, front & rear dash cam, LED tail light bar, trailer plug wiring harness, locking fuel door, matte black interior door handles, glovebox & fuel door keyhole decals, TUNDRA sill plates decals, chalk bag cup holder / trash can, HD Roadmaster active suspension kit, HD front struts, Backlit window control panel, tailgate gap cover, matte black radio surround. https://www.tundras.com/threads/740-yota-2020-sr5-4x4-dc-w-sx-pkg.79742/
    Thanks. I definitely need to get creative sometimes to get mods done. The cat covers were kinda fun to install by myself. Work smarter, not harder.
     
    2mchfun likes this.
  8. Mar 28, 2022 at 10:04 AM
    #8
    Hbjeff

    Hbjeff New Member

    Joined:
    Jan 20, 2019
    Member:
    #24845
    Messages:
    5,114
    Gender:
    Male
    Huntington Beach
    Vehicle:
    2010 DC 5.7 2wd
    Trd sways, bullydog, magnaflow, sumo springs
    The longest torque wrench at home depot will give you the leverage to get 220ft lbs.

    Look up the videos on you tube about how to use your lower control arm as a spring compressor. It looks way safer than the at home spring compressors
     
    a522467[OP] likes this.
  9. Mar 28, 2022 at 10:08 AM
    #9
    triharder

    triharder Sorry, Not Sorry

    Joined:
    Sep 19, 2017
    Member:
    #9745
    Messages:
    218
    Gender:
    Male
    First Name:
    Jake
    Southern, Maine
    Vehicle:
    2010 RWB Black
    Billstein 6112/5160's, coachbuilder spacer on driver side/ 20" rockstar wheels/ 33" nitto ridge grappers/SS Brake lines (or as most people write Break), Painted Calipers/Powercoated Tow hooks/pocket flairs/heated seats,bed leds/line-x liner/xtang trifold/tow mirrors/Stereo Work/Compustar Remote Starter/ retrofit Morimoto Minin H1 and switch back LEDs/ plenty I'm forgetting
    Whoa there guys.
    Why would anybody break any of their ball joints loose to do this job?

    There are two bolts under the LCA (lower control arm) that you can unbolt to get clearance. You need to loose the LCA (which needs to be marked and does require torque to make up.

    Speaking from experience: failed at upper ball joint on passenger side of the truck. somehow outta pure luck got the shock in. Realized the bolts, on the opposite side and did the job in minutes.

    You'll need an alignment with the new shocks anyway. so you can have them verify torque as long as you make them reasonably tight before limping to alignment station.

    And I strongly recommended you pay to have the spring swapped. Or source new springs, have them assembled and then install as a unit. Its not worth dying over when you have other options.
     
  10. Mar 28, 2022 at 10:16 AM
    #10
    BroTun13

    BroTun13 New Member

    Joined:
    Jan 7, 2021
    Member:
    #57262
    Messages:
    349
    Gender:
    Male
    First Name:
    Erik
    Beaumont, CA
    Vehicle:
    2021 White Tundra SR5
    Sorry those are the bolts I was referring to because the lower ball joint is attached to that bracket. You are correct. Do not detach the ball joint itself
     
    2mchfun likes this.
  11. Mar 28, 2022 at 10:18 AM
    #11
    Rodtheviking

    Rodtheviking New Member

    Joined:
    Jan 8, 2021
    Member:
    #57282
    Messages:
    939
    Gender:
    Male
    First Name:
    Chris
    Vancouver, WA
    Vehicle:
    Sequoia
    2015 Sequoia Platinum, Eibach Pro, Bilstein, Tandem Off Road, 12Deg Rock Sliders, RCI, Sherpa Rack
    1/2 inch cordless impact wrench.. best money I have spent in a while. It will make short work of the lower control arm bolts. Just mark where the cam bolts are and loosen them just enough for the arm to drop. You need an alignment anyway so just get them back to the marks you made and dack-dack them back tight.
     
  12. Mar 28, 2022 at 10:29 AM
    #12
    triharder

    triharder Sorry, Not Sorry

    Joined:
    Sep 19, 2017
    Member:
    #9745
    Messages:
    218
    Gender:
    Male
    First Name:
    Jake
    Southern, Maine
    Vehicle:
    2010 RWB Black
    Billstein 6112/5160's, coachbuilder spacer on driver side/ 20" rockstar wheels/ 33" nitto ridge grappers/SS Brake lines (or as most people write Break), Painted Calipers/Powercoated Tow hooks/pocket flairs/heated seats,bed leds/line-x liner/xtang trifold/tow mirrors/Stereo Work/Compustar Remote Starter/ retrofit Morimoto Minin H1 and switch back LEDs/ plenty I'm forgetting
    I believe the technical term is Ugga-Gugga's.
     
  13. Mar 28, 2022 at 10:46 AM
    #13
    joseph_womack

    joseph_womack @ 4x4bound

    Joined:
    Nov 3, 2020
    Member:
    #54467
    Messages:
    1,004
    Gender:
    Male
    First Name:
    Joe
    Louisiana
    Vehicle:
    2007 RCLB, 4WD, 4.7L V8
    3/1 Lift, 35s, Front Bumper, etc etc
    Here's the step by step process I followed to install my front suspension:
    1. Jack truck up (place jackstands underneath)
    2. Take wheel off
    3. I left the tie rod attached to the spindle; turn the brake rotor as if you were turning the wheel to give you a clear look at the Upper Control Arm to Spindal mount.
    4. Pull cottor pin off castle nut, break castle nut loose, then loosen a couple threads.
    5. You will most likely have to hit the spindle with a mallet to break the ball joint on the upper control arm loose from the spindal, you'll see a pad on the spindal to strike- warning you will have to hit hard (if you can't manage to break the ball joint loose, get you a small torch from Home Depot and heat the spindal thats around the threads of the ball joint- then hit hard again)
    6. Once the spindal and UCA are free from each other, take a ratchet strap to the brake rotor to kinda of hang it off to the side of the wheel well (be careful of the ABS sensor line and brake line)
    7. From there you can bust the bottom bolt of the coilover and take that off, then loosen the 4 bolts holding the top of the coilover to the strut tower.
    8. After that you'll need to take a pry bar to the base of the shock and pry it out of the mounting hole its in. Once its out of the hole, then take of the nuts on the top of the shock tower and drop your coilover out.
    Just repeat steps in backwards order (remember to reinstall a cottor pin) and if you got oil and dirt on your brake rotor you might want to spray with brake clean.
    If you can't rotate the brake rotor back over because the CV shaft doesn't want articulate over, it could be because your CV shaft has slid out of the spindal a little bit, stick a screw driver between the lug nut studs off the brake rotor and spin the CV shaft while pulling the rotor over, the shaft should slide into place.

    I might be missing some steps, I believe this was the video I followed: https://www.youtube.com/watch?v=Oo5G6j2cDF0
    Granted I was also a mechanic for a year so this was pretty easy for me, and I already had the tools necessary
     
    AggiePhil, JLS in WA and a522467[OP] like this.
  14. Mar 28, 2022 at 5:50 PM
    #14
    JLS in WA

    JLS in WA New Member

    Joined:
    Jan 1, 2020
    Member:
    #40610
    Messages:
    1,376
    Gender:
    Male
    Somewhere in the basalt rocks with my dogs
    Vehicle:
    2008 White DC Limited 4x4
    Drahthaar Transport Unit
    ^^^^ exactly what I did last time
     
    joseph_womack likes this.
  15. Mar 29, 2022 at 11:54 AM
    #15
    triharder

    triharder Sorry, Not Sorry

    Joined:
    Sep 19, 2017
    Member:
    #9745
    Messages:
    218
    Gender:
    Male
    First Name:
    Jake
    Southern, Maine
    Vehicle:
    2010 RWB Black
    Billstein 6112/5160's, coachbuilder spacer on driver side/ 20" rockstar wheels/ 33" nitto ridge grappers/SS Brake lines (or as most people write Break), Painted Calipers/Powercoated Tow hooks/pocket flairs/heated seats,bed leds/line-x liner/xtang trifold/tow mirrors/Stereo Work/Compustar Remote Starter/ retrofit Morimoto Minin H1 and switch back LEDs/ plenty I'm forgetting
    When i did this i stripped the castle nut, which was seized to my upper ball joint. Then i had to dremel it off after finding an replacement to replace.
    Hence the struggle with doing this technique.
    Other side i loosened the LCA bolt, then loosned the two bolts that bolt the lower ball joint to the LCA and slowly with a jack dropped it low enough to swap out the strut assembly.

    Easy-peasy. Reinstalled the ball joint to the LCA with the two bolts lifting the assembly with a jack (watching to make sure i wasn't lifting the truck off the lift it was on (i was lucky enought o be able to use a lift). Then re-adjusted the cam bolts back to where they started. Finally went to get an alignment.

    Not saying anybodies way is wrong. Just saying this is what worked best for me. AFter failing to get the upper ball joint apart.
     
    joseph_womack likes this.
  16. Mar 29, 2022 at 11:58 AM
    #16
    joseph_womack

    joseph_womack @ 4x4bound

    Joined:
    Nov 3, 2020
    Member:
    #54467
    Messages:
    1,004
    Gender:
    Male
    First Name:
    Joe
    Louisiana
    Vehicle:
    2007 RCLB, 4WD, 4.7L V8
    3/1 Lift, 35s, Front Bumper, etc etc
    Is your truck rusty?
     
  17. Mar 29, 2022 at 11:59 AM
    #17
    triharder

    triharder Sorry, Not Sorry

    Joined:
    Sep 19, 2017
    Member:
    #9745
    Messages:
    218
    Gender:
    Male
    First Name:
    Jake
    Southern, Maine
    Vehicle:
    2010 RWB Black
    Billstein 6112/5160's, coachbuilder spacer on driver side/ 20" rockstar wheels/ 33" nitto ridge grappers/SS Brake lines (or as most people write Break), Painted Calipers/Powercoated Tow hooks/pocket flairs/heated seats,bed leds/line-x liner/xtang trifold/tow mirrors/Stereo Work/Compustar Remote Starter/ retrofit Morimoto Minin H1 and switch back LEDs/ plenty I'm forgetting
    In New England a 8 year old (truck) when i did this wasn't too bad in the rust department.

    However, my bilstiens look like they've lived at the bottom of the ocean with surface rust. The aluminzeding is the chrome moly shaft i believe not the shock body. But down south you don't have these issues unless you live on the ocean front.
     
    joseph_womack likes this.
  18. Mar 29, 2022 at 1:11 PM
    #18
    skip1980

    skip1980 New Member

    Joined:
    Apr 14, 2020
    Member:
    #45020
    Messages:
    188
    Gender:
    Male
    Columbia, Missouri
    I just replaced mine about a month ago. Separate upper ball joint and removed lower strut bolt. No need to removed the 2 lower ball joint bolts that go in vertically. Of course you must disconnect sway bar link also.
     
    AggiePhil and joseph_womack like this.
  19. Mar 29, 2022 at 1:27 PM
    #19
    pvn.beluga

    pvn.beluga New Member

    Joined:
    Dec 28, 2020
    Member:
    #56744
    Messages:
    2,009
    Gender:
    Male
    First Name:
    Phuc (Phooc)
    Connecticut
    Definitely take a look at this video:

    https://youtu.be/hpFb6f8rJjU

    Snailtrail4x4 makes it extremely simple to do your fronts and rears. It’s not as hard as it seems, but you’ll definitely want a breaker bar and cheater tube for some of the higher torqued nuts.
     
    AggiePhil and joseph_womack like this.
  20. Mar 29, 2022 at 5:54 PM
    #20
    JLS in WA

    JLS in WA New Member

    Joined:
    Jan 1, 2020
    Member:
    #40610
    Messages:
    1,376
    Gender:
    Male
    Somewhere in the basalt rocks with my dogs
    Vehicle:
    2008 White DC Limited 4x4
    Drahthaar Transport Unit
    Best money you’ll spend for this job is a cordless impact wrench and a torque wrench.

    Screw the cheater bar.
     
  21. Mar 29, 2022 at 9:02 PM
    #21
    joseph_womack

    joseph_womack @ 4x4bound

    Joined:
    Nov 3, 2020
    Member:
    #54467
    Messages:
    1,004
    Gender:
    Male
    First Name:
    Joe
    Louisiana
    Vehicle:
    2007 RCLB, 4WD, 4.7L V8
    3/1 Lift, 35s, Front Bumper, etc etc
    Totally forgot about the sway bar, had already pulled mine off for off road articulation :fistbump:
     
    pvn.beluga likes this.
  22. Mar 29, 2022 at 9:03 PM
    #22
    joseph_womack

    joseph_womack @ 4x4bound

    Joined:
    Nov 3, 2020
    Member:
    #54467
    Messages:
    1,004
    Gender:
    Male
    First Name:
    Joe
    Louisiana
    Vehicle:
    2007 RCLB, 4WD, 4.7L V8
    3/1 Lift, 35s, Front Bumper, etc etc
    Yep that’s why I was curious, I’m in the south so no rust issues, hopefully OP won’t have any rust issues as well
     
    a522467[OP] likes this.
  23. Mar 30, 2022 at 7:09 AM
    #23
    pvn.beluga

    pvn.beluga New Member

    Joined:
    Dec 28, 2020
    Member:
    #56744
    Messages:
    2,009
    Gender:
    Male
    First Name:
    Phuc (Phooc)
    Connecticut
    True, but good luck fitting the impact with a 22mm when you’re trying to take out the UCA through bolt which is torqued to 173 ft/lbs…
     
    2mchfun, a522467[OP] and des2mtn like this.
  24. Mar 30, 2022 at 7:30 AM
    #24
    Hbjeff

    Hbjeff New Member

    Joined:
    Jan 20, 2019
    Member:
    #24845
    Messages:
    5,114
    Gender:
    Male
    Huntington Beach
    Vehicle:
    2010 DC 5.7 2wd
    Trd sways, bullydog, magnaflow, sumo springs
    Home depot sells a 2 foot long breaker bar. Still requires some mustard but it will loosen the uca bolt no problem
     
    a522467[OP] likes this.
  25. Mar 30, 2022 at 8:14 AM
    #25
    vtl

    vtl New Member

    Joined:
    Mar 23, 2020
    Member:
    #44238
    Messages:
    2,877
    Gender:
    Male
    Boston 'burbs
    Vehicle:
    2019 Red SR5 DC 4x4
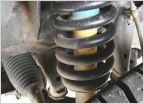
    $80-100 spring compressor from ebay will do it easily. In fact, it takes me more sweat doing suspension in my old Volvo than in Tundra, you just have to compress spring lot more in Volvo.
    [​IMG]

    I put 5100 in the middle setting, and the suspension turn out to be noticeably firmer than with 4600. Also you camber will be not at zero (positive) anymore, need to force technician to correct that along with the toe when you'll bring your upgraded truck for alignment. Camber will be "within the spec", but it'd better be zeroed.

    It helps to unbolt ABS sensor wire, gives much more flexibility with pulling the LCA down.

    [​IMG]

    [​IMG]
     
    This site contains affiliate links for which the site may be compensated.
    #25
    a522467[OP] and joseph_womack like this.
  26. Mar 30, 2022 at 9:00 AM
    #26
    Hbjeff

    Hbjeff New Member

    Joined:
    Jan 20, 2019
    Member:
    #24845
    Messages:
    5,114
    Gender:
    Male
    Huntington Beach
    Vehicle:
    2010 DC 5.7 2wd
    Trd sways, bullydog, magnaflow, sumo springs
    Wow that spring compressor looks way stronger than autozones
     
    2mchfun and joseph_womack like this.
  27. Mar 31, 2022 at 3:07 AM
    #27
    MALIBU1794DC

    MALIBU1794DC New Member

    Joined:
    Feb 25, 2022
    Member:
    #75115
    Messages:
    98
    Gender:
    Male
    Vehicle:
    2019 Double cab 1794

    I'm about to do this job this weekend at home.

    I have the Milwaukee m12 right-angle impact it makes 220 lbs/ft of torque.

    It's an excellent tool.
    Definitely the right tool, at certain moments.

    The one on the left.

    milwaukee-impact-wrenches-2554-20-2564-20-2567-20-2485-20-64_600.jpg
     
    Last edited: Mar 31, 2022
    joseph_womack and AggiePhil like this.
  28. Mar 31, 2022 at 8:14 AM
    #28
    AggiePhil

    AggiePhil Texas Chapter President

    Joined:
    Jun 16, 2020
    Member:
    #48017
    Messages:
    1,437
    Gender:
    Male
    College Station, TX
    Vehicle:
    2020 Smoked Mesquite Platinum 4x4
    Let us know if it fits in there to remove the UCA bolt. I have a nice DeWalt impact wrench but it wouldn't fit in that spot.
     
  29. Mar 31, 2022 at 9:43 AM
    #29
    joseph_womack

    joseph_womack @ 4x4bound

    Joined:
    Nov 3, 2020
    Member:
    #54467
    Messages:
    1,004
    Gender:
    Male
    First Name:
    Joe
    Louisiana
    Vehicle:
    2007 RCLB, 4WD, 4.7L V8
    3/1 Lift, 35s, Front Bumper, etc etc
    Are we talking the UCA bolt for the ball joint? Or the bolt actually holding the UCA onto the truck?
     
  30. Mar 31, 2022 at 9:44 AM
    #30
    AggiePhil

    AggiePhil Texas Chapter President

    Joined:
    Jun 16, 2020
    Member:
    #48017
    Messages:
    1,437
    Gender:
    Male
    College Station, TX
    Vehicle:
    2020 Smoked Mesquite Platinum 4x4
    I'm talking about the long one holding the UCA in. Looking to replace the UCA when I do the lift, since I'll already have everything taken apart.
     
    joseph_womack[QUOTED] likes this.

Products Discussed in

To Top