1. Welcome to Tundras.com!

    You are currently viewing as a guest! To get full-access, you need to register for a FREE account.

    As a registered member, you’ll be able to:
    • Participate in all Tundra discussion topics
    • Transfer over your build thread from a different forum to this one
    • Communicate privately with other Tundra owners from around the world
    • Post your own photos in our Members Gallery
    • Access all special features of the site

Running wires from engine bay to cab

Discussion in '1st Gen Tundras (2000-2006)' started by Voss, Jun 12, 2021.

  1. Jun 12, 2021 at 2:43 PM
    #1
    Voss

    Voss [OP] Dust in the wind

    Joined:
    Feb 28, 2019
    Member:
    #26833
    Messages:
    1,458
    Gender:
    Male
    First Name:
    Valod
    Vehicle:
    2003 AC TRD 4x4
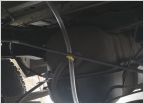
    I’m trying to figure out how to run wiring for the front locker into the cab and would like some input/your opinions. I’ve run some wires through the section on the driver side but there isn’t room for the harness.

    Harness:
    67C15C5C-B706-43E1-88F2-B4F72953617D.jpg

    Driver side that’s pretty much stuffed:
    D2CF9CC9-A243-4F6B-A5E9-BC849C1634BB.jpg

    I ran the compressor wiring through here but the harness for the locker is fairly thick which makes me hesitant to run it here:
    DD85C2DA-052B-4B07-BD71-12DEAD16B58D.jpg

    Did see this on the passenger side and considering cutting a hole to fit the harness:
    A37A7FFD-9CE5-48DB-BCF6-34B2AE592692.jpg

    Any thoughts on which location would be best, any areas you all have run wires not in above pics?

    Thanks!
     
  2. Jun 12, 2021 at 3:08 PM
    #2
    des2mtn

    des2mtn On the scenery looking at the road

    Joined:
    Jul 1, 2020
    Member:
    #48721
    Messages:
    4,372
    SW
    Vehicle:
    2004 Black DC Limited 4x4
    Tonto cover
    I've been able to push different connectors through both those driver and passenger grommets, you should be able to as well. Carefully cut a hole, stick a piece of bailing wire through first and either wrap it or tape it to that connector to help work it through. If you're worried about water getting through the incision when you're done, use some epoxy or liquid tape to seal it back up.
     
    Darkness and Voss[OP] like this.
  3. Jun 12, 2021 at 3:19 PM
    #3
    empty_lord

    empty_lord They see me rollin'

    Joined:
    Feb 1, 2019
    Member:
    #25441
    Messages:
    10,101
    Gender:
    Male
    First Name:
    Dan
    Indiana, Chicagoland
    Vehicle:
    05 rollover special
    custom body work, Billies with taco ARB springs, Icon AAL, TRD FJ trail team wheels, 2019 Toyota 86 radio, Blacked out interior, Added factory power everything, heater mirrors, ETC
    I went through the floor pan on the passenger side. But I happened to have a spare grommet from the driver side floor pan
     
    Darkness, Voss[OP] and des2mtn like this.
  4. Jun 12, 2021 at 3:21 PM
    #4
    assassin10000

    assassin10000 New Member

    Joined:
    Oct 27, 2020
    Member:
    #54157
    Messages:
    2,131
    First Name:
    Andrew
    Northern CA
    Vehicle:
    '05 SR5 AC
    Remote start alarm Removed keyless entry piezo Qi phone charger & dash mount Subaru underseat subwoofer Hopkins Easylift Steering wheel audio controls No-tenna mod 3/4 adhesive anti-rattle shim D/S door
    De-pin the connector and fish wires through the existing hole?

    Or cut, feed through and splice back together after.
     
  5. Jun 12, 2021 at 3:38 PM
    #5
    Voss

    Voss [OP] Dust in the wind

    Joined:
    Feb 28, 2019
    Member:
    #26833
    Messages:
    1,458
    Gender:
    Male
    First Name:
    Valod
    Vehicle:
    2003 AC TRD 4x4
    Thanks guys!
     

Products Discussed in

To Top