1. Welcome to Tundras.com!

    You are currently viewing as a guest! To get full-access, you need to register for a FREE account.

    As a registered member, you’ll be able to:
    • Participate in all Tundra discussion topics
    • Transfer over your build thread from a different forum to this one
    • Communicate privately with other Tundra owners from around the world
    • Post your own photos in our Members Gallery
    • Access all special features of the site

Go Rhino E-1 Power Running Boards

Discussion in '3rd Gen Tundras (2022+)' started by cartage1, Jul 28, 2023.

  1. Jan 16, 2024 at 7:16 AM
    #31
    raylo

    raylo not so new member

    Joined:
    Oct 1, 2021
    Member:
    #68780
    Messages:
    2,234
    Gender:
    Male
    Frederick, MD
    Vehicle:
    2023 SR5 DC 6.5 bed Lunar Rock, TRD OR +Options
    DashCam, amp & sub, DIY rear seat delete, cat shield
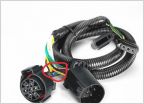
    Interesting, many conductors. I believe the RB switch is only 2, simple on/off single pole. I guess you can just cut off the unused wires.

     
    This site contains affiliate links for which the site may be compensated.
    #31
  2. Jan 16, 2024 at 7:37 AM
    #32
    rlc177

    rlc177 Data Logger

    Joined:
    Jan 2, 2023
    Member:
    #89650
    Messages:
    289
    Gender:
    Male
    Northeast PA
    For the OEM style switch there are 2 wires for the on/off connection, 2 for the backlight and an additional ground to operate the on indicator LED. the on/off wires I spliced into E1 module wires and the 2 for the backlight I put into the OEM connector that happened to be shoved into the blanking panel. And the remaing wire I just tied off.

    Its just the go rhino switch in the "on" position is actually open circuit.
     
  3. Jan 16, 2024 at 7:45 AM
    #33
    raylo

    raylo not so new member

    Joined:
    Oct 1, 2021
    Member:
    #68780
    Messages:
    2,234
    Gender:
    Male
    Frederick, MD
    Vehicle:
    2023 SR5 DC 6.5 bed Lunar Rock, TRD OR +Options
    DashCam, amp & sub, DIY rear seat delete, cat shield
    Yup, the switch "off" probably makes ground to disable the boards.

     
  4. Jan 16, 2024 at 7:49 AM
    #34
    rlc177

    rlc177 Data Logger

    Joined:
    Jan 2, 2023
    Member:
    #89650
    Messages:
    289
    Gender:
    Male
    Northeast PA
  5. Jan 16, 2024 at 10:43 AM
    #35
    MaxPayne3

    MaxPayne3 New Member

    Joined:
    Dec 22, 2023
    Member:
    #108909
    Messages:
    216
    Gender:
    Male
    Vehicle:
    2024 Lunar Rock SR5 Crew Cab
    Just starting out but never will be done
    I bought the Rough Country E boards. After doing some research, I found that all of the aftermarket electronic running boards for Gen 3 Tundras are likely manufactured by the same company and just marketed under different name brands. I had the same issues with the wiring harness not being long enough and had to extend the wires for the driver side magnet sensor as well as the on off switch. I was going to install the AOB power switch but I am out of switch panel blanks. I ended up mounting the switch to the driver side under dash cover. I'm not going to be constantly turning them off and on so not a big deal for me.
    At some point I'm going to have to elongate the most rearward mounting bracket slots because the front and middle parts of the boards tuck up about 3/8" of an inch to the body wile the rear part of the board is 3/4 off the body.
     
  6. Jan 16, 2024 at 10:52 AM
    #36
    raylo

    raylo not so new member

    Joined:
    Oct 1, 2021
    Member:
    #68780
    Messages:
    2,234
    Gender:
    Male
    Frederick, MD
    Vehicle:
    2023 SR5 DC 6.5 bed Lunar Rock, TRD OR +Options
    DashCam, amp & sub, DIY rear seat delete, cat shield
    Sounds like they may have sent you an out of spec bracket. Why not ask them for a replacement.

     
  7. Jan 16, 2024 at 11:17 AM
    #37
    MaxPayne3

    MaxPayne3 New Member

    Joined:
    Dec 22, 2023
    Member:
    #108909
    Messages:
    216
    Gender:
    Male
    Vehicle:
    2024 Lunar Rock SR5 Crew Cab
    Just starting out but never will be done
    I don't think it will make a difference. I have a friend that bought a set off of e boards from Amazon for his Tundra for $1400. Was the exact set as my Rough Country minus the Rough country stickers. Same wiring instructions, brackets, motors, etc. Same issue with his rear brackets as well. Probably would get another set of the brackets with the motors attached out of spec. Probably something in the casting. It's easier for me to just take my brackets off and use a drill press to elongate the slots. Looking at the pictures online of the Go Rhino, everything looks exactly like my RC kit and my friends Amazon set, down to the LED pods. I ended up going with the RC's because they were only $800 opposed to the $1400 my friend paid for the Amazon ones and the $1850 that Go Rhino is charging for theirs.
     
  8. Jan 16, 2024 at 12:08 PM
    #38
    matth66

    matth66 New Member

    Joined:
    Jul 25, 2022
    Member:
    #81123
    Messages:
    261
    Gender:
    Male
    First Name:
    matt
    Nor cal
    Vehicle:
    2023 Black Tundra Trd Pro
    I believe the switch goes to a relay. You need to swap the wires from normally open to normally close. Might need to swap out to a different relay. Then it will work how you want
     
    This site contains affiliate links for which the site may be compensated.
    #38
  9. Jan 16, 2024 at 1:10 PM
    #39
    MaxPayne3

    MaxPayne3 New Member

    Joined:
    Dec 22, 2023
    Member:
    #108909
    Messages:
    216
    Gender:
    Male
    Vehicle:
    2024 Lunar Rock SR5 Crew Cab
    Just starting out but never will be done
    I don't believe you would need a relay because there is already a relay built into the control module. As rlc177 mentioned the switch from the kit is an off/on switch. The on off switch from AOB for Accessory Power is also a latching on off switch (not a momentary switch). It's just a fancier switch with backlighting and a power light indicator.
     
    raylo likes this.
  10. Jan 16, 2024 at 1:25 PM
    #40
    raylo

    raylo not so new member

    Joined:
    Oct 1, 2021
    Member:
    #68780
    Messages:
    2,234
    Gender:
    Male
    Frederick, MD
    Vehicle:
    2023 SR5 DC 6.5 bed Lunar Rock, TRD OR +Options
    DashCam, amp & sub, DIY rear seat delete, cat shield
    No relays... transistors. These bypass switches just make or break ground to a connection on the circuit board which enables or disables the device function. Just like a valet switch on an alarm system.

     
  11. Jan 16, 2024 at 1:54 PM
    #41
    rlc177

    rlc177 Data Logger

    Joined:
    Jan 2, 2023
    Member:
    #89650
    Messages:
    289
    Gender:
    Male
    Northeast PA
    The switch I wired in works fine for my needs its a little nicer than what they gave in the kit. I had to extend the wires a bit from what go rhino gave.
     
  12. Jan 16, 2024 at 7:36 PM
    #42
    matth66

    matth66 New Member

    Joined:
    Jul 25, 2022
    Member:
    #81123
    Messages:
    261
    Gender:
    Male
    First Name:
    matt
    Nor cal
    Vehicle:
    2023 Black Tundra Trd Pro
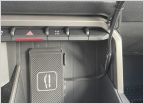
    I looked at the diagram, you could do it with your own relay to get the function of the switch, but I like you are just going to not connect the on indicator lite. Not really worth the effort. Here’s the switch I ordered. upload_2024-1-16_19-36-37.jpg
     
  13. Jan 22, 2024 at 7:53 AM
    #43
    raylo

    raylo not so new member

    Joined:
    Oct 1, 2021
    Member:
    #68780
    Messages:
    2,234
    Gender:
    Male
    Frederick, MD
    Vehicle:
    2023 SR5 DC 6.5 bed Lunar Rock, TRD OR +Options
    DashCam, amp & sub, DIY rear seat delete, cat shield
    Just to update this thread with some more info... My idea to perhaps tap the door pin switch trigger wires instead of using the magnets won't work. I just got my E1 kit and examined and tested the magnetic sensor harnesses and they work the opposite of what I had been thinking. Each pair of sensors is wired in series and have normally shut contacts with the magnets present (doors shut). With both doors shut you have continuity to ground, then if either door is opened that opens the circuit and removes the connection to ground, which tells the controller to deploy that board. Whereas the door pin switches normally show +12V or open circuit when the doors are shut and ground when opened. Just the opposite. You could make this work by adding some relays to reverse the signal, but that would defeat the purpose of simplifying the installation. Oh well... magnets it is.
     
    Last edited: Jan 22, 2024
    ChucklesToy likes this.
  14. Jan 22, 2024 at 9:41 AM
    #44
    MaxPayne3

    MaxPayne3 New Member

    Joined:
    Dec 22, 2023
    Member:
    #108909
    Messages:
    216
    Gender:
    Male
    Vehicle:
    2024 Lunar Rock SR5 Crew Cab
    Just starting out but never will be done
    Nothing is simpler than the magnets, except for the other style that plugs into the OBD and works from CAN Bus signal like the factory ones. Adding 4 additional relays would definitely work but add a lot more labor and some cost. I would only consider it for the clean look, but the magnets are only seen when the doors are open. It just takes some patience and measuring to get the sensors aligned. That was one of the easiest parts for me putting my whole system in.
     
    ChucklesToy likes this.
  15. Jan 25, 2024 at 7:20 AM
    #45
    raylo

    raylo not so new member

    Joined:
    Oct 1, 2021
    Member:
    #68780
    Messages:
    2,234
    Gender:
    Male
    Frederick, MD
    Vehicle:
    2023 SR5 DC 6.5 bed Lunar Rock, TRD OR +Options
    DashCam, amp & sub, DIY rear seat delete, cat shield
    Since the terrible weather is still preventing me from installing my E1's I went into the electrical schematics and sketched out how the boards can be made to work by tapping the door pin switches instead of using the provided magnetic switches. This can be put together for cheap, Amazon has a 5 pack of micro relays for $13, so I am going to put this together and have when I get around to do my installation. I'd need to find a constant +12V source in the sill wire bundles or run a new one. Otherwise just simple taps on the door trigger wires and a connection to ground. The sketch includes diodes... which would require cutting the wires to splice these in... intended to isolate the BCM wires to the pin switches, but I suspect that they aren't necessary as the BCM will likely already have that protection built in to prevent damage from shorts and surges from any source. I'll most likely use the magnets, but depending on what I find when I get in there I might just do this instead. We'll see...TundraRhinoRelays.jpg
     
    Last edited: Jan 25, 2024
  16. Jan 26, 2024 at 2:28 PM
    #46
    raylo

    raylo not so new member

    Joined:
    Oct 1, 2021
    Member:
    #68780
    Messages:
    2,234
    Gender:
    Male
    Frederick, MD
    Vehicle:
    2023 SR5 DC 6.5 bed Lunar Rock, TRD OR +Options
    DashCam, amp & sub, DIY rear seat delete, cat shield
    We had a 72 degree dry day so I got out there and did the install. Just with the magnets, at least for now. The steps seem to be good quality, plenty sturdy and function flawlessly. Only functional issue is, as an earlier poster mentioned, there is no time delay so if you open the back to toss something in the steps cycle shut after you shut the door and before you open the driver's door. Minor thing, but there will be a good number of unnecessary extra cycles.

    And one thing I don't like about these boards... and it is my fault for not doing enough research... they don't go low enough, especially if you are a taller person. The open steps sit right at 14" off the ground on my SR5 OR. The remaining step up to the cab is only 10". So taller folks will basically have to do a bit of a one legged squat to sit back down into the truck. I guess I should have done more research. I knew the Amp XLs go really low for lifted trucks but I assumed the others were all a standard height. These aren't as bad as fixed steps, and my GF will love them for sure. But I may not use them all the time for myself.

    IMG_5194.jpg
     
    cartage1[OP] and ChucklesToy like this.
  17. Jan 28, 2024 at 5:22 AM
    #47
    raylo

    raylo not so new member

    Joined:
    Oct 1, 2021
    Member:
    #68780
    Messages:
    2,234
    Gender:
    Male
    Frederick, MD
    Vehicle:
    2023 SR5 DC 6.5 bed Lunar Rock, TRD OR +Options
    DashCam, amp & sub, DIY rear seat delete, cat shield
    Max, after looking at the components in my kit and seeing the identical pieces on the Rough Country website listing, I believe you are spot on about this. I did look at those once upon a time before buying mine from Rhino, because they were such a good price, but the RC offering is only for the CrewMax and they don't have a DC version. And they don't offer the bedliner sprayed boards version, but that wouldn't have been a deal breaker for me.

    And now I am slapping myself in the head again because I probably could have got the RC CrewMax kit and just cut the boards down from 87" to 80". Might have had to figure out a way to get one of the end caps off non-destructively and then epoxy it back on, but that could work. Bottom line, folks looking for these boards should strongly consider getting them from RC... like half the price.

     
    MaxPayne3[QUOTED] likes this.
  18. Jan 28, 2024 at 8:14 AM
    #48
    matth66

    matth66 New Member

    Joined:
    Jul 25, 2022
    Member:
    #81123
    Messages:
    261
    Gender:
    Male
    First Name:
    matt
    Nor cal
    Vehicle:
    2023 Black Tundra Trd Pro
    So seeing what you described I went with
    The switch below, so when it is in the on position the e boards will be “over ridden” and remain closed. Thank you for the info

    upload_2024-1-28_8-13-38.jpg
     
    This site contains affiliate links for which the site may be compensated.
    #48
  19. Jan 28, 2024 at 8:52 AM
    #49
    raylo

    raylo not so new member

    Joined:
    Oct 1, 2021
    Member:
    #68780
    Messages:
    2,234
    Gender:
    Male
    Frederick, MD
    Vehicle:
    2023 SR5 DC 6.5 bed Lunar Rock, TRD OR +Options
    DashCam, amp & sub, DIY rear seat delete, cat shield
    Do you have a link for this override switch? I haven't decided what to do with the Rhino switch. For now it is at the console but it would be easy to extend the wires and put one of these in that lower panel.

     
  20. Jan 28, 2024 at 11:44 AM
    #50
    matth66

    matth66 New Member

    Joined:
    Jul 25, 2022
    Member:
    #81123
    Messages:
    261
    Gender:
    Male
    First Name:
    matt
    Nor cal
    Vehicle:
    2023 Black Tundra Trd Pro
    CH4X4 industries, I was trying to make a custom switch and couldn’t come up with a good idea so I emailed them and they shot me some ideas and that was the one I picked really easy to work with
     
    raylo likes this.
  21. Jan 28, 2024 at 11:59 AM
    #51
    raylo

    raylo not so new member

    Joined:
    Oct 1, 2021
    Member:
    #68780
    Messages:
    2,234
    Gender:
    Male
    Frederick, MD
    Vehicle:
    2023 SR5 DC 6.5 bed Lunar Rock, TRD OR +Options
    DashCam, amp & sub, DIY rear seat delete, cat shield
    I just visited their site earlier today and don't see that switch. Did they give a SKU or part number on your order?

    Edit: Oh, I see, that is a custom design that they came up with. I like it. For now I am going to use a cheaper lightbar switch and just print a steps logo of some sort, glue it on, and laminate it or cover it with a thin coat of polyurethane. Not gonna bother wiring up the lights.

     
    Last edited: Jan 28, 2024
  22. Jan 29, 2024 at 8:17 AM
    #52
    raylo

    raylo not so new member

    Joined:
    Oct 1, 2021
    Member:
    #68780
    Messages:
    2,234
    Gender:
    Male
    Frederick, MD
    Vehicle:
    2023 SR5 DC 6.5 bed Lunar Rock, TRD OR +Options
    DashCam, amp & sub, DIY rear seat delete, cat shield
    Here is what I plan to glue onto my square switch. I suppose this could also be used for a custom switch at CH4x4 or wherever. It should print the image 20mmx20mm which will fit on the switch.
    TundraStepsSwitch.jpg
     
    matth66 likes this.
  23. Jan 30, 2024 at 12:43 PM
    #53
    raylo

    raylo not so new member

    Joined:
    Oct 1, 2021
    Member:
    #68780
    Messages:
    2,234
    Gender:
    Male
    Frederick, MD
    Vehicle:
    2023 SR5 DC 6.5 bed Lunar Rock, TRD OR +Options
    DashCam, amp & sub, DIY rear seat delete, cat shield
    Question for any of you guys that DIY'ed the Rhino E1's... The directions said to remove the B-pillars to run the mag sensors and harness. I popped it free on the bottom but couldn't get the top loose. I was able to finish the install like that, but it wasn't ideal. I'd like to get back in there and clean that part up a bit. What's the trick to removing those B-pillars??
     
  24. Jan 30, 2024 at 12:56 PM
    #54
    MaxPayne3

    MaxPayne3 New Member

    Joined:
    Dec 22, 2023
    Member:
    #108909
    Messages:
    216
    Gender:
    Male
    Vehicle:
    2024 Lunar Rock SR5 Crew Cab
    Just starting out but never will be done
    You just didn't pull hard enough, the bottom of the b pillars have a white panel clip that goes directly into the body, the upper part clips into the plastic top piece that has the seat belt attachment. This is where the 2 trim panels are different colors. Part of the key to getting that top part separated from the seat belt trim panel is to pull out one side away from the door weather stripping and "roll it" towards the inside of the truck to get it to clear the weather-stripping and break loose from the seat belt trim piece at the same time. Takes a little bit more force than the bottom section.
     
    cartage1[OP] and raylo[QUOTED] like this.
  25. Jan 31, 2024 at 1:44 PM
    #55
    ChucklesToy

    ChucklesToy Retired

    Joined:
    Apr 13, 2016
    Member:
    #3129
    Messages:
    1,128
    Gender:
    Male
    First Name:
    Chuck
    Georgetown , TX
    Vehicle:
    2024 Honda Ridgeline Black Edition
    I went to their web site to the "custom switches" section https://www.ch4x4.com/product/ch4x4-custom-laser-etched-cube-push-switch-for-toyota/
    and ordered one that looks like the step, but choosing one of the designs from the design tab ("CHOOSE FROM DESIGNS").
    upload_2024-1-31_15-41-46.png
     
    raylo[QUOTED] likes this.
  26. Jan 31, 2024 at 1:50 PM
    #56
    raylo

    raylo not so new member

    Joined:
    Oct 1, 2021
    Member:
    #68780
    Messages:
    2,234
    Gender:
    Male
    Frederick, MD
    Vehicle:
    2023 SR5 DC 6.5 bed Lunar Rock, TRD OR +Options
    DashCam, amp & sub, DIY rear seat delete, cat shield
    Nice. I didn't see that one. Meanwhile I am working that other thread to see if the Amps would be better boards for me by going significantly lower, in which case I'll be removing and selling the Rhinos. Should have done that homework before. LOL.
     
    ChucklesToy likes this.
  27. Jan 31, 2024 at 2:32 PM
    #57
    MaxPayne3

    MaxPayne3 New Member

    Joined:
    Dec 22, 2023
    Member:
    #108909
    Messages:
    216
    Gender:
    Male
    Vehicle:
    2024 Lunar Rock SR5 Crew Cab
    Just starting out but never will be done
    I don't see how the AMP ones will be significantly lower. The step is the same width as the others and folds up to the same line on the body. I think you'd just be spending more money on the same results. Not sure about the current boards you have but the Rough Country has (3) mounting points and (4) motors opposed to others, including AMP that only have (2) mounting points and only (2) motors. Plus with the AMP you are going to have something always plugged into your OBD port.
     
  28. Jan 31, 2024 at 2:48 PM
    #58
    raylo

    raylo not so new member

    Joined:
    Oct 1, 2021
    Member:
    #68780
    Messages:
    2,234
    Gender:
    Male
    Frederick, MD
    Vehicle:
    2023 SR5 DC 6.5 bed Lunar Rock, TRD OR +Options
    DashCam, amp & sub, DIY rear seat delete, cat shield
    Yeah, I know all those differences. And I really like the Rhinos... except for the too small drop. All the other differences (advantages for the Rhinos, IMO) matter little if the basic function of the steps isn't good. The one thing I don't know is the exact drop of the AMPs. It may turn out that the difference is not significant. But I don't know that yet.

    I just parked in the veterans end space at Lowes that has an 8" curb. Now THAT was perfect for me to slide right in. Without deploying the boards, of course.

     
    ChucklesToy likes this.
  29. Jan 31, 2024 at 3:12 PM
    #59
    MaxPayne3

    MaxPayne3 New Member

    Joined:
    Dec 22, 2023
    Member:
    #108909
    Messages:
    216
    Gender:
    Male
    Vehicle:
    2024 Lunar Rock SR5 Crew Cab
    Just starting out but never will be done
    Hopefully another member here has the AMP ones without suspension mods and can measure the deployed height for you :fingerscrossed:
     
  30. Jan 31, 2024 at 3:18 PM
    #60
    Yota802

    Yota802 New Member

    Joined:
    Oct 12, 2022
    Member:
    #84823
    Messages:
    496
    Gender:
    Male
    First Name:
    Adam
    802
    Vehicle:
    2023 Tundra Hybrid Limited CM WP
    Amp does offer an option to buy a plug accessory that allows for the OBD port to be available. Kinda like an extension cord, Amp cord plugs in but off the cord gives an additional access to port.
     
    ChucklesToy likes this.

Products Discussed in

To Top