1. Welcome to Tundras.com!

    You are currently viewing as a guest! To get full-access, you need to register for a FREE account.

    As a registered member, you’ll be able to:
    • Participate in all Tundra discussion topics
    • Transfer over your build thread from a different forum to this one
    • Communicate privately with other Tundra owners from around the world
    • Post your own photos in our Members Gallery
    • Access all special features of the site

Rextinkleton's 2018 Tundra Build and BS

Discussion in '2.5 Gen Builds (2014-2021)' started by Rextinkleton93, Jan 25, 2018.

  1. Feb 9, 2018 at 10:35 PM
    #61
    KevinK

    KevinK SGU - High Speed Overlander

    Joined:
    Nov 8, 2016
    Member:
    #5141
    Messages:
    1,997
    Gender:
    Male
    Back in Arizona. Again.
    Vehicle:
    SGU - Speed Glampers Uberfahrt
    Tundras to Sedona
    Lemme check my credit card limit real quick


    Looks like I’m only short the 5k

    I got $32

    :rofl:
     
  2. Feb 11, 2018 at 11:23 AM
    #62
    Rextinkleton93

    Rextinkleton93 [OP] New Member

    Joined:
    Jan 12, 2018
    Member:
    #12142
    Messages:
    445
    Gender:
    Male
    First Name:
    Kyle
    Chandler, AZ
    Vehicle:
    2018 Superwhite 4x4
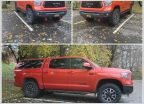
    Upskirt pic for your enjoyment :D

    43BC811E-5250-4736-A996-157C69F9DBB7.jpg
     
  3. Feb 11, 2018 at 12:09 PM
    #63
    PLC721

    PLC721 New Member

    Joined:
    Aug 26, 2015
    Member:
    #1714
    Messages:
    1,350
    Gender:
    Male
    First Name:
    Patrick
    Chandler, AZ
    Vehicle:
    2018 Ram 2500 Cummins Laramie
    IG: PLC721
    Were you finally able to adjust the preload?
     
    Rextinkleton93[OP] likes this.
  4. Feb 11, 2018 at 12:55 PM
    #64
    Rextinkleton93

    Rextinkleton93 [OP] New Member

    Joined:
    Jan 12, 2018
    Member:
    #12142
    Messages:
    445
    Gender:
    Male
    First Name:
    Kyle
    Chandler, AZ
    Vehicle:
    2018 Superwhite 4x4
    Yeah. Got it all lowered down on Friday. Sits way happier now.
     
    PLC721[QUOTED] likes this.
  5. Feb 11, 2018 at 1:10 PM
    #65
    PLC721

    PLC721 New Member

    Joined:
    Aug 26, 2015
    Member:
    #1714
    Messages:
    1,350
    Gender:
    Male
    First Name:
    Patrick
    Chandler, AZ
    Vehicle:
    2018 Ram 2500 Cummins Laramie
    IG: PLC721
    Looks good!
     
  6. Feb 13, 2018 at 2:37 PM
    #66
    Rextinkleton93

    Rextinkleton93 [OP] New Member

    Joined:
    Jan 12, 2018
    Member:
    #12142
    Messages:
    445
    Gender:
    Male
    First Name:
    Kyle
    Chandler, AZ
    Vehicle:
    2018 Superwhite 4x4
    ESP under seat plastic storage ordered! Decided that I couldn’t justify their long gun storage solution. Excited for this though.

    Will be buying some tool rolls and other little things to get a solid set of supplies in the truck.
     
  7. Feb 18, 2018 at 8:38 AM
    #67
    Rextinkleton93

    Rextinkleton93 [OP] New Member

    Joined:
    Jan 12, 2018
    Member:
    #12142
    Messages:
    445
    Gender:
    Male
    First Name:
    Kyle
    Chandler, AZ
    Vehicle:
    2018 Superwhite 4x4
    February 17, 2018

    Had a chance to take the truck out on some mild trails. We went up to butcher Jones and ran a trail that had us shoot out right near the 4 peaks staging lot. It was about an hour or hour and a half of trail (we took our time). The truck did great, I was super impressed. We find some bypasses that were steeper and loose and she crawled right up. There where a few spots that got narrow, but it was pretty easy to get through.

    I’ve never had 4x4 before, so this was fun for me. I enjoyed cruising more than I thought I would. As much as I like doing 60 through whoops, it was fun to be able to get out deep and explore. Excited to get out again.

    Only took a couple pictures in lame spots. I’m one of those people that enjoys the fun at the time too much to stop and take pictures :hattip:We also stopped and shot for a while. Great areas out there to shoot if anyone is needing a shooting spot.

    40FCED6B-403D-4F64-B8EA-233DD1179D7C.jpg 7488A364-B7CF-438C-B2B4-2C7932387154.jpg 24DF98C7-E902-4E91-BA99-01AD6C50C181.jpg
     
  8. Feb 18, 2018 at 8:47 AM
    #68
    CaptTyler

    CaptTyler Life’s too short to have an ugly boat.

    Joined:
    Jul 23, 2015
    Member:
    #1561
    Messages:
    1,461
    Gender:
    Male
    First Name:
    Tyler
    Florida
    Vehicle:
    2018 Ram 2500 Cummins
    Nice work brother!!! Anxious to see what else you have planned for this one.
    Any plans for the rear suspension?
     
  9. Feb 18, 2018 at 8:55 AM
    #69
    Rextinkleton93

    Rextinkleton93 [OP] New Member

    Joined:
    Jan 12, 2018
    Member:
    #12142
    Messages:
    445
    Gender:
    Male
    First Name:
    Kyle
    Chandler, AZ
    Vehicle:
    2018 Superwhite 4x4
    Thanks man!

    Yes, just letting the wallet cool off for a little bit haha. I’ll be doing fox smooth bodies with dsc’s Just like the front. May look into having fox make me a custom bypass, but not sure I really want or need that.

    Eventually may do different leaf springs but I don’t think that will be on the list right away. The plan is to keep her as low as possible while still clearing the tires everywhere. Also just to keep it simple and clean.
     
    Bannock452 and zackbremer like this.
  10. Feb 18, 2018 at 10:25 PM
    #70
    zackbremer

    zackbremer New Member

    Joined:
    May 4, 2017
    Member:
    #7559
    Messages:
    339
    Gender:
    Male
    First Name:
    Da Z
    theres some snow coming to AZ this week, payson, crownking, camp verde area....lets wheel
     
    TRON, PLC721 and Rextinkleton93[OP] like this.
  11. Feb 25, 2018 at 10:47 PM
    #71
    TRON

    TRON Is LIVE on the GRID.

    Joined:
    Jan 8, 2016
    Member:
    #2398
    Messages:
    662
    Gender:
    Male
    First Name:
    Stefen
    Gilbert, Arizona
    Vehicle:
    IG: @ST3F3NS
    DUROBUMPS Use TRON10 for 10% Off & Free Shipping
    I can finally confirm this superwhite is sexy in person :cool:
     
  12. Mar 15, 2018 at 7:37 AM
    #72
    Rextinkleton93

    Rextinkleton93 [OP] New Member

    Joined:
    Jan 12, 2018
    Member:
    #12142
    Messages:
    445
    Gender:
    Male
    First Name:
    Kyle
    Chandler, AZ
    Vehicle:
    2018 Superwhite 4x4
    Added a few small things to the truck, need to take some pictures. Got the ESP under seat storage installed. I literally cut my previous truck in half, but cutting the carpet and foam on this truck was wayyyy more intimating.

    Also was able to get my chase radio installed and wired up.

    I’ll get some pics of the radio install and how I chose to keep it all clean as a whistle :)
     
    KevinK likes this.
  13. Mar 15, 2018 at 8:51 AM
    #73
    pschiller86

    pschiller86 2017 SR5 CrewMax

    Joined:
    Nov 16, 2017
    Member:
    #11000
    Messages:
    781
    Gender:
    Male
    First Name:
    Paul
    Temecula, CA
    I'm looking at getting those Camburg UCA's. How do you like them?
     
    Rextinkleton93[OP] likes this.
  14. Mar 15, 2018 at 11:25 AM
    #74
    Rextinkleton93

    Rextinkleton93 [OP] New Member

    Joined:
    Jan 12, 2018
    Member:
    #12142
    Messages:
    445
    Gender:
    Male
    First Name:
    Kyle
    Chandler, AZ
    Vehicle:
    2018 Superwhite 4x4
    Love them man. Would do the same again. I like their design to countersink the spindle bolt into the uniball. Makes for a really clean look.
     
  15. Mar 19, 2018 at 8:56 AM
    #75
    Rextinkleton93

    Rextinkleton93 [OP] New Member

    Joined:
    Jan 12, 2018
    Member:
    #12142
    Messages:
    445
    Gender:
    Male
    First Name:
    Kyle
    Chandler, AZ
    Vehicle:
    2018 Superwhite 4x4
    Okay need some opinions boys and girls.

    Ended up selling my old switch pros and bought a new 9100 unit :spending:


    Used the SDHQ behind the headlight mount for the brain, and their flush mount for the center console for the switch panel itself.

    Here’s where my OCD kicks in. I want to terminate all the accessory wires off of the brain to weatherpack connectors. This is what I did on my last one and it made it soooo easy to add things to the truck. However, I’m just trying to figure out the best place to run all the wires to do this cleanly.

    All you who have installed switch pros, I’d love it if you could post a pic or two of how you mounted/wires everything in your engine bay. I think it will help me get some ideas. There is really no room on the driver side without blocking the fuse block cover, which I would like to avoid if possible.
     
  16. Mar 19, 2018 at 9:51 AM
    #76
    KevinK

    KevinK SGU - High Speed Overlander

    Joined:
    Nov 8, 2016
    Member:
    #5141
    Messages:
    1,997
    Gender:
    Male
    Back in Arizona. Again.
    Vehicle:
    SGU - Speed Glampers Uberfahrt
    Tundras to Sedona
    @osidepunker donyiu have the switchpros or the spod?

    Alex does good electrical work on The Truck.
     
  17. Mar 19, 2018 at 9:55 AM
    #77
    osidepunker

    osidepunker OsidePunker

    Joined:
    Oct 19, 2016
    Member:
    #4918
    Messages:
    3,000
    Gender:
    Male
    First Name:
    Alex
    SoCal
    Vehicle:
    2013 Tundra DC 4x4
    Full LT, full armor, fully self contained Speed Glamper
    I have the SPOD and I thoroughly suck at electrical work. Don't be spreading rumors kevin
     
  18. Mar 19, 2018 at 12:18 PM
    #78
    KevinK

    KevinK SGU - High Speed Overlander

    Joined:
    Nov 8, 2016
    Member:
    #5141
    Messages:
    1,997
    Gender:
    Male
    Back in Arizona. Again.
    Vehicle:
    SGU - Speed Glampers Uberfahrt
    Tundras to Sedona
    If you suck at it, the rest of us yahoos are doomed. At least you put forethought into it and follow strict standards. Whether your execution is any good, well...

    :rofl:
     
    Black Wolf and PLC721 like this.
  19. Mar 20, 2018 at 4:16 AM
    #79
    osidepunker

    osidepunker OsidePunker

    Joined:
    Oct 19, 2016
    Member:
    #4918
    Messages:
    3,000
    Gender:
    Male
    First Name:
    Alex
    SoCal
    Vehicle:
    2013 Tundra DC 4x4
    Full LT, full armor, fully self contained Speed Glamper
    20150521_150742.jpg 20150607_120107 (1).jpg 20150607_115710 (1).jpg
     
  20. Mar 20, 2018 at 4:26 AM
    #80
    kirk1963

    kirk1963 New Member

    Joined:
    Feb 15, 2018
    Member:
    #12922
    Messages:
    37
    Gender:
    Male
    Beautiful truck! any idea how much of a lift you got from the fox's? curious how they compare (lift wise) to 6120s on top setting. Thanks!!
     
  21. Mar 20, 2018 at 6:55 AM
    #81
    Rextinkleton93

    Rextinkleton93 [OP] New Member

    Joined:
    Jan 12, 2018
    Member:
    #12142
    Messages:
    445
    Gender:
    Male
    First Name:
    Kyle
    Chandler, AZ
    Vehicle:
    2018 Superwhite 4x4
    You have 3 batteries? Collecting them like they are going out of style huh? :rofl:

    Looks good man
     
  22. Mar 20, 2018 at 6:57 AM
    #82
    Rextinkleton93

    Rextinkleton93 [OP] New Member

    Joined:
    Jan 12, 2018
    Member:
    #12142
    Messages:
    445
    Gender:
    Male
    First Name:
    Kyle
    Chandler, AZ
    Vehicle:
    2018 Superwhite 4x4
    Thanks! Probably right at 2.75 to 3in with as much preload as possible out of them. Didn’t measure for a starting point so that’s my best guess based off of looks.

    Rear is completely stock right now and I’m level or maybe .25” high in the front.

    Edit: by as much preload out of them I mean with the collars as high as possible. So I guess as little preload as possible? The springs must be a heavy rate on these because with minimal preload I got my lift. Didn’t see any markings on the springs for spring rate but it rides great so i don’t care haha.
     
    Last edited: Mar 20, 2018
    kirk1963[QUOTED] and Black Wolf like this.
  23. Mar 20, 2018 at 11:34 PM
    #83
    signalbobby

    signalbobby New Member

    Joined:
    Jun 19, 2016
    Member:
    #3647
    Messages:
    212
    First Name:
    Robert
    AZ
    Vehicle:
    16 Tundra PRO & 4R PRO
    wrong.


    ;-)
     
  24. Mar 20, 2018 at 11:36 PM
    #84
    signalbobby

    signalbobby New Member

    Joined:
    Jun 19, 2016
    Member:
    #3647
    Messages:
    212
    First Name:
    Robert
    AZ
    Vehicle:
    16 Tundra PRO & 4R PRO
    Cut to length. Run the wires on the side below the fuse block. Unbolt it and shove the wires down there.
     
  25. Mar 31, 2018 at 5:06 PM
    #85
    Rextinkleton93

    Rextinkleton93 [OP] New Member

    Joined:
    Jan 12, 2018
    Member:
    #12142
    Messages:
    445
    Gender:
    Male
    First Name:
    Kyle
    Chandler, AZ
    Vehicle:
    2018 Superwhite 4x4
    March 31st, 2018

    Finished up my switch pros install today. Originally I had the 8100 unit from my tacoma, but was able to sell that (get good money out of it) throw a little money on top and get the 9100 unit. Haven't had much time to play with anything on it yet, but it seems sweet.

    So I used the SDHQ flush mount for the switches and the SDHQ behind the headlight mount for the brain. From there, I terminated all of the accessory wiring into separate weatherpak connectors for easy accessory wiring. I also made a ground harness that takes the grounds from all 8 pins (once I add the lights and sh*t I want to) and merged them into a common ground. I broke up a piece of aluminum to mount all the weatherpak connectors onto. Finally, I made up a quick cover our of ABS to cover everything and make it appear as stock as possible.

    Heres some pics. Let me know if you have any questions!

    (the only thing that I have hooked up currently is my HAM radio. I will get some pictures of how I installed that shortly)

    C406647A-0913-48B4-A517-9DAEF56EE7AC.jpg
    C437DE6A-9BD3-40F6-99D6-DF13607D79D9.jpg F3F606FD-C36E-46E4-97D5-B82AF47F857C.jpg B73D1736-86EC-4B17-BCB4-267FAF086CB0.jpg FD0B6C13-C46C-4287-ABAD-226A21198B74.jpg 5D91E95A-76B0-481D-AD7B-17FBBA47DC32.jpg F6F81A28-7C9C-4D7A-BB44-94C24C0D6830.jpg
    2D0C5569-AA41-4516-A387-39FDC6D98132.jpg
     
    Last edited: Apr 2, 2018
  26. Mar 31, 2018 at 5:49 PM
    #86
    KevinK

    KevinK SGU - High Speed Overlander

    Joined:
    Nov 8, 2016
    Member:
    #5141
    Messages:
    1,997
    Gender:
    Male
    Back in Arizona. Again.
    Vehicle:
    SGU - Speed Glampers Uberfahrt
    Tundras to Sedona
    Clean install! The ABS is a nice touch.
     
    Rextinkleton93[OP] likes this.
  27. Mar 31, 2018 at 6:24 PM
    #87
    Rextinkleton93

    Rextinkleton93 [OP] New Member

    Joined:
    Jan 12, 2018
    Member:
    #12142
    Messages:
    445
    Gender:
    Male
    First Name:
    Kyle
    Chandler, AZ
    Vehicle:
    2018 Superwhite 4x4
    Thanks man. Couldn’t decide between aluminum or this. Did this for times sake. But I may go back and do an aluminum one instead.
     
  28. Mar 31, 2018 at 6:39 PM
    #88
    KevinK

    KevinK SGU - High Speed Overlander

    Joined:
    Nov 8, 2016
    Member:
    #5141
    Messages:
    1,997
    Gender:
    Male
    Back in Arizona. Again.
    Vehicle:
    SGU - Speed Glampers Uberfahrt
    Tundras to Sedona
    Yeah the aluminum might look nice, but I like the clean stock look of the abs. Oh, and not sure about putting an aluminum piece above the battery in case it drops or bends down. Is it close enough to contact the + terminal?
     
  29. Mar 31, 2018 at 10:50 PM
    #89
    Rextinkleton93

    Rextinkleton93 [OP] New Member

    Joined:
    Jan 12, 2018
    Member:
    #12142
    Messages:
    445
    Gender:
    Male
    First Name:
    Kyle
    Chandler, AZ
    Vehicle:
    2018 Superwhite 4x4
    Nah there is 2+ inches between the battery and the plate.

    I like the stick look too of the abs. May just leave it. We shall see
     
    KevinK[QUOTED] likes this.
  30. Mar 31, 2018 at 11:28 PM
    #90
    Rextinkleton93

    Rextinkleton93 [OP] New Member

    Joined:
    Jan 12, 2018
    Member:
    #12142
    Messages:
    445
    Gender:
    Male
    First Name:
    Kyle
    Chandler, AZ
    Vehicle:
    2018 Superwhite 4x4
    March 31st, 2018

    Also installed the bed rail system today. Kinda a PITA since the bed liner that I had done at the dealer didn't tape off the threaded holes. The dumb part is, I couldn't find the M6 x 1.0 tap locally that I needed to clean the holes. So.... bought a long bolt in the same thread and pitch, cut some flutes in it tapered the tip and made my own tap. Worked like a charm. Form there it just took 15 or so minutes to get them all installed.

    No pics of this cause its super lame sauce. Just documenting the things that I have done in here. Maybe it will help someone down the road.
     
    KevinK likes this.
To Top