1. Welcome to Tundras.com!

    You are currently viewing as a guest! To get full-access, you need to register for a FREE account.

    As a registered member, you’ll be able to:
    • Participate in all Tundra discussion topics
    • Transfer over your build thread from a different forum to this one
    • Communicate privately with other Tundra owners from around the world
    • Post your own photos in our Members Gallery
    • Access all special features of the site

Transmission Plug Stripped / Pan Replacement

Discussion in '1st Gen Tundras (2000-2006)' started by DarkMint, Apr 3, 2022.

  1. Apr 5, 2022 at 7:16 PM
    #31
    DarkMint

    DarkMint [OP] just gettin by

    Joined:
    Apr 12, 2021
    Member:
    #61680
    Messages:
    482
    First Name:
    Ben
    Vehicle:
    2004 Tundra DC SR5 4WD
    What are the chances of going through all this work to tap to a larger size, only to then have the next plug threads strip again anyway?

    I tried the pull-and-turn method as well, it did nothing but mess up the plug's surface a bit.
     
  2. Apr 5, 2022 at 7:23 PM
    #32
    Jack McCarthy

    Jack McCarthy Working remotely from the local pub

    Joined:
    Nov 2, 2020
    Member:
    #54409
    Messages:
    9,862
    Gender:
    Male
    First Name:
    Bill
    North of Boston
    Vehicle:
    02 Tundra AC SR5 V8 4x4
    I'd say if you're careful, it's unlikely. But, if you're not confident you get get rid of any shavings by greasing the tap and flushing it out with a fill/drain then replace the pan.
     
    DarkMint[QUOTED][OP] likes this.
  3. Apr 6, 2022 at 9:23 AM
    #33
    SouthPaw

    SouthPaw The headlight guy

    Joined:
    Sep 11, 2019
    Member:
    #35992
    Messages:
    1,284
    Colorado
    Vehicle:
    2000 Limited 4x4 AC
    If you do it correctly, it will be as good as new and you will not have any issues.

    I can't stress this enough, but if you do proceed with it, run the tap 3/4 turn, back it out, run it back in another 3/4, back it out and repeat till you have the tap all the way through. Go slow.
     
    Last edited: Apr 6, 2022
  4. Apr 11, 2022 at 1:49 PM
    #34
    DarkMint

    DarkMint [OP] just gettin by

    Joined:
    Apr 12, 2021
    Member:
    #61680
    Messages:
    482
    First Name:
    Ben
    Vehicle:
    2004 Tundra DC SR5 4WD
    I've decided to drop and replace the pan myself. The truck has been garaged until today, I pop in to check on it and am greeted with a puddle of trans fluid on the floor. Very very slow dripping leak from the janked up trans plug.

    Got all the parts from the dealer except the dipstick tube o-ring. Oversight on my part, I forgot to order it too. Hopefully I can just reuse the existing o-ring.

    @FirstGenVol can you send me that great tutorial you have? I've found a couple on YouTube but none of them use FIPG and instead use a rubber gasket.


    Fortunately at this point I have removed all 20 little trans pan bolts without any of them breaking. Does anyone have a recommended method for removing the pan while it's full of fluid? It's still glued on there right now. I want to avoid that face full of ATF.
     
  5. Apr 11, 2022 at 1:58 PM
    #35
    FirstGenVol

    FirstGenVol Check the name tag. You're in my world now.

    Joined:
    Dec 13, 2018
    Member:
    #22934
    Messages:
    13,931
    East TN
    Vehicle:
    2002 AC
    I mentioned in a previous post that tutorial is now not a safe website anymore according to Google chrome. You can Google A340F transmission pan replacement and it pulls up. Website is Skjos.net

    Once you remove the bolts, the pan will be held in place by the old FIPG. You'll need to use a thin plastic scraper or similar tool and carefully break the old seal. Work you way around and gently tap it in. Be careful as the metal used for the transmission is actually pretty soft and can't be scarred fairly easily apparently.

    Actually, now that I think about it, I bought this and it was great.


    https://www.ebay.com/itm/Engine-Tra...over-Removal-Pan-Separator-Tool-/174310063759
     
    This site contains affiliate links for which the site may be compensated.
    #35
  6. Apr 11, 2022 at 2:25 PM
    #36
    BubbaW

    BubbaW Blessed 2 B above Ground

    Joined:
    Aug 19, 2019
    Member:
    #34845
    Messages:
    3,371
    First Name:
    Bubba
    Where Eagles Nest
    Vehicle:
    04 DC LTD 4X4 4.7 V8
    T150 Lover
    Thanks for that, I have added it to my "How To" folder.
    Also printed the page via browser to a Microsoft pdf file if any one needs it....Helluva tutorial.
     

    Attached Files:

  7. Apr 11, 2022 at 2:52 PM
    #37
    Jack McCarthy

    Jack McCarthy Working remotely from the local pub

    Joined:
    Nov 2, 2020
    Member:
    #54409
    Messages:
    9,862
    Gender:
    Male
    First Name:
    Bill
    North of Boston
    Vehicle:
    02 Tundra AC SR5 V8 4x4
    I’d have an open drain pan below it in case it spills out and several blocks of wood to support the 12-15 lbs of fluid from underneath in the drain pan.

    The next step is essentially playing jenga by removing those blocks and letting the pan to partially spill out into the bucket from one side.
     
    DarkMint[QUOTED][OP] likes this.
  8. Apr 11, 2022 at 2:53 PM
    #38
    FrenchToasty

    FrenchToasty The Desert rat, SSEM #5/25, 6 lug enthusiast

    Joined:
    Sep 15, 2019
    Member:
    #36156
    Messages:
    17,908
    First Name:
    Mo
    The SoAz….. big surprise
    Vehicle:
    2006 DC 4.88s Elocker and some other trippy stuff
    Bone stock
    Suck it out thru the dip stick hole
     
    DarkMint[OP] likes this.
  9. Apr 11, 2022 at 2:54 PM
    #39
    FirstGenVol

    FirstGenVol Check the name tag. You're in my world now.

    Joined:
    Dec 13, 2018
    Member:
    #22934
    Messages:
    13,931
    East TN
    Vehicle:
    2002 AC
    Yeah it doesn't get much better than that for a "how to". He was very thorough. Even a mangler like me was able to do this job without damaging anything else.
     
    DarkMint[OP] and BubbaW[QUOTED] like this.
  10. Apr 11, 2022 at 4:27 PM
    #40
    assassin10000

    assassin10000 New Member

    Joined:
    Oct 27, 2020
    Member:
    #54157
    Messages:
    2,124
    First Name:
    Andrew
    Northern CA
    Vehicle:
    '05 SR5 AC
    Remote start alarm Removed keyless entry piezo Qi phone charger & dash mount Subaru underseat subwoofer Hopkins Easylift Steering wheel audio controls No-tenna mod 3/4 adhesive anti-rattle shim D/S door
    Drill or punch a hole in the pan if you have a replacement already.
     
  11. Apr 11, 2022 at 7:08 PM
    #41
    NickB_01TRD

    NickB_01TRD You don't need less cars, just more driveway.

    Joined:
    Jun 16, 2021
    Member:
    #64346
    Messages:
    2,517
    Gender:
    Male
    First Name:
    Nick
    KY
    Vehicle:
    01 Tundra V8 4X4 AC SR5 TRD
    That's what I was thinking. Very small single hole.
     
    DarkMint[OP] likes this.
  12. Apr 12, 2022 at 10:39 AM
    #42
    DarkMint

    DarkMint [OP] just gettin by

    Joined:
    Apr 12, 2021
    Member:
    #61680
    Messages:
    482
    First Name:
    Ben
    Vehicle:
    2004 Tundra DC SR5 4WD
    I ended up drilling a hole through the stuck plug itself. It's a small hole so it's only a drip coming out, but it's an active drip so I've put a jug under it and let it sit overnight. It's dripping about 0.25qt/hr. It should be fully drained by now.

    I didn't want to drill through the pan surface for fear of hitting the trans on the other side or jacking something up in the process (metal shavings, etc). It's probably an unnecessary fear but drilling through the plug itself worked out fine.

    Fun fact, when I was drilling through the plug I smeared it with axle grease from my leaking axle boot to catch shavings!

    [​IMG]
     
    bmf4069, Jack McCarthy and dbittle like this.
  13. Apr 12, 2022 at 12:17 PM
    #43
    FirstGenVol

    FirstGenVol Check the name tag. You're in my world now.

    Joined:
    Dec 13, 2018
    Member:
    #22934
    Messages:
    13,931
    East TN
    Vehicle:
    2002 AC
    @DarkMint

    Do you have an inch lb torque wrench for this job?

    Also, I would plan on snugging all the valve body bolts you'll see once you open it up. I only had a few loose though. That tutorial that Bubba posted should help a lot.
     
  14. Apr 12, 2022 at 1:40 PM
    #44
    DarkMint

    DarkMint [OP] just gettin by

    Joined:
    Apr 12, 2021
    Member:
    #61680
    Messages:
    482
    First Name:
    Ben
    Vehicle:
    2004 Tundra DC SR5 4WD
    Yes, I have an in/lb torque wrench I'll be using for the little pan bolts.
    I'll check out the valve body bolts once it's open, thanks for the reminder, I checked out that guide and I agree it's pretty great (nice touch with moving the sway bar outta the way).
     
  15. Apr 12, 2022 at 2:11 PM
    #45
    FirstGenVol

    FirstGenVol Check the name tag. You're in my world now.

    Joined:
    Dec 13, 2018
    Member:
    #22934
    Messages:
    13,931
    East TN
    Vehicle:
    2002 AC
    That guy was working on a 4Runner. I'm pretty sure I didn't need to move the sway bar.
     
  16. Apr 12, 2022 at 2:47 PM
    #46
    DarkMint

    DarkMint [OP] just gettin by

    Joined:
    Apr 12, 2021
    Member:
    #61680
    Messages:
    482
    First Name:
    Ben
    Vehicle:
    2004 Tundra DC SR5 4WD
    I didn't have to, but it does give me a bit more room to work with the trans pan bolts. I'll post a pic when I get the chance.
     
    tvpierce and FirstGenVol[QUOTED] like this.
  17. Apr 18, 2022 at 5:51 PM
    #47
    DarkMint

    DarkMint [OP] just gettin by

    Joined:
    Apr 12, 2021
    Member:
    #61680
    Messages:
    482
    First Name:
    Ben
    Vehicle:
    2004 Tundra DC SR5 4WD
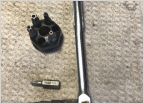
    Pics of the hole drilled into drain plug, old fluid that dropped out, and sway bar moved out of the way with the end links resting on the power steering tie rods. Not sure if that is OK on the tie rods but I'm not driving it like this, just resting it for now. (I hope I'm using "tie rods" correctly.)
    The old fluid is nasty and very dark, almost black. Looks like my 1st drain and fill didn't help it much. Expecting this 2nd time to help esp with dropping the pan.

    Actually removing the pan glued on there is proving to be the hardest part... I can't make it budge even with the 19 pan bolts removed. And while I don't care about damaging the pan itself since I'm replacing it, I don't want to damage the trans surface. So I'm trying to be careful. As of now the pan is still stuck on there, and I'm brainstorming a safe and better way to remove it VS just prying it off.

    IMG_20220418_153229.jpg
    IMG_20220418_160729.jpg
    IMG_20220418_174906.jpg
     
    bmf4069 and FrenchToasty like this.
  18. Apr 18, 2022 at 5:57 PM
    #48
    Jack McCarthy

    Jack McCarthy Working remotely from the local pub

    Joined:
    Nov 2, 2020
    Member:
    #54409
    Messages:
    9,862
    Gender:
    Male
    First Name:
    Bill
    North of Boston
    Vehicle:
    02 Tundra AC SR5 V8 4x4
    @DarkMint I wonder if you can heat that gasket stuff with a propane or mapp gas torch to soften it and peel it away?

    I’d be careful though, I believe tranny fluid vapors are combustible from what I read.
     
    Last edited: Apr 18, 2022
    DarkMint[OP] and FrenchToasty like this.
  19. Apr 18, 2022 at 6:00 PM
    #49
    FrenchToasty

    FrenchToasty The Desert rat, SSEM #5/25, 6 lug enthusiast

    Joined:
    Sep 15, 2019
    Member:
    #36156
    Messages:
    17,908
    First Name:
    Mo
    The SoAz….. big surprise
    Vehicle:
    2006 DC 4.88s Elocker and some other trippy stuff
    Bone stock
    Use some heat, gently, torch the edge going around all of the circumference
     
    DarkMint[OP] likes this.
  20. Apr 18, 2022 at 6:06 PM
    #50
    KNABORES

    KNABORES Sarcasm incoming

    Joined:
    Jan 1, 2020
    Member:
    #40572
    Messages:
    12,525
    Gender:
    Male
    Arkansas
    Vehicle:
    2000 Limited TRD AC 4X4 Thunder Grey 272k miles. 2019 Limited TRD CM 4x4 - SOLD
    Bilstein 5100's on the forbidden notch Husky HD rear leafs 16x8 Eagle Alloy 187's with 285/75/16 MagnaFlow 3" flow through Pioneer touchscreen with backup camera Full interior and dash LED conversion Trailer brake controller with 7 pin Bedliner coat bumpers & trim ARE Mpulse topper - Rhino Vortex rack
    I wouldn’t be torching around my trans pan. A thin scraper will get through the gasket material. I wouldn’t use a screwdriver. I used a 2” putty knife to run between my pan and trans housing. Didn’t try to scrape the surfaces, just used it to cut through the RTV. My pan appeared to have been off before and had some pry marks and bending on the flange. Had to use some wooden blocks and a hammer to straighten it out. That fluid looks like ink
     
  21. Apr 18, 2022 at 6:08 PM
    #51
    FrenchToasty

    FrenchToasty The Desert rat, SSEM #5/25, 6 lug enthusiast

    Joined:
    Sep 15, 2019
    Member:
    #36156
    Messages:
    17,908
    First Name:
    Mo
    The SoAz….. big surprise
    Vehicle:
    2006 DC 4.88s Elocker and some other trippy stuff
    Bone stock
    The only scraper I’ll ever buy, I only use the one end, but imagine all the possibilities.https://www.amazon.com/Husky-DSX-G1...t=&hvlocphy=9030244&hvtargid=pla-362397907364
     
  22. Apr 18, 2022 at 6:09 PM
    #52
    KNABORES

    KNABORES Sarcasm incoming

    Joined:
    Jan 1, 2020
    Member:
    #40572
    Messages:
    12,525
    Gender:
    Male
    Arkansas
    Vehicle:
    2000 Limited TRD AC 4X4 Thunder Grey 272k miles. 2019 Limited TRD CM 4x4 - SOLD
    Bilstein 5100's on the forbidden notch Husky HD rear leafs 16x8 Eagle Alloy 187's with 285/75/16 MagnaFlow 3" flow through Pioneer touchscreen with backup camera Full interior and dash LED conversion Trailer brake controller with 7 pin Bedliner coat bumpers & trim ARE Mpulse topper - Rhino Vortex rack
  23. Apr 18, 2022 at 6:12 PM
    #53
    FrenchToasty

    FrenchToasty The Desert rat, SSEM #5/25, 6 lug enthusiast

    Joined:
    Sep 15, 2019
    Member:
    #36156
    Messages:
    17,908
    First Name:
    Mo
    The SoAz….. big surprise
    Vehicle:
    2006 DC 4.88s Elocker and some other trippy stuff
    Bone stock
    Until last year I had no clue what the crescent shape was for……..
    I like them because they seem to hold up well if your hitting the handle end with a hammer. We have gaskets on heat exchangers that are 1/8” thick and don’t like to peel off the best, so these work perfect. I also used these a lot hanging stainless wall liner to clear out the center clip track/reveal.
     
    DarkMint[OP] likes this.
  24. Apr 18, 2022 at 6:13 PM
    #54
    FirstGenVol

    FirstGenVol Check the name tag. You're in my world now.

    Joined:
    Dec 13, 2018
    Member:
    #22934
    Messages:
    13,931
    East TN
    Vehicle:
    2002 AC
     
    This site contains affiliate links for which the site may be compensated.
    #54
    KNABORES likes this.
  25. Apr 18, 2022 at 8:39 PM
    #55
    DarkMint

    DarkMint [OP] just gettin by

    Joined:
    Apr 12, 2021
    Member:
    #61680
    Messages:
    482
    First Name:
    Ben
    Vehicle:
    2004 Tundra DC SR5 4WD
    Yeah I'll be going the @FirstGenVol route. I didn't want to have to buy another specialized tool but I don't feel comfortable using a steel scraper or putty knife. I'm afraid of marring the surfaces.
    My plastic putty knife just ain't cutting it.

    I also have zero confidence using a torch to heat it up haha.
     
    Last edited: Apr 18, 2022
    Jack McCarthy likes this.
  26. Apr 19, 2022 at 3:26 AM
    #56
    bmf4069

    bmf4069 Something something Miller Lite

    Joined:
    Sep 1, 2018
    Member:
    #18880
    Messages:
    8,875
    Gender:
    Male
    First Name:
    Beau
    TX
    Vehicle:
    02 AC sr5 4wd v8
    All your bass are belong to us
    Get a rubber mallet and beat that fucker like it owes you money. It'll come off.
     
    DarkMint[OP] likes this.
  27. Apr 19, 2022 at 3:48 AM
    #57
    FirstGenVol

    FirstGenVol Check the name tag. You're in my world now.

    Joined:
    Dec 13, 2018
    Member:
    #22934
    Messages:
    13,931
    East TN
    Vehicle:
    2002 AC
    How soon is your big road trip? I'll be glad to give you my tool I linked. I hope to never need it again.
     
    DarkMint[QUOTED][OP] likes this.
  28. Apr 19, 2022 at 5:30 AM
    #58
    BubbaW

    BubbaW Blessed 2 B above Ground

    Joined:
    Aug 19, 2019
    Member:
    #34845
    Messages:
    3,371
    First Name:
    Bubba
    Where Eagles Nest
    Vehicle:
    04 DC LTD 4X4 4.7 V8
    T150 Lover
    Being a Timmy the Toolman kinda guy, he mentions a pan separation tool at the 8:30 mark. Perhaps they're not expensive or they might even rent at AutoZone, NAPA, etc. With that tool you could do what @bmf4069 said and "beat that fucker like it owes you money."

    PanTool.jpg


  29. Apr 19, 2022 at 5:33 AM
    #59
    FirstGenVol

    FirstGenVol Check the name tag. You're in my world now.

    Joined:
    Dec 13, 2018
    Member:
    #22934
    Messages:
    13,931
    East TN
    Vehicle:
    2002 AC
    That's exactly what I'm offering to give him. But I remember he was pressed for time so might be able to find one locally.
     
  30. Apr 19, 2022 at 8:47 AM
    #60
    DarkMint

    DarkMint [OP] just gettin by

    Joined:
    Apr 12, 2021
    Member:
    #61680
    Messages:
    482
    First Name:
    Ben
    Vehicle:
    2004 Tundra DC SR5 4WD
    I ended up buying the tool with expedited shipping, should come by tomorrow. @FirstGenVol I appreciate your generosity nonetheless.

    @bmf4069 I tried the rubber mallet thing, beat the sh*t out of it and it still won't move haha.
     
To Top