

-
Welcome to Tundras.com!
You are currently viewing as a guest! To get full-access, you need to register for a FREE account.
As a registered member, you’ll be able to:- Participate in all Tundra discussion topics
- Transfer over your build thread from a different forum to this one
- Communicate privately with other Tundra owners from around the world
- Post your own photos in our Members Gallery
- Access all special features of the site
Quick Links: Wiring Sony ex9500 to an amp - RCA outs?
  Finally decided on what I will do to replace the JBL setup
  Audio upgrade recommendations/input?
 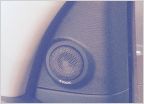 Wiring 3 way components - How to get wire from door to dash?
 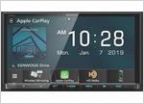 Wireless Carplay with the Kenwood DMX906S in a SR Loooooooooooooong bed
  Aftermarket Head Unit
Use OEM Mic with Aftermarket Headunit
Discussion in 'Audio & Video' started by SchnauzerMan, Aug 2, 2021.
Page 4 of 4
Page 4 of 4
Products Discussed in


